Bypassing AWS IAM: How important it is to look closely at your policies

If you are dealing everyday with dozens of users in AWS and you like to have (or believe that you have) control over them; that you like to believe that you drive them like a good flock of sheep, you will feel my pain, and I’ll feel yours.

We manage multiple AWS accounts, for many purposes. Some accounts with more restrictions than others, we kinda control and deny to use some regions, some instance types, some services, etc. Just for security and budget control (like you do as well, probably).

That being said, you are now a “ninja” of AWS IAM because you have to add, remove, create, change, test and simulate easy and complex policies pretty much everyday, to make your flock trustfully follow its shepherd.

But dealing with users is great to test the strength of your policies. I have a policy where explicitly denied a list of instance types to be used (a black list with “ec2:RunInstances”). Ok, it denies to create them, but not to stop them, change instance type and start them again. You may end up feeling that your control is like this:

Let me show you all the technical details and a very self-explanatory demo in this video:

What do you think? Is it an expected behavior? It is actually. But I also think that the “ec2:ModifyInstanceAttribute” control should be more granular and should have “instanceType” somehow related to “ec2:RunInstances”. A limitation from AWS IAM, I guess.
In case you want to try by yourself, here you go below all commands I used (you will have to change the instance id, profile and region), if you want to copy a similar IAM policy, look at here in my blog post How to restrict by regions and instance types in AWS with IAM:
# create an allowed instance
aws ec2 run-instances --image-id ami-c58c1dd3 \
--count 1 --instance-type t2.large --key-name sec-poc \
--security-group-ids sg-12b5376a --subnet-id subnet-11fe4e49 \
--profile soleng --region us-east-1

# check status
aws ec2 describe-instances --instance-ids i-0152bc219d24c5f25 \
--query 'Reservations[*].Instances[*].[InstanceType,State]' \
--profile soleng --region us-east-1

# stop instance
aws ec2 stop-instances --instance-ids i-0152bc219d24c5f25 \
--profile soleng --region us-east-1

# check status
aws ec2 describe-instances --instance-ids i-0152bc219d24c5f25 \
--query 'Reservations[*].Instances[*].[InstanceType,State]' \
--profile soleng --region us-east-1

# change instance type
aws ec2 modify-instance-attribute --instance-id i-0152bc219d24c5f25 \
--instance-type "{\"Value\": \"i2.2xlarge\"}" \
--profile soleng --region us-east-1

# start instance type
aws ec2 start-instances --instance-ids i-0152bc219d24c5f25 \
--profile soleng --region us-east-1

# check status
aws ec2 describe-instances --instance-ids i-0152bc219d24c5f25 \
--query 'Reservations[*].Instances[*].[InstanceType,State]' \
--profile soleng --region us-east-1

# terminate instance
aws ec2 terminate-instances --instance-ids i-0152bc219d24c5f25 \
--profile soleng --region us-east-1

Automate or Die! My next talk at RootedCON 2017 in Madrid

UPDATED!  My talk will be on March, Friday the 3rd at 11AM (Sala 25)
Regardless I’ve given many talks in Spain during the last 18 years, It has been a while since I don’t do a talk in a security congress. I think last time was NcN when I presented phpRADmin in 2006.
I have to confess that I was mad to talk at RootedCON. Living abroad for more than four years now, the RootedCON has been a reference event for Spanish speakers and I always have been following it very closely, I think it is one of the most popular security conferences in Spain.
Last year I tried to attend with a “Docker Security” paper but it wasn’t good enough, and honestly I didn’t work much on the paper itself. This time I worked on a more decent paper (and better tittle as well) and voila! My talk was approved.
And what I’m gonna talk about? Security in IaaS, attacks, hardening, incident response, forensics and all about its automation. Despite I will talk about general concept related to AWS, Azure and GCP, I will show specific demos and threats in AWS and I will go in detail with some caveats and hazards in AWS. My talk is called “Automate or die! How to survive to an attack in the Cloud” and you have more details here.
If you are in Spain or around the place, don’t miss the opportunity to learn from people like Mikko Hypponen, Paul Vixie, Hugo Teso, Juan Garrido or Chema Alonso. As you may see in the full list, there are 3 days plenty of good material to improve your skills from very good professionals, they also offer a training day. And compared to the price of security cons in other countries, this one is not expensive at all.
My talk will be on March, Friday the 3rd at 11AM (Sala 25). Looking forward to see you there!

Hardening assessment and automation with OpenSCAP in 5 minutes

SCAP (Security Content Automation Protocol) provides a mechanism to check configurations, vulnerability management and evaluate policy compliance for a variety of systems. One of the most popular implementations of SCAP is OpenSCAP and it is very helpful for vulnerability assessment and also as hardening helper.
In this article I’m going to show you how to use OpenSCAP in 5 minutes (or less). We will create reports and also dynamically hardening a CentOS 7 server.
Installation for CentOS 7:
yum -y install openscap openscap-utils scap-security-guide
wget http://people.redhat.com/swells/scap-security-guide/RHEL/7/output/ssg-rhel7-ocil.xml -O /usr/share/xml/scap/ssg/content/ssg-rhel7-ocil.xml
Create a configuration assessment report in xccdf (eXtensible Configuration Checklist Description Format):
oscap xccdf eval --profile stig-rhel7-server-upstream \
--results $(hostname)-scap-results-$(date +%Y%m%d).xml \
--report $(hostname)-scap-report-$(date +%Y%m%d)-after.html \
--oval-results --fetch-remote-resources \
--cpe /usr/share/xml/scap/ssg/content/ssg-rhel7-cpe-dictionary.xml \
 /usr/share/xml/scap/ssg/content/ssg-centos7-xccdf.xml
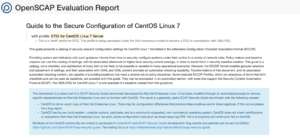
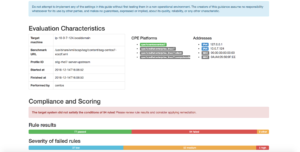
Now you can see your report, and it will be something like this (hostname.localdomain-scap-report-20161214.html):
 
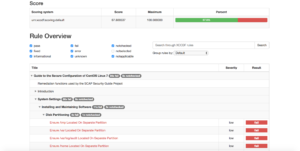
See also different group rules considered:
You can go through the fails in red and see how to fix them manually or dynamically generate a bash script to fix them. Take a note of the Score number that your system got, it will be a reference after hardening.
In order to generate a script to fix all needed and harden the system (and improve the score), we need to know our report result-id, we can get it running this command using the results xml file:
export RESULTID=$(grep TestResult $(hostname)-scap-results-$(date +%Y%m%d).xml | awk -F\" '{ print $2 }')
Run oscap command to generate the fix script, we will call it fixer.sh:
oscap xccdf generate fix \
--result-id $RESULTID \
--output fixer.sh $(hostname)-scap-results-$(date +%Y%m%d).xml
chmod +x fixer.sh
Now you should have a fixer.sh script to fix all issues, open and edit it if needed. For instance, remember that the script will enable SELINUX and do lots of changes to Auditd configuration. If you have a different configuration you can run commands like bellow after running ./fixer.sh to keep SElinux permissive and in case you can change some actions of Auditd.
sed -i "s/^SELINUX=.*/SELINUX=permissive/g" /etc/selinux/config
sed -i "s/^space_left_action =.*/space_left_action = syslog/g" /etc/audit/auditd.conf
sed -i "s/^admin_space_left_action =.*/admin_space_left_action = syslog/g" /etc/audit/auditd.conf
Then you can build a new assessment report to see how much it improved your system hardening (note I added -after to the files name):
oscap xccdf eval --profile stig-rhel7-server-upstream \
--results $(hostname)-scap-results-$(date +%Y%m%d)-after.xml \
--report $(hostname)-scap-report-$(date +%Y%m%d)-after.html \
--oval-results --fetch-remote-resources \
--cpe /usr/share/xml/scap/ssg/content/ssg-rhel7-cpe-dictionary.xml \
 /usr/share/xml/scap/ssg/content/ssg-centos7-xccdf.xml
Additionally, we can generate another evaluation report of the system in OVAL format (Open Vulnerability and Assessment Language):
oscap oval eval --results $(hostname)-oval-results-$(date +%Y%m%d).xml \
--report $(hostname)-oval-report-$(date +%Y%m%d).html \
/usr/share/xml/scap/ssg/content/ssg-rhel7-oval.xml
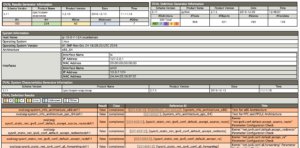
OVAL report will give you another view of your system status and configuration ir order to allow you improve it and follow up, making sure your environment reaches the level your organization requires.
Sample OVAL report:
Happy hardening!

Security Monkey deployment with CloudFormation template

netflix-security-monkey-overview-1-638In order to give back to the Open Source community what we take from it (actually from the Netflix awesome engineers), I wanted to make this work public, a CloudFormation template to easily deploy and configure Security Monkey in AWS. I’m pretty sure it will help many people to get their AWS infrastructure more secure.

Security Monkey is a tool for monitoring and analyzing the security of our Amazon Web Services configurations.

You are maybe thinking on AWS CloudTrail or AWS Trusted Advisor, right? This is what the authors say:
“Security Monkey predates both of these services and meets a bit of each services’ goals while having unique value of its own:
CloudTrail provides verbose data on API calls, but has no sense of state in terms of how a particular configuration item (e.g. security group) has changed over time. Security Monkey provides exactly this capability.
Trusted Advisor has some excellent checks, but it is a paid service and provides no means for the user to add custom security checks. For example, Netflix has a custom check to identify whether a given IAM user matches a Netflix employee user account, something that is impossible to do via Trusted Advisor. Trusted Advisor is also a per-account service, whereas Security Monkey scales to support and monitor an arbitrary number of AWS accounts from a single Security Monkey installation.”

cloud-formationNow, with this provided CloudFormation template you can deploy SecurityMonkey pretty much production ready in a couple of minutes.

For more information, documentation and tests visit my Github project: https://github.com/toniblyx/security_monkey_cloudformation

How to restrict by regions and instance types in AWS with IAM

The use case is easy, and if you work with AWS I’m pretty sure that you have faced this requirement at some point: I don’t want a certain group of users of a particular AWS account to create anything anywhere. I had to configure the security of one of our AWS accounts to only allow users to work with EC2 and a few other AWS services in only two regions (N. Virginia and Ireland in this case). In addition to that, and to keep our budget under control, we wanted to limit the instance types they can use, in this example we will only allow to use EC2 instances that are not bigger than 16GB of RAM (for a quick view of all available EC2 instances types see http://www.ec2instances.info).

Thanks to the documentation and AWS Support, I came across this solution (as an example). The only issue is that, at the moment, we can not hide features in the AWS Console, but at least AWS Support is very clear and supportive on that. They know how challenging is IAM for certain requirements.

Go to IAM -> Policies -> Create Policy -> Create Your Own Policy and use the next json code or in this gist link  as reference to write your own based on your requirements. After that you have to attach that policy to the role/user/group you want to.

Hope this helps.

[ES] Análisis Forense en AWS: introducción

English version here.

AWS siempre está monitorizando cualquier uso no autorizado de sus/nuestros recursos. Si tienes docenas de servicios ejecutándose en AWS, en algún momento serás avisado de un incidente debido a varias razones como compartir accidentalmente una contraseña en Github, una mala configuración de un servidor que lo hace fácil de atacar, servicios con vulnerabilidades, DoS o DDoS, 0days, etc… Así que debes estar preparado para realizar un análisis forense y/o gestionar la respuesta ante incidentes de tu infraestructura en AWS.

Recuerda, encaso de incidente debes mantener la calma y procura seguir un procedimiento definido, no dejes este proceso en manos del azar porque probablemente tu o tu jefe este lo suficientemente nervioso como para no esperar ni pensar. Siempre es mucho mejor seguir una guía previamente testeada que tu intuición (que ya la usarás después).

ADVERTENCIA: si has llegado a este artículo de forma desesperada haciendo una búsqueda en Google, te recomiendo probar todos los comandos antes en un entorno controlado como tu laboratorio o sistemas de pruebas. Como decía, deberías tener una guia de respuesta a incidentes y proceso de análisis forense antes de que ocurra un incidente.

En este artículo quiero recomendar algunos pasos y trucos que nosotros hemos usado en algún momento. Doy por hecho que tienes el cliente de linea de comandos de AWS ya instalado, si no es así mira aquí: http://docs.aws.amazon.com/general/latest/gr/GetTheTools.html. Todos los comandos están basados en una posible instancia comprometida en EC2 (Linux), pero la mayoría de estos comandos “aws” se pueden usar también para servidores Windows aunque no lo he probado. Todas estas acciones también se pueden realizar mediante la AWS Cosole. Estos serían algunos de los pasos a tener en cuenta:

1) Desactiva o borra el Access Key. Si una AWS Access Key ha sido comprometida  (AWS te lo hará saber en un correo electrónico u tu lo notarás pagando una gran factura) o te das cuenta que lo has publicado en Github:

aws iam list-access-keys
aws iam update-access-key --access-key-id AKIAIOSFODNN7EXAMPLE \
--status Inactive --user-name Bob
aws iam delete-access-key --access-key AKIDPMS9RO4H3FEXAMPLE \
--user-name Bob

2) En caso de que la Key sea comprometida, comprueba si algún recurso ha sido creado usando esa Key, en todas las regiones. Es común ver que alguien ha usado tus claves para lanzar instancias EC2 en otras regiones de AWS así que comprueba todas buscando instancias que te parezcan sospechosas. Aquí un ejemplo para buscar instancias creadas en la región us-east-1 desde el 9 de Marzo de 2016:

aws ec2 describe-instances --region us-east-1 \
--query 'Reservations[].Instances[?LaunchTime>=`2016-03-9`][].{id: InstanceId, type: InstanceType, launched: LaunchTime}'

3) Contacta con el equipo de soporte de AWS y avísales del incidente, están siempre dispuestos a ayudar y en caso necesario escalarán al equipo de seguridad de AWS.

4) Aisla la instancia, en este caso cuando hablo de YOUR.IP.ADDRESS.HERE, puede ser la IP pública de tu oficina o un servidor intermedio donde saltar y hacer el análisis:

    • Crea un security group para aislar la isntancia, ojo con la diferencia entre EC2-Classic y EC2-VPC, apunta el Group-ID
aws ec2 create-security-group --group-name isolation-sg \
--description "Security group to isolate EC2-Classic instances"
aws ec2 create-security-group --group-name isolation-sg \
--description "Security group to isolate a EC2-VPC instance" --vpc-id vpc-1a2b3c4d 
# where vpc-1a2b3c4d is the VPC ID that the instance is member of
    • Configura una regla para permitir SSH solo desde tu IP pública, aunque primero debes saber tu IP pública:
dig +short myip.opendns.com @resolver1.opendns.com
aws ec2 authorize-security-group-ingress --group-name isolation-sg \
--protocol tcp --port 22 --cidr YOUR.IP.ADDRESS.HERE/32
aws ec2 authorize-security-group-ingress --group-id sg-BLOCK-ID \
--protocol tcp --port 22 --cidr YOUR.IP.ADDRESS.HERE/32 
# note the difference between both commands in group-name \
and group-id, sg-BLOCK-ID is the ID of your isolation-sg
    • Los EC2-Classic Security Groups no soportan reglas de trafico saliente (solo entrante). Sin embargo, para EC2-VPC Security Groups, reglas de trafico saliente se puede configurar con estos comandos:
aws ec2 revoke-security-group-egress --group-id sg-BLOCK-ID \
--protocol '-1' --port all --cidr '0.0.0.0/0’ 
# removed rule that allows all outbound traffic
aws ec2 authorize-security-group-egress --group-id sg-BLOCK-ID \
--protocol 'tcp' --port 80 --cidr '0.0.0.0/0’ 
# place a port or IP if you want to enable some other outbound \
 traffic otherwise do not execute this command.
    • Aplica ese Security Group a la instancia comprometida:
aws ec2 modify-instance-attribute --instance-id i-INSTANCE-ID \
--groups sg-BLOCK-ID 
# where sg-BLOCK-ID is the ID of your isolation-sg
aws iam put-user-policy --user-name MyUser --policy-name MyPowerUserRole \
--policy-document file://C:\Temp\MyPolicyFile.json

5) Etiqueta la instancia para marcarla como “en investigación”:

aws ec2 create-tags –-resources i-INSTANCE-ID \
–tags "Key=Environment, Value=Quarantine:REFERENCE-ID"

6) Guarda los metadatatos de la instancia:

    • Más información sobre la instancia comprometida:
aws ec2 describe-instances --instance-ids i-INSTANCE-ID > forensic-metadata.log
or
aws ec2 describe-instances --filters "Name=ip-address,Values=xx.xx.xx.xx"
    • La salida de consola, puede ser útil dependiendo del tipo de ataque o compromiso aunque recuerda que deberías tener un sistema de logs centralizado:
aws ec2 get-console-output --instance-id i-INSTANCE-ID

7) Crea un Snapshot del volumen o volúmenes de la instancia comprometida para el análisis forense:

aws ec2 create-snapshot –-volume-id vol-xxxx –-description "IR-ResponderName- Date-REFERENCE-ID"
    • Ese snapshot no se modificará o montará, sino que trabajaremos con un volumen.

8) Ahora podemos seguir dos caminos, Parar la instancia:

aws ec2 stop-instances --instance-ids i-INSTANCE-ID
    • Dejarla ejecutándose, si podemos, en cuyo caso deberíamos aislarla también desde dentro  (iptables) y hacer un volcado de la memoria RAM usando LiME.

9) Crea un Volume desde el snapshot:

    • Piensa que región vas a usar, y otras opciones como  –region us-east-1 –availability-zone us-east-1a –volume-type y personaliza los comandos siguientes:
aws ec2 create-volume --snapshot-id snap-abcd1234
    • Toma nota del volumen:
aws ec2 describe-volumes

10) Monta ese volumen en tu distribución favorita de análisis forense y comienza la investigación.

Iré añadiendo más información en futuros artículos, por ahora esto es una introducción adecuada.

Si quieres aprender mucho más sobre este tema, voy a dar un curso online sobre Análisis forense en AWS, GCE y Azure en español con Securizame, más info aquí.

Forense2-1

Algunas referencias que he usado:

https://securosis.com/blog/my-500-cloud-security-screwup

https://securosis.com/blog/cloud-forensics-101

http://www.slideshare.net/AmazonWebServices/sec316-your-architecture-w-security-incident-response-simulations

http://sysforensics.org/2014/10/forensics-in-the-amazon-cloud-ec2/

The 10 commandments to avoid disabling SELinux

Well, they are 10 ideas or commands actually 😉
Due to my new role at Alfresco as Senior DevOps Security Architect, I’m doing some new cool stuff (that I will be publishing here soon) and also learning a lot and helping a little bit with my knowledge on security to the DevOps team.
One of the goals I promised myself was to “never disable SELinux”, even if that means to learn more about it and spend time on it. I may say that it’s being a worth it investment of my time and here you go some results of it.

This article is not about what is or what is not SELinux, you have the Wikipedia for that. But a brief description could be: a MAC (Mandatory Access Control) implementation in Linux that prevents a process to access to other processes or files that is supposed to not to have access (open, read, write files, etc.)

If you are here is because you want to finally start using SELinux and you are really interested on make it work, to tame this wild horse. Let me just say something, if you are really worry about security and have dozens of Linux servers in production, keep SELinux enabled, keep it “Enforcing”, no question.
Once said that, here is my list. It is not an exhaustive list, I’m looking forward to see your insights in the comments:
  1. Enable SELinux in Enforcing mode:
    • In configuration files (need restart)
      • /etc/sysconfig/selinux (RedHat/CentOS 6.7 and older)
      • /etc/selinux/config (RedHat/CentOS 7.0 and newer)
    • Through commands (no restart required)
      • setenforce Enforcing
    • To check the status use
      • sestatus # or command getenforce
  2. Use the right tools. To do cool things you need cool tools, we will need some of them:
    • yum install -y setools-console policycoreutils-python setroubleshoot-server
    • policycoreutils-python comes with the great semanage command, the lord of the SELinux commands
    • setools-console comes with seinfosesearch and sechecker among others
    • from setroubleshoot-server package we will use sealert to easily identify issues
  3. Get to know what is going on: Dealing with SELinux happens mostly during installation, configuration and tests of Linux services. Therefore, in case something in your system is not working properly or in the same manner as with SELinux disabled. When you are configuring and installing a service or application on a server and something is not working as expected, not starting as it should to, you always think “Damn SELinux, let’s disable it”. Forget about that, you have to check the proper place to see what is going on with it: the Audit logs. Check /var/log/audit/audit.log and look for lines with “denied”.
    • tail -f /var/log/audit/audit.log | perl -pe ‘s/(\d+)/localtime($1)/e’
    • the perl command is to convert the Epoch time (or UNIX or POSIX time) inside the audit.log file to human readable time.
  4. See the extended attributes in the file system that SELinux use:
    • ls -ltraZ # most important here is the Z
    • ls -ltraZ /etc/nginx/nginx.conf will show:
      • -rw-r–r–. root root system_u:object_r:httpd_config_t:s0 /etc/nginx/nginx.conf
      • where system_u: is the user (not always a user of the system), object_r: role and  httpd_config_t: is the object type, other objects can be a directory, a port or socket and types of an object can be a config file, log file, etc.; finally s0 means the level or category of that object.
  5. See the SELinux attributes that applies to a running process:
    • ps auxZ
      • You need to know this command in case of issues.
  6. Who am I for SELinux:
    • id -Z
      • You need to know this command in case of issues.
  7. Check, enable or disable defined modes (enforcing or permissive) per deamon:
    • getsebool -a # list all current status
    • setsebool -P docker_connect_any 1 # allow Docker to connect to all TCP ports
    • semanage boolean -l # is another alternative command
    • semanage fcontext -l # to see al contexts where SELinux applies
  8. Add a non default directory or file to be used by a given daemon:
    • For a folder used by a service, i.e.: change Mysql data directory:
      • Change your default data directory in /etc/my.cnf
      • semanage fcontext -a -t mysqld_db_t “/var/lib/mysql-default/(/.*)?”
      • restorecon -Rv /var/lib/mysql-default
      • ls -lZ /var/lib/mysql-default
    • For a new file used by a service, i.e.: a new index.html file for Apache:
      • semanage fcontext -a -t httpd_sys_content_t ‘/myweb/web1/html/index.html’
      • restorecon -v ‘/myweb/web1/html/index.html’
  9. Add a non default port to be used by a given service:
    • i.e.: If you want nginx to listen in other additional port:
      • semanage port -a -t http_port_t -p tcp 2100
      • semanage port -l | grep  http_port # check if the change is effective
  10. Spread the word!
    • SELinux is not easy but writing easy tips make people using it and making the Internet a safer place!

Buenas Prácticas de Seguridad en Docker

DockerLogoNota: Este artículo lo escribí para SecurityByDefault.com el 18/05/2015, espero que lo disfrutéis.
Docker es una plataforma abierta que permite construir, portar y ejecutar aplicaciones distribuidas, se basa en contenedores que corren en Linux y funcionan tanto en máquinas físicas como virtuales simplemente usando un runtime. Está escrito en Go y usa librerías del sistema operativo así como funcionalidades del kernel de Linux en el que se ejecuta. Consta de un engine con API RESTful y un cliente que pueden ejecutarse en la misma máquina o en máquinas separadas. Es Open Source (Apache 2.0) y gratuito.
Los contenedores existen desde hace muchos años, Docker no ha inventado nada en ese sentido, o casi nada, pero no hay que quitarles mérito, están en el momento adecuado y aportan las características y herramientas concretas que se necesitan en la actualidad, donde la portabilidad, escalabilidad, alta disponibilidad y los microservicios en aplicaciones distribuidas son cada vez más utilizados, y no sólo eso, sino que también son mejor entendidos por la comunidad de desarrolladores y administradores de sistemas. Cada vez se desarrollan menos aplicaciones monolíticas y más basadas en módulos o en microservicios, que permiten un desarrollo más ágil, rápido y a la vez portable. Empresas de sobra conocidas como Netflix, Spotify o Google e infinidad de Start ups usan arquitecturas basadas en microservicios en muchos de los servicios que ofrecen.
Te estarás preguntando ¿Y no es más o menos lo mismo que hacer un chroot de una aplicación? Sería como comparar una rueda con un coche. El concepto de chroot es similar ya que se trata de aislar una aplicación, pero Docker va mucho más allá, sería un chroot con esteroides, muchos esteroides. Por ejemplo, puede limitar y controlar los recursos a los que accede la aplicación en el contenedor, generalmente usan su propio sistema de archivos como UnionFS o variantes como AUFS, btrfs, vfs, Overlayfs o Device Mapper que básicamente son sistemas de ficheros en capas. La forma de controlar los recursos y capacidades que hereda del host es mediante namespaces y cgroups de Linux. Esas opciones de Linux no son nuevas en absoluto, pero Docker lo hace fácil y el ecosistema que hay alrededor lo ha hecho tan utilizado.
Adicionalmente, la flexibilidad, comodidad y ahorro de recursos de un contenedor es mayor a la que aporta una máquina virtual o un servidor físico, esto es así en muchos casos de uso, no en todos. Por ejemplo, tres servidores web para un cluster con Nginx en una VM con una instalación de Linux CentOS mínima ocuparía unos 400MB, multiplicado por 3 máquinas sería total de uso en disco de 1,2 GB, con contenedores serían 400MB las mismas 3 máquinas corriendo ya que usa la misma imagen para múltiples contenedores. Eso es sólo por destacar una característica interesante a nivel de recursos. Otro uso muy común de Docker es la portabilidad de aplicaciones, imagina una aplicación que solo funciona con Python 3.4 y hacerla funcionar en un sistema Linux con Python 2.x es complicado, piensa en lo que puede suponer en un sistema en producción actualizar Python, con contenedores sería casi automático, descargar la imagen del contenedor y ejecutar la aplicación de turno.
Solo por ponernos en situación de la envergadura Docker, unos números alrededor del producto y la compañía (fuente aquí):
  • 95 millones de dólares de inversión.
  • Valorada en 1.000 millones de dólares.
  • Más de 300 millones de descargas en 96 releases desde marzo de 2013
Pero un contenedor no es para todo, ni hay que volverse loco “dockerizando” cualquier cosa, aunque no es este el sitio para esa reflexión. Al cambiar la forma de desarrollar, desplegar y mantener aplicaciones, también cambia en cierto modo la forma de securizar estos nuevos actores.
Docker aporta seguridad en capas, aísla aplicaciones entre ellas y del host sin usar grandes recursos, también se pueden desplegar contenedores en máquinas virtuales lo que aporta otra capa adicional de aislamiento (estaréis pensando en VENOM pero eso es otra película que no afecta directamente a Docker). Dada la arquitectura de Docker y usando buenas prácticas, aplicar parches de seguridad al anfitrión o a aplicaciones suele ser más rápido y menos doloroso.
Buenas Prácticas de Seguridad:
Aunque la seguridad es algo innato en un contenedor, desde Docker Inc. están haciendo esfuerzos por la seguridad, por ejemplo, contrataron hace unos meses a ingenieros de seguridad de Square, que no son precisamente nuevos en el tema. Ellos, junto a compañías como VMware entre otras, han publicado recientemente un extenso informe de sobre buenas prácticas de seguridad en Docker en el CIS. Gracias a este informe tenemos acceso a más de 90 recomendaciones de seguridad a tener siempre en cuenta cuando vamos a usar Docker en producción. En la siguiente tabla podemos ver las recomendaciones de seguridad sugeridas, algunas son muy obvias pero un check list así nunca viene mal:
1. Recomendaciones a nivel de host
1.1. Crear una partición separada para los contenedores 
1.2. Usar un Kernel de Linux actualizado 
1.3. No usar herramientas de desarrollo en producción
1.4. Securizar el sistema anfitrión 
1.5. Borrar todos los servicios no esenciales en el sistema anfitrión
1.6. Mantener Docker actualizado 
1.7. Permitir solo a los usuarios autorizados controlar el demonio Docker
1.8. Auditar el demonio Docker  (auditd)
1.9. Auditar el fichero o directorio de Docker – /var/lib/docker 
1.10. Auditar el fichero o directorio de Docker – /etc/docker 
1.11. Auditar el fichero o directorio de Docker – docker-registry.service 
1.12. Auditar el fichero o directorio de Docker – docker.service 
1.13. Auditar el fichero o directorio de Docker – /var/run/docker.sock 
1.14. Auditar el fichero o directorio de Docker – /etc/sysconfig/docker 
1.15. Auditar el fichero o directorio de Docker – /etc/sysconfig/docker-network 
1.16. Auditar el fichero o directorio de Docker – /etc/sysconfig/docker-registry 
1.17. Auditar el fichero o directorio de Docker – /etc/sysconfig/docker-storage 
1.18. Auditar el fichero o directorio de Docker – /etc/default/docker 
 
2. Recomendaciones a nivel de Docker Engine (daemon)
2.1 No usar el driver obsoleto de ejecución de lxc 
2.2 Restringir el tráfico de red entre contenedores 
2.3 Configurar el nivel de logging deseado 
2.4 Permitir a Docker hacer cambios en iptables 
2.5 No usar registros inseguros (sin TLS)
2.6 Configurar un registro espejo local
2.7 No usar aufs como driver de almacenamiento
2.8 No arrancar Docker para escuchar a  una IP/Port o Unix socket diferente
2.9 Configurar autenticación TLS para el daemon de Docker
2.10 Configurar el ulimit por defecto de forma apropiada

3. Recomendaciones a nivel de configuración de Docker
3.1 Verificar que los permisos del archivo docker.service están como root:root 
3.2 Verificar que los permisos del archivo docker.service están en 644 o más restringidos 
3.3 Verificar que los permisos del archivo docker-registry.service están como root:root 
3.4 Verificar que los permisos del archivo docker-registry.service están en 644 o más restringidos
3.5 Verificar que los permisos del archivo docker.socket están como root:root 
3.6 Verificar que los permisos del archivo docker.socket están en 644 o más restringidos
3.7  Verificar que los permisos del archivo de entorno Docker (/etc/sysconfig/docker o /etc/default/docker) están como root:root 
3.8 Verificar que los permisos del archivo de entorno Docker (/etc/sysconfig/docker o /etc/default/docker) están en 644 o más restringidos
3.9 Verificar que los permisos del archivo /etc/sysconfig/docker-network (si se usa systemd) están como root:root 
3.10 Verificar que los permisos del archivo /etc/sysconfig/docker-network están en 644 o más restringidos
3.11  Verificar que los permisos del archivo /etc/sysconfig/docker-registry (si se usa systemd) están como root:root
3.12 Verificar que los permisos del archivo /etc/sysconfig/docker-registry (si se usa systemd) están en 644 o más restringidos
3.13 Verificar que los permisos del archivo /etc/sysconfig/docker-storage (si se usa systemd) están como root:root 
3.14 Verificar que los permisos del archivo /etc/sysconfig/docker-storage (si se usa systemd) están en 644 o más restringidos 
3.15 Verificar que los permisos del directorio /etc/docker están como root:root 
3.16 Verificar que los permisos del directorio /etc/docker están en 755 o más restrictivos 
3.17 Verificar que los permisos del certificado del registry están como root:root 
3.18 Verificar que los permisos del certificado del registry están en 444 o más restringidos 
3.19 Verificar que los permisos del certificado TLS CA están como root:root 
3.20 Verificar que los permisos del certificado TLS CA están en 444 o más restringidos 
3.21 Verificar que los permisos del certificado del servidor Docker están como root:root 
3.22 Verificar que los permisos del certificado del servidor Docker están en 444 o más restringidos 
3.23 Verificar que los permisos del archivo de clave del certificado del servidor Docker están como root:root 
3.24 Verificar que los permisos del archivo de clave del certificado del servidor Docker están en 400 
3.25 Verificar que los permisos del archivo de socket de Docker están como root:docker 
3.26 Verificar que los permisos del archivo de socket de Docker están en 660 o más restringidos 
 
4 Imágenes de Contenedores y Dockerfiles
4.1 Crean un usuario para el contenedor
4.2 Usar imágenes de confianza para los contenedores 
4.3 No instalar paquetes innecesarios en el contenedor
4.4 Regenerar las imágenes si es necesario con parches de seguridad
 
5 Runtime del contenedor
5.1 Verificar el perfil de AppArmor (Debian o Ubuntu) 
5.2 Verificar las opciones de seguridad de SELinux (RedHat, CentOS o Fedora) 
5.3 Verificar que los contenedores esten ejecutando un solo proceso principal
5.4 Restringir las Linux Kernel Capabilities dentro de los contenedores 
5.5 No usar contenedores con privilegios   
5.6 No montar directorios sensibles del anfitrión en los contenedores
5.7 No ejecutar ssh dentro de los contenedores
5.8 No mapear puertos privilegiados dentro de los contenedores
5.9 Abrir solo los puertos necesarios en un contenedor
5.10 No usar el modo “host network” en un contenedor 
5.11 Limitar el uso de memoria por contenedor 
5.12 Configurar la prioridad de uso de CPU apropiadamente 
5.13 Montar el sistema de ficheros raíz de un contenedor como solo lectura
5.14 Limitar el tráfico entrante al contenedor mediante una interfaz específica del anfitrión
5.15 Configurar la política de reinicio ‘on-failure’ de un contenedor a 5 
5.16 No compartir PID de procesos del anfitrión con contenedores
5.17 No compartir IPC del anfitrión con contenedores 
5.18 No exponer directamente dispositivos del anfitrión en contenedores
5.19 Sobre-escribir el ulimit por defecto en tiempo de ejecución solo si es necesario
 
6 Operaciones de Seguridad en Docker
6.1 Realizar auditorías de seguridad tanto en el anfitrión como en los contenedores de forma regular
6.2 Monitorizar el uso, rendimiento y métricas de los contenedores
6.3 Endpoint protection platform (EPP) para contenedores (si las hubiese) 
6.4 Hacer Backup de los datos del contenedor 
6.5 Usar un servicio centralizado y remoto para recolección de logs
6.6 Evita almacenar imágenes obsoletas, sin etiquetar correctamente o de forma masiva.   
6.7 Evita almacenar contenedores obsoletos, sin etiquetar correctamente o de forma masiva.
En algunos casos, hay recomendaciones que merecen un artículo por si solas. Si quieres profundizar más en este tema recuerda que los pormenores de estos aspectos de seguridad y auditoría los ampliaremos durante el curso online Hardening de Windows, Linux e Infraestructuras” en el que colaboraré junto a Lorenzo Martínez, Yago Jesús, Juan Garrido y Pedro Sanchez, todo un lujo de curso en el que aportaré mi granito de arena con seguridad en Docker completando el módulo de Hardening Linux. Más información aquí: https://www.securizame.com/curso-online-de-hardening-de-sistemas-windows-y-linux-e-infraestructuras_yj/
Para otros posibles artículos en el futuro me parece interesante ver algunas consideraciones de seguridad en Docker Hub y otros componentes relacionados, así como auditorías de contenedores con Lynis.
Recursos y referencias:


Alfresco security check list

Alfresco security check list is a list of elements to check before going live with an Alfresco installation in a production environment. This check list is part of the Alfresco Security Best Practices Guide, but I wanted to give it a post in case you missed (thinks that happen due to the 30+ pages of the guide).

[slideshare id=43292696&doc=alfrescosecuritybestpractices-checklistonly-150107130033-conversion-gate02&type=d]