Cloud Forensics: CAINE7 on AWS

caine-7-accessories-481x460If you work with AWS, you may have to perform a forensics analisys at some point. As discussed in previous articles here, there are many tasks we can achieve in the cloud.
Here is a quick quide based on AWS-CLI on how to install, upload and use the well known CAINE7 distribution up in the Amazon Cloud importing it as an EC2 AMI:
  • First of all start CAINE7.iso as live CD in Virtualbox,  12GB of disk in VHD format will be fine ( if you don’t use VHD or you have VMDK instead you can convert it with “VBoxManage clonemedium CAINE7.vmdk  CAINE7.vhd –format vhd”)
  • Inside CAINE:
    • Run BlockON/OFF app from Desktop icon, select your virtual hard drive and make it Writable.
    • Go to Menu / System / Administration / gParted
    • In gParted  Device / Create Partition Table… msdos
    • Partition new create a 10GB partition and leave the rest empty
    • Create another partition linux-swap for the remaining 2GB
    • Edit – Apply all operations
    • Run Systemback (installer) form the Desktop icon.
    • System Install, fill the form with user full name: caine, system user: ec2-user, your password and hostname: caine. Then Next
    • Select the 10GB partition and set the mount point /
    • Click Next and the installation will start
  • Once the installation is finished you can stop the virtual machine, remove the liveCD, start it and log in to the VM again to do some additional steps inside your just installed CAINE7.
  • Update and upgrade:
    • sudo apt-get update; sudo apt-get upgrade
  • Install aws-cli:
    • sudo pip install aws-cli
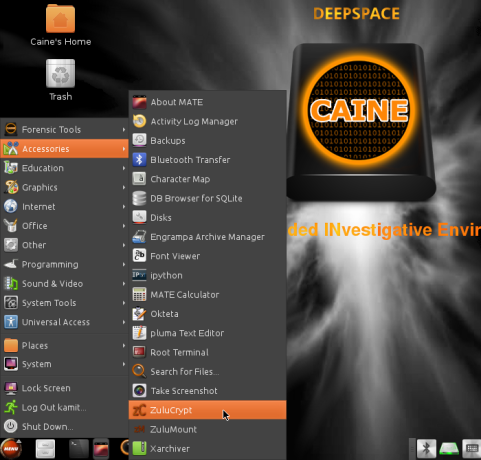
  • Now we will install some dependences needed to get access via RDP once we run CAINE in AWS, just like if it is in our local workstation.
    • sudo apt-get install xrdp curl
    • sudo sed -i s/port=-1/port=ask-1/g /etc/xrdp/xrdp.ini
    • sudo sed -i s#/\.\ \/etc\/X11\/Xsession#mate-session#g /etc/xrdp/startwm.sh
    • sudo service xrdp restart
  • Extra: install the Amazon EC2 Simple Systems Manager (SSM) agent to process Run Command requests remotely and automated:
    • cd /tmp
    • curl https://amazon-ssm-<region>.s3.amazonaws.com/latest/debian_386/amazon-ssm-agent.deb -o amazon-ssm-agent.deb
    • dpkg -i amazon-ssm-agent.deb
  • Now we have to upload this VM VHD file to a S3 bucket, it will be around 8GBaws-logo1.png
    • aws s3 cp CAINE7.vhd  s3://your-forensics-tools-bucket/CAINE7.vhd
    • This will take time, depending on your bandwith.
  • If the AWS IAM user you are running doesn’t have proper permissions, you should review and follow these prerequisites http://docs.aws.amazon.com/AWSEC2/latest/UserGuide/VMImportPrerequisites.html
  • Then we can import this virtual hard drive as AWS AMI. Firs create a json file like below to use it as parameter for the import task (caine7vm.json):
[{
    “Description”: “CAINE7”,
    “Format”: “vhd”,
    “UserBucket”: {
        “S3Bucket”: “your-forensics-tools-bucket”,
        “S3Key”: “CAINE7.vhd”
    }
}]
  • Lets perform the import:
    • aws ec2 import-image –description “CAINE7” –disk-containers file://caine7vm.json –profile default –region us-east-1
    • NOTE: you probably don’t need to specify profile or region.
  • The import taks may take some minutes, depending on how big is the VHD and how busy is AWS by that time. To check the status use this command:
    • aws ec2 describe-import-image-tasks –profile default –region us-east-1 –query ‘ImportImageTasks[].[ImportTaskId,StatusMessage,Progress]’
    • or this one with your custom “import-ami-XXXXX”
    • aws ec2 describe-import-image-tasks –profile default –region us-east-1 –query ‘ImportImageTasks[].[ImportTaskId,StatusMessage,Progress]’ –cli-input-json “{ \”ImportTaskIds\”: [\”import-ami-XXXXX\”]}”
    • You will see “StatusMessage”: “pending” –> “validated”–> “converting” –> “preparing to boot” –> “booted” –> “preparing ami” –> “completed”
  • Once it is completed, look for your brand new AMI id:
    • aws ec2 describe-images –owners self –profile default –region us-east-1 –filters “Name=name,Values=import-ami-XXXXX”
  • Good, we know the AMI id so let’s create a new instance inside an existing VPC and a Public Subnet (I use t2.medium with 2GB of RAM), please use your own Security Group with RDP and SSH open and your own ssh keyname:
    • aws ec2 run-instances –image-id ami-XXXX –count 1 –instance-type t2.medium –key-name YOURKEY –security-group-ids sg-YOURSG –subnet-id subnet-YOURPUBLIC –profile default –region us-east-1
  • Add it a tag for better identification:
    • aws ec2 create-tags –resources i-XXXX –tags Key=Name,Value=Investigator –profile default –region us-east-1
  • At this point you can attache a public IP to the instance and get access to it.
  • First allocate a public Elastic IP:
    • aws ec2 allocate-address –domain vpc-XXXX –profile default –region us-east-1
  • Then associate that new Elastic IP to our just launched CAINE7 instance (changeeipalloc-XXXX):
    • aws ec2 associate-address –instance-id i-XXXX –allocation-id eipalloc-XXXX –profile security –region us-east-1
  • Now open your favorite remote desktop application and access to your CAINE7, remember you will be asked for the username and password you set when CAINE was installed in your VirtualBox VM:

Screenshot 2016-06-13 23.09.56

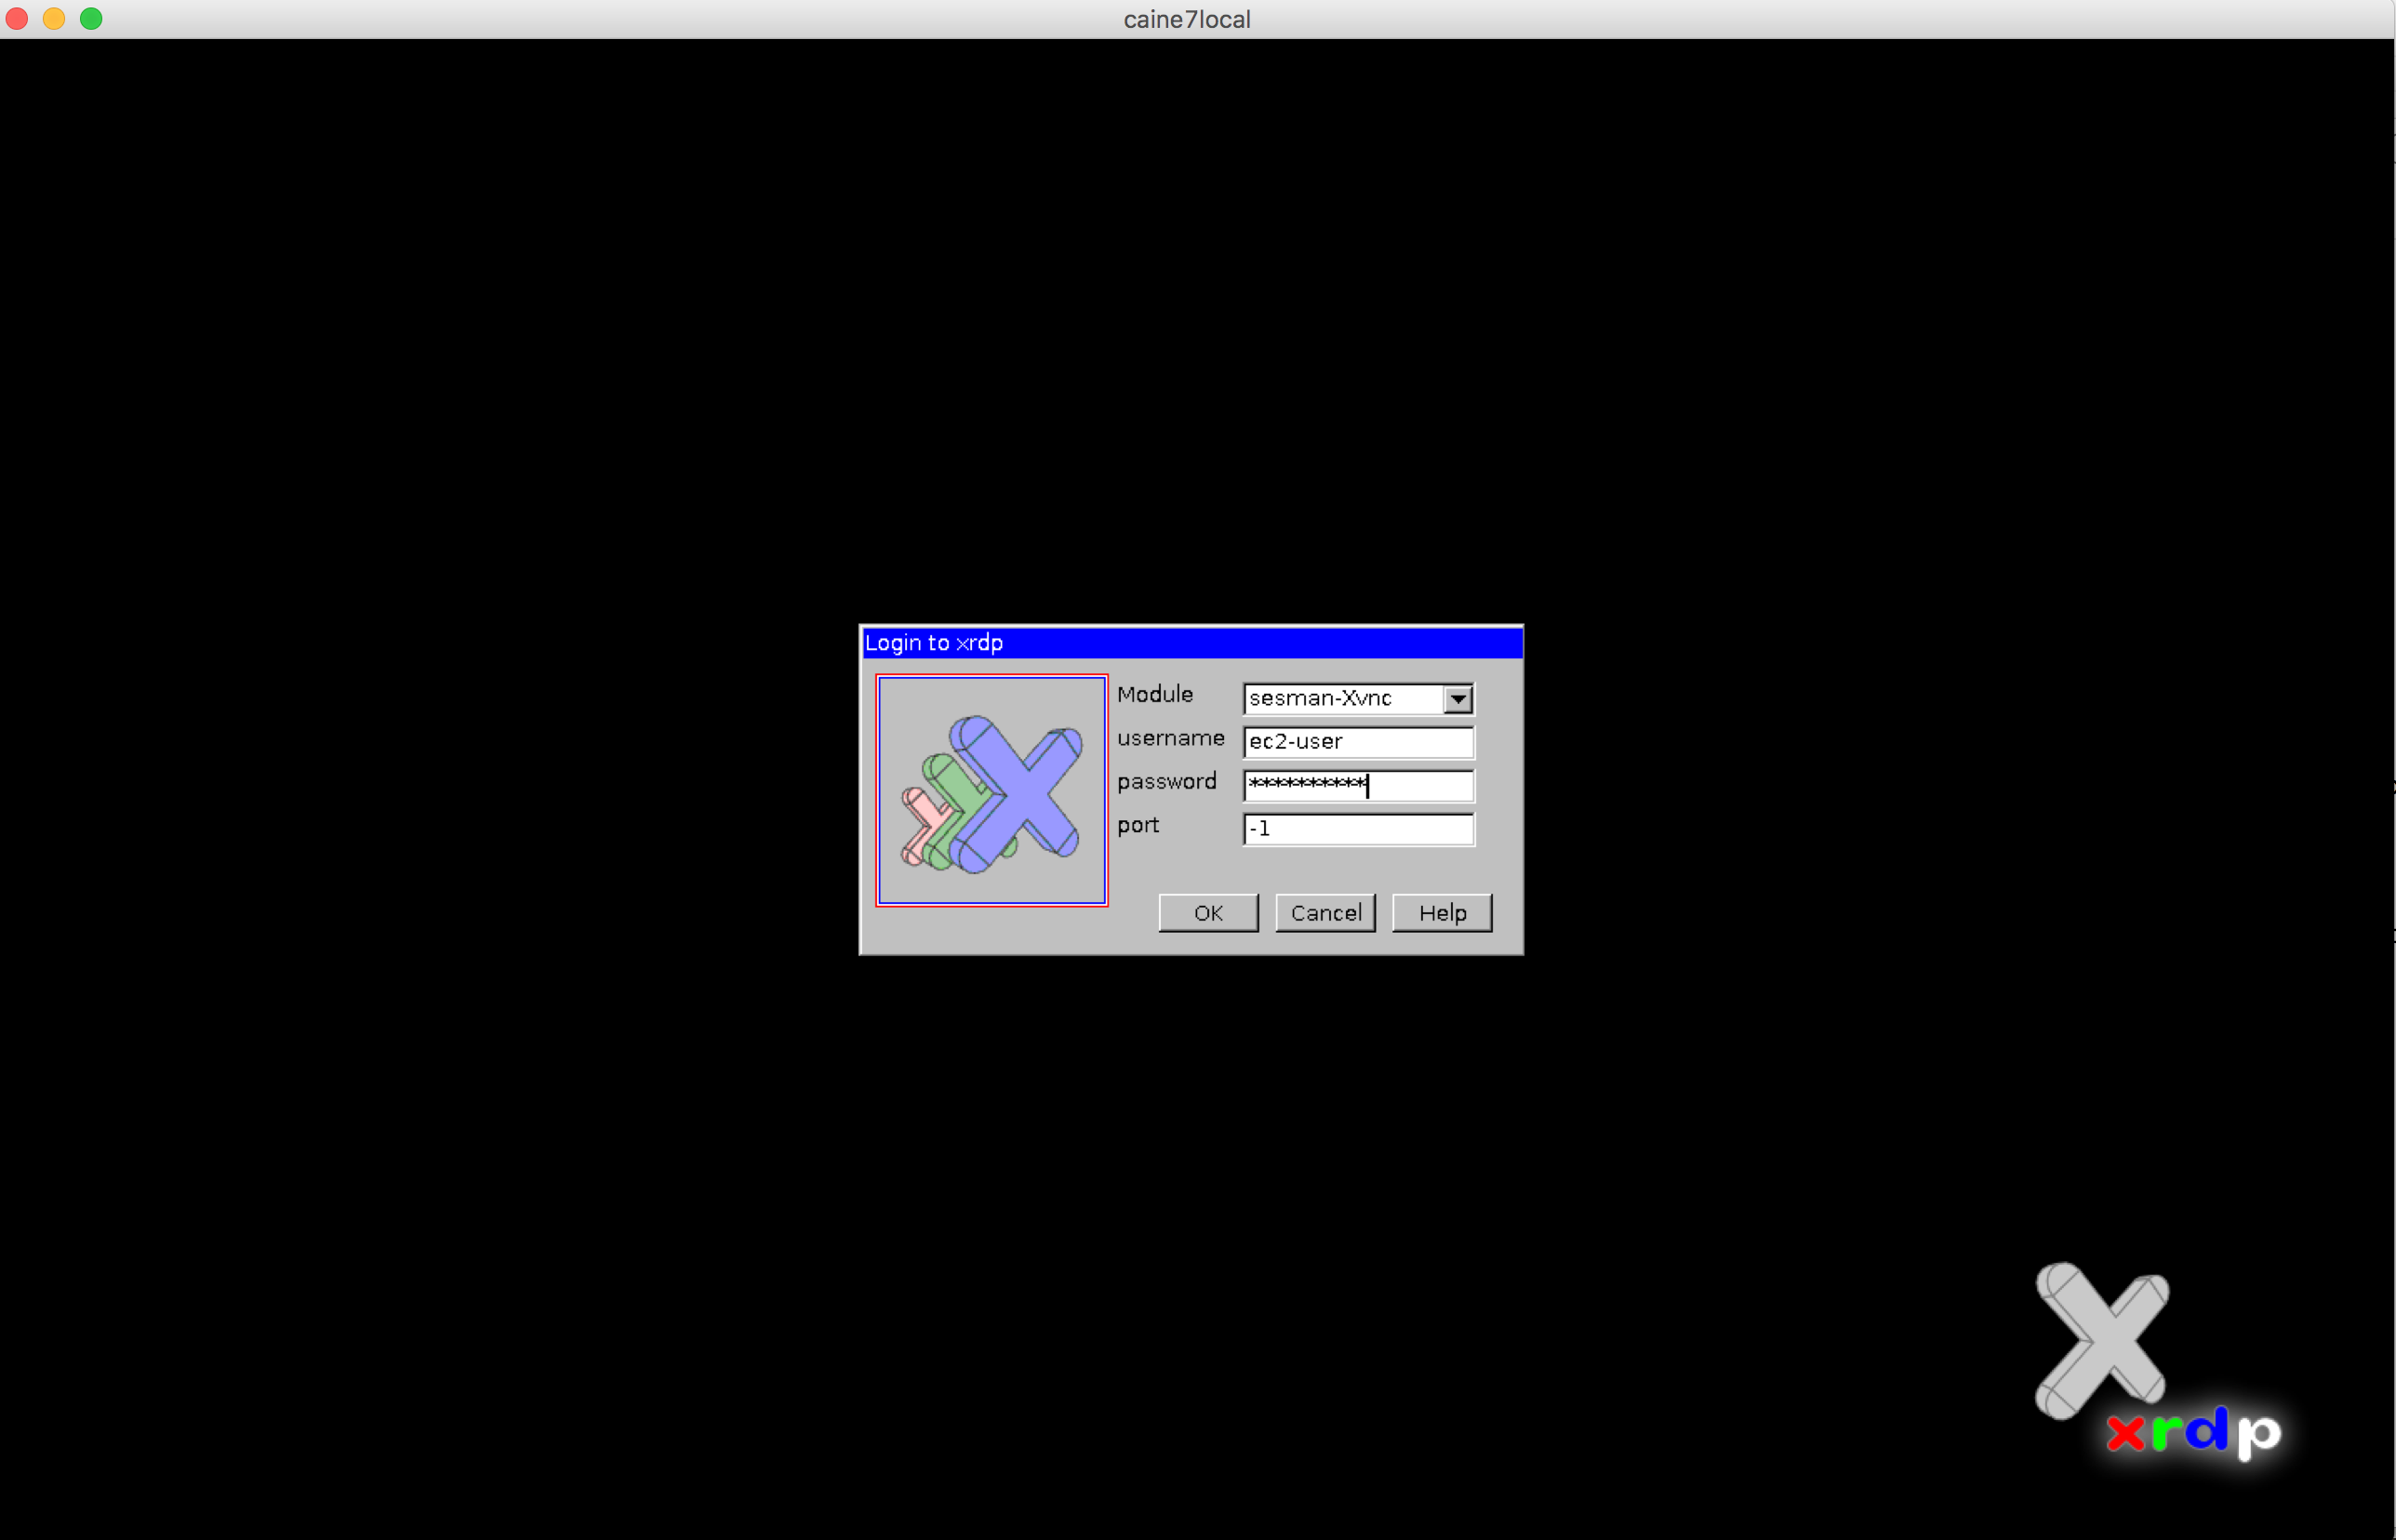
  • Now you should be in!
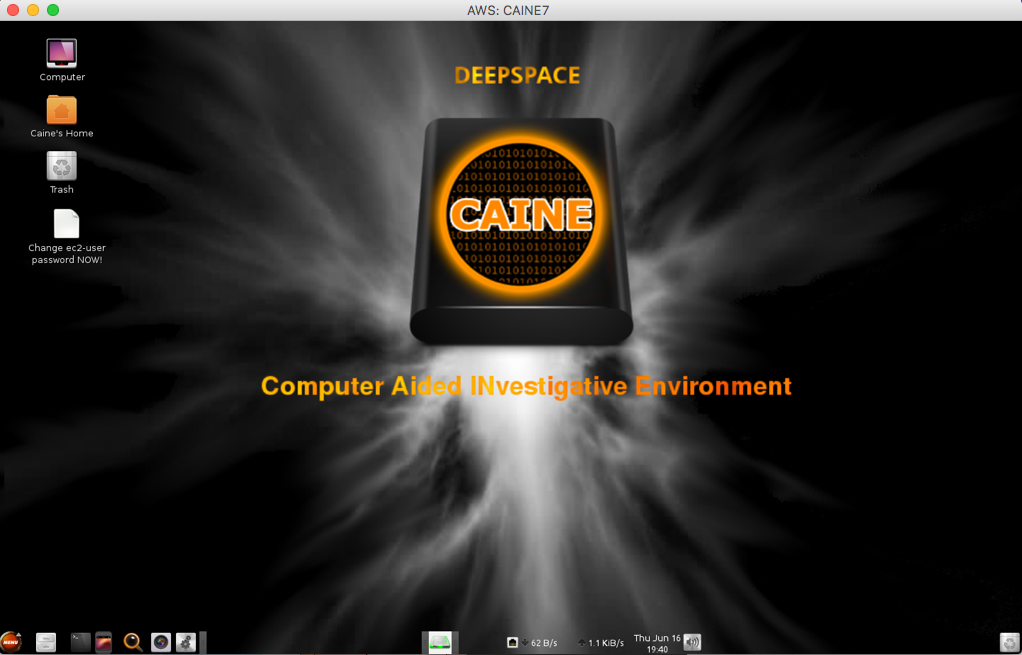
Screenshot 2016-06-16 13.40.33

Essential commands for Alfresco BART

Alfresco BART usage:

[bash]
./alfresco-bart.sh [set] [date dest]
[/bash]

But what really modes are? With modes I mean different ways to use Alfresco BART depending of what do you want to do, for instance:

  • backup: runs an incremental backup or a full if first time
  • restore: runs the restore, wizard if no arguments, see below more commands with arguments [set] [date] [dest], while [set] can also be “all” for all sets.
  • verify: verifies the backup, it compares what you have backed up and what you have in your live system.
  • collection: shows all the backup sets already in the backup archive that might be restored.
  • list: lists the files currently backed up in the archive. It shows files contained in the last backup.

Sets:

  • no value: use all backup sets
  • index: use index backup set (group) for selected mode.
  • db: use data base backup set (group) for selected mode.
  • cs: use content store backup set (group) for selected mode.
  • files: use rest of files backup set (group) for selected mode.

Now lets see how to use Alfresco BART.

To make a backup:

[bash]
./alfresco-bart.sh backup
[/bash]

NOTE1: if first time, it makes a full backup
NOTE2: you should add this command to your root crontab with something like “0 5 * * * /path/to/alfresco-bart.sh backup” (without quotes) if you want to run your backup daily at 5AM (after Alfresco’s nightly backups and maintenance jobs).
NOTE3: running command above with without any data sets (index, db, cs or files) it will perform a backup of all data sets configured in alfresco-bart.properties. You can run “./alfresco-bart.sh backup files” to only perform a backup of your configuration files, installation and customization files or “./alfresco-bart.sh backup cs” to create a backup (full if first time or incremental if not) of your contentstore and additional stores configured.

Commands and options to restore backup:

To restore an existing backup guided by the wizard:

[bash]
./alfresco-bart.sh restore

################## Welcome to Alfresco BART Recovery wizard ###################

This backup and recovery tool does not overrides nor modify your existing
data, then you must have a destination folder ready to do the entire
or partial restore process.

##############################################################################

Choose a restore option:
1) Full restore
2) Set restore
3) Restore a single file of your Alfresco repository
4) Restore alfresco-global.properties from a given date
5) Restore other configuration file or directory

Enter an option [1|2|3|4|5] or CTRL+c to exit:
[/bash]

To restore the last (now) existing backup of all sets (all) and leave it in /tmp:

[bash]
./alfresco-bart.sh restore all now /tmp
[/bash]

To restore a DB backup from 14 days ago to /tmp:

[bash]
./alfresco-bart.sh restore db 14D /tmp
[/bash]

To restore the indexes backup from december 2nd 2013:

[bash]
./alfresco-bart.sh restore index 12-02-2013 /tmp
[/bash]

Valid date format is: now: for last backup, s: for second, m: minutes, h: hours, D: days, W: weeks, M: months or Y: years, all date values must be specified without spaces, i.e: 4D, 2W, 1Y, 33m. Dates may also be like: YYYY/MM/DD, YYYY-MM-DD, MM/DD/YYYY or MM-DD-YYYY.

To restore a single file deleted on the repository but existing in previous backup please use the backup wizard by typing: “./alfresco-bart.sh restore” and then follow instructions in the menu option “3”.

To restore the alfresco-global.properties configuration file from a given date please use the backup wizard by typing: “./alfresco-bart.sh restore” and then follow instructions in the menu option “4”.

Finally if you want to restore any other configuration, installation or custom file from your existing backup on a given date follow instructions by choosing option 5 in the recovery wizard.

NOTE4: Alfresco BART restore options or recovery wizard never will overrides your existing Alfresco files, you should specify a temporary recovery folder with enough space, then you have to move that content manually or following the instructions on the screen.

In case of source mismatch error with Duplicity try running this command:

[bash]
./alfresco-bart.sh backup all force
[/bash]

My talk about “Alfresco Backup and Recovery Tool” in the Alfresco Summit

All recorded videos has been published recently in the Alfresco Summit portal and here you go my talk “Alfresco Backup and Recovery Tool: A Real World Backup Solution” I gave in both Boston and Barcelona. I was the first public presentation about Alfresco BART.

Thanks to all who attended this session and made it one of the most-well attended and highest-rated in both cities. I’m looking forward to keep talking covering security topics as usual (I already have some “hack-ideas”…).

If you only want to see the demo, it starts at minute 33:

The presentation is published in Slideshare as well:

Remember you can download here the White Paper I mention during the talk.

If you only want to see the practical demo (best resolution in the talk video above), you can enjoy it here:

Any questions and comments are always welcome!

Alfresco Backup and Recovery Tool, release v0.1

Project was moved to Github!

Please go to https://github.com/toniblyx/alfresco-backup-and-recovery-tool for downloads, questions, issues, suggestions or feedback. Thanks!

Here you go, first release of the Alfresco Backup and Recovery Tool (Alfresco BART). An Apache 2.0 licensed tool for backup and restore of Alfresco ECM.

DESCRIPTION
Alfresco BART is a tool written in shell script on top of Duplicity for Alfresco backups and restore from a local file system, FTP, SCP or Amazon S3 of all its components: indexes, data base, content store and all deployment and configuration files. It should runs in most Linux distributions, for Windows you may use Cygwin (non tested yet).

Brief description of its features: full and incremental backups, backup policies, backup volume control, encryption with GPG, compression. Also it has a restore wizard with shortcuts for quick restore of some key components (alfresco-global.properties and more).

DISCLAIMER
This is an initial version, it has bugs and needs many improvements, please take care 🙂

FEATURES
Features in this version (v0.1):

  • 5 different modes of work: backup, restore, verify, collection and list
    • backup: runs an incremental backup or a full if first time or configured
    • restore: runs the restore wizard
    • verify: verifies the backup
    • collection: shows all the backup sets in the archive
    • list: lists the files currently backed up in the archive
  • Full and incremental backups.
  • Backup policies:
    • Periodicity: number of days of every full backup, if not backup found it does a full
    • Retention: keep full or incremental copies, clean old backups.
    • Control of number of moths to remove all backups older than or backup retention period.
  • Separated components (backup sets or groups), ability to enable or disable any set (cluster and dedicated search server aware), all backup sets supported are:
    • Indexes (SOLR or Lucene)
    • Data base (MySQL, PostgreSQL and Oracle)
    • Content Store plus deleted, cached and content store selector (optional).
    • Files: all configuration files, deployments, installation files, etc.
  • Restore wizard with support to:
    • restore a full backup (all sets)
    • given backup set
    • restore from a given date or days, month, year ago
    • restore alfresco-global.properties from a point in time
  • Backup volume control:
    • All backups collections are split in a volume size 25MB by default, this can help to store your backup in tapes or in order to upload to a FTP, SCP or S3 server.
  • Backup to different destinations:
    • Local filesystem
    • Remote FTP or FTPS server
    • SCP server (should have shared keys already configured, no authentication with user and password supported)
    • Amazon S3
  • Encryption with GnuPG, all backup volumes are encrypted, this feature is configurable (enable or disable).
  • Compression, all backup volumes are compressed by default
  • Log reporting, Alfresco BART creates a log file each day of operation with in a report of any activity.

DEPENDENCES

  • Duplicity 0.6 (with boto and fabric)
  • Python 
  • GnuPG
  • NcFTP
  • librsync
  • mysqldump for MySQL backup
  • pg_dump for PostgreSQL backup
  • exp for Oracle backup

TODO

  • TEST, TEST and TEST with JBOSS, MySQL, Oracle, S3, FTPs, SCP, etc.
  • Add more input and task controllers (and configuration, first run).
  • Restore single repository file.
  • Snapshots (LVM if exist, AWS if exist).
  • Support for MS SQL Server.
  • Configuration wizard (shell).
  • Share admin panel configuration page as main point to configure more options related to backup (eager, cleaner, index backup, trascan cleaner, etc.).
  • Custom logging control and reporting improvement.

DOWNLOADS and INSTALLATION 

Most recent information about tool and latest code is available in:
http://blyx.com/alfresco-bart

Please report bugs and improvements to: reverse moc.xylb@inot

Playing with Duplicity backup and restore tool and Amazon S3

Duplicity is a python command line tool for encrypted bandwidth-efficient backup.

In their creator words: “Duplicity  incrementally  backs  up  files  and directory by encrypting tar-format volumes with GnuPG and uploading them to a remote (or local) file server.  Currently local, ftp, sftp/scp, rsync, WebDAV, WebDAVs, Google Docs, HSi and Amazon S3 backends  are  available.   Because  duplicity  uses librsync,  the  incremental  archives  are  space  efficient  and only record the parts of files that have changed since the last backup.  Currently duplicity supports deleted files, full Unix permissions, directories, symbolic links, fifos, etc., but not hard links.

My brief description: a free and open source tool for doing full and incremental backup and restore from linux to local or almost any remote target, compressed and encrypted. A charm for any sys admin.

In order to explain how Duplicity works for backup and restore. I’m going to show how to do a backup of a folder called “sample_data” to an Amazon S3 bucket called “alfresco-backup” and a folder called “test” inside my bucket (use your own bucket name) the bucket and folder has been created by me before running any command but could be created by duplicity first time we run the command. If you want to let Duplicity create your own Amazon S3 bucket and you are located in Europe, please read the Duplicity man page.

Note: please not get confused with my bucket name “alfresco-backup”, use your own bucket name. I will use this bucket name also in future articles 😉

How to install Duplicity in Ubuntu:

[bash]
# sudo apt-get install duplicity
[/bash]

Create a gpg key and remember the passphrase because will be required by Duplicity, defaults values works good. Your backup will be encrypted with the passphrase, all files created by command below will be on your Linux home/.gnupg but you won’t need that at all:

[bash]
# gpg –gen-key
[/bash]

Create required system variables (you can also use them with an script):

[bash]
# export PASSPHRASE=yoursupersecretpassphrase
# export AWS_ACCESS_KEY_ID=XXXXXXXXXXX
# export AWS_SECRET_ACCESS_KEY=XXXXXXXXXX
[/bash]

Backup:

To perform a backup with the Duplicity command (the easy and simple command):

[bash]
# duplicity sample-data/ s3+http://alfresco-backup/test
[/bash]

If you get errors, some dependencies for Python and S3 support are required, try installing librsync1 and next python libraries python-gobject-2, boto and dbus.

The command output should be something like this:

[bash]
Local and Remote metadata are synchronized, no sync needed.
Last full backup date: none
No signatures found, switching to full backup.
————–[ Backup Statistics ]————–
StartTime 1368207483.83 (Fri May 10 19:38:03 2013)
EndTime 1368207483.86 (Fri May 10 19:38:03 2013)
ElapsedTime 0.02 (0.02 seconds)
SourceFiles 5
SourceFileSize 1915485 (1.83 MB)
NewFiles 5
NewFileSize 1915485 (1.83 MB)
DeletedFiles 0
ChangedFiles 0
ChangedFileSize 0 (0 bytes)
ChangedDeltaSize 0 (0 bytes)
DeltaEntries 5
RawDeltaSize 1907293 (1.82 MB)
TotalDestinationSizeChange 5543 (5.41 KB)
Errors 0
————————————————-
[/bash]

This will create 3 files in your S3 bucket:

  • duplicity-full-signatures.20130510T160711Z.sigtar.gpg
  • duplicity-full.20130510T160711Z.manifest.gpg
  • duplicity-full.20130510T160711Z.vol1.difftar.gpg

All files are stored with the GNU tar format and encrypted, “duplicity-full” means that was first backup, in next backups you will see “duplicity-inc” in different volumes.

  • sigtar.gpg file contains files signatures then Duplicity will know what file has changed and do the incremental backup
  • manifest.gpg contains all files backed up and a SHA1 hash of each one
  • volume files (vol1 to volN depending of your backup size) will contains data files, a volume file use to be up to 25MB each one, this is for improve performance doing backup and restoration.

For more information about file format look at here: http://duplicity.nongnu.org/duplicity.1.html#sect19

[bash]
# duplicity –full-if-older-than 30D sample-data s3+http://alfresco-backup/test
[/bash]

Verify if there are changes between last backup and your local files:

[bash]
# duplicity verify s3+http://alfresco-backup/test sample-data
Local and Remote metadata are synchronized, no sync needed.
Last full backup date: Fri May 10 19:38:03 2013
Difference found: File . has mtime Fri May 10 19:39:05 2013, expected Fri May 10 19:34:53 2013
Difference found: File file1.txt has mtime Fri May 10 19:39:05 2013, expected Fri May 10 18:25:36 2013
Verify complete: 5 files compared, 2 differences found.
[/bash]

In last example we can see that a fine called file1.txt has changed and also the root directory “.” date,

List files backed up in S3:

[bash]
# duplicity list-current-files s3+http://alfresco-backup/test
Local and Remote metadata are synchronized, no sync needed.
Last full backup date: Fri May 10 18:32:59 2013
Fri May 10 19:34:53 2013 .
Fri May 10 18:25:36 2013 file1.txt
Fri May 10 18:54:31 2013 file2.txt
Fri May 10 19:35:03 2013 mydir
Fri May 10 19:35:03 2013 mydir/file3.txt
[/bash]

You can see 3 files and 2 directories, in the statistics report duplicity counts any directory as file.

Restore:

Duplicity can also manage the restore process but it will never override any existing file, the you can restore to a different location or remove your corrupted or old data if you want to restore in the original place. If duplicity successfully completes the restore it is not going to show any output.

How to restore last full backup:

[bash]
# duplicity s3+http://alfresco-backup/test restore-dir/
[/bash]

How to restore a single file:

[bash]
# duplicity –file-to-restore mydir/file3.txt s3+http://alfresco-backup/test restore-dir/file3.txt
[/bash]

How to restore entire backup in a given date:

[bash]
# duplicity -t 2D s3+http://alfresco-backup/test restore-dir/
[/bash]

this will restore full backup of  2 days ago (see -t options, seconds, minutes, hours, months, etc may be used)

How to restore a single file in a given date:

If you are looking for a file with a content but you don’t know what version of the file you have to recover, you can try restoring different file versions in the backup:

[bash]
# duplicity -t 2D –file-to-restore file1.txt s3+http://alfresco-backup/test file1.txt.2D
# duplicity -t 30D –file-to-restore file1.txt s3+http://alfresco-backup/test file1.txt.30D
[/bash]

Note, you have to specify a different file name for local restoration, remember that duplicity never overrides existing content.

Delete older backups:

[bash]
# duplicity remove-older-than 1Y s3+http://alfresco-backup/test –force
[/bash]

also you can use for example 6M (six months), 30D (30 days) or 60m (60 minutes).

To see more information when you are running a duplicity command can use the vervosity flag -v [1-9] but also can see all logs here /root/.cache/duplicity/[directory with unique ID]/duplicity-full.YYYMMDDT182930Z.manifest.part

When you are finished playing with Duplicity and Amazon S3 remember to clean your passphrase and Amazon keys from the variables:

[bash]
# unset PASSPHRASE
# unset AWS_ACCESS_KEY_ID
# unset AWS_SECRET_ACCESS_KEY
[/bash]

In next posts I will show  how to use Duplicity to have a perfect backup and restore policy of Alfresco.

Revisión del libro “Hacker Épico” de Informática64

Hacker ÉpicoHoy quiero comentar este libro, Hacker Épico. Magistralmente escrito por Alejandro Ramos (Dab) y Rodrigo Yepes, publicado y editado por Informatica64. Si empiezas no puedes dejarlo hasta que no lees la última página, te mantiene enganchado, en tensión, disfrutándolo y aprendiendo con cada una de sus poco más de 250 páginas.

Contada en primera persona por Ángel Ríos, el hacker protagonista, esta novela trata sobre la aventura en la que se ve envuelto este informático que trabaja para una prometedora consultora de seguridad como auditor y junto a la ayuda de su amigo Marcos, se enfrenta a un sin fin de retos que pondrán a prueba sus habilidades de hacking y análisis forense a lo largo de toda la trama. Ambientada en la Madrid actual, este thriller hacker se basa en hechos que lamentablemente leemos con demasiada asiduidad en prensa.

Como sabéis los que seguís el blog, comento muchos libros técnicos en blyx.com, generalmente relacionados de alguna forma con Alfresco. A diferencia de esos otros libros que he comentado, en esta ocasión no voy a hacer un repaso de cada capítulo ya que no quiero dar ninguna pista sobre lo que acontece en la historia, solo quiero limitarme publicar mi opinión y notas que he ido tomando mientras lo leía.

Hacker Épico no es una novela al uso, va mucho más allá, es un completo y actualizado manual de referencia, herramientas, casos de uso prácticos y totalmente actuales en los que, si estáis involucrados de alguna forma en el mundo de la seguridad informática, os sentiréis muy identificados y también, como ha sido mi caso, aprenderéis muchísimo mientras devoráis, sin necesidad de marca-páginas, esta maravilla.

Es un libro que no solo se lee una vez, puede ser perfectamente un libro de cabecera al que recurrir más de una vez. Como decía antes, prepárate una libreta (o Evernote en mi caso) mientras lo estés leyendo, podrás tomar jugosas notas, ver como se descubren vulnerabilidades 0day, saltar la seguridad de cámaras, puertas traseras, dominios, Windows, Linux, PDFs, redes WiFi y mucho más.

Por supuesto, también tiene su punto friki, como no podía ser de otra forma, no hay capítulo en el que no se hagan guiños al cine de superhéroes, series de culto y a otras novelas, e incluso a otros personajes de la escena hacker española. También se encuentran detalles y chascarrillos para gamers. Incluso, si conoces Madrid, te puedes ir imaginando algunas escenas descritas.

Fuga de datos, aplicaciones como Whatsapp, recursos web y redes sociales reales, iPhones, iPads… Conceptos, argumentos y soluciones bien documentados y totalmente cercanos al mundo real. Podrás ver como se hacen análisis forenses e incluso algunas partes de la trama y comentarios suenan muy familiares.

Un recorrido através de un sin fin de herramientas explicando cada uno de los flags utilizados.

¿Estamos ante el principio de una saga? ¿Son Alejandro y Rodrigo los Neal Stephenson y Clifford Stoll españoles? No lo sé, pero desde luego que no tienen nada que envidiarles, por lo menos por las sensaciones que provocan en el lector, igual que otras novelas del estilo como Criptonomicon o El Huevo del Cuco.

Aunque los autores se preocupan por explicar de la forma más sencilla posible algunas de las peripecias puramente técnicas del protagonista, si no estas familiarizado con algunos conceptos informáticos en algunas ocasiones puede resultar un poco difícil seguir la trama al 100%, de cualquier forma, si no eres informático o si lo eres y no entiendes algo siempre puedes buscar en internet lo que no entiendas. Así que, además de disfrutar, aprenderás más de lo que imaginas.

Hace unos años tuve el privilegio de trabajar durante unos días en el mismo departamento que Alejandro Ramos y compartir amigos comunes. Así que estoy doblemente orgulloso de que en nuestro país se escriban estas obras de arte y encima sea gente que se ha ganado lo que tiene a base de esfuerzo y pasión por esta locura infinita que es la seguridad informática. Gracias.

Seguro que no va a ser el único que diga que quiere más. ¡Quiero más aventuras de Ángel y Marcos!

Puedes comprarlo por 20€ en la web de Informática64, no te vas a arrepentir, te lo prometo.

¿Para cuándo la película?

Instalación de Alfresco con MySQL en Linux desde la linea de comandos

En este artículo os voy a mostrar el procedimiento para instalar Alfresco Enterprise 4.1.1 o Community en un servidor Linux 64bits usando el instalador (bundle) desde la linea de comandos (si no tenemos interfaz gráfica instalada en nuestro servidor), y como hacerlo con MySQL 5.1 en lugar de Postgresql (que viene por defecto en el instalador). Usaré Alfresco Enterprise 4.1.1 pero todos los comandos son igualmente válidos para Community;

Descargar el instalador de Alfresco (Enterprise o Community):

Enterprise de este enlace: http://www.alfresco.com/products/enterprise/trial

Community de este otro: alfresco-community-4.2.b-installer-linux-x64.bin

También descargamos el driver de conexión JDBC con MySQL de este enlace: http://dev.mysql.com/downloads/connector/j/

Creamos un usuario con el que correrá el servidor de aplicaciones (Tomcat), por ejemplo, un usuario llamado “alfresco”:

[bash]
# useradd alfresco
[/bash]

Asignamos una contraseña al usuario alfresco:

[bash]
# passwd alfresco
Changing password for user alfresco.
New UNIX password:
Retype new UNIX password:
passwd: all authentication tokens updated successfully.
[/bash]

Antes de seguir, comprueba que tienes correctamente configurado el fichero de hosts del servidor (/etc/hosts), algo así:

[bash]
127.0.0.1   localhost localhost.localdomain localhost4 localhost4.localdomain4
::1         localhost localhost.localdomain localhost6 localhost6.localdomain6
192.168.0.22 servidor.dominio.com servidor
[/bash]

Creamos el directorio donde vas a instalar Alfresco y damos permisos al usuario que acabamos de crear (ponle el nombre y versión si quieres), por ejemplo yo usaré:

[bash]
# mkdir /opt/alfresco-enterprise-4.1.1
# chown alfresco.alfresco /opt/alfresco-enterprise-4.1.1
[/bash]

Accedemos con ese usuario o vamos desde root:

[bash]
# su – alfresco
[/bash]

Tras tener el paquete y el conector con mysql descargados, vamos a empezar la instalación:

Si el paquete no estuviese ejecutable puedes hacerlo con el siguiente comando:

[bash]
$ chmod +x alfresco-*-installer-linux-x64.bin
[/bash]

Ejecutamos el instalador y seguimos los pasos como se indica a continuación, fíjate bien en las opciones que elijo, cambia el nombre de base de datos, usuario y contraseña en tu caso, también ojo a los cambios al usar MySQL:

[bash]
$ ./alfresco-enterprise-4.1.1-installer-linux-x64.bin
Language Selection

Please select the installation language
[1] English – English
[2] French – Français
[3] Spanish – Español
[4] Italian – Italiano
[5] German – Deutsch
[6] Japanese – 日本語
[7] Dutch – Nederlands
[8] Russian – Русский
[9] Simplified Chinese – 简体中文
Please choose an option [1] : 3
—————————————————————————-
Bienvenido a la instalación de Alfresco Enterprise.

—————————————————————————-
Tipo de instalación

[1] Fácil: instala los servidores con la configuración por defecto
[2] Avanzada: Configura las propiedades de servicio y los puertos de servidor.: También puede elegir componentes opcionales para instalar.
Por favor seleccione una opción [1] : 2

—————————————————————————-
Seleccione los componentes que desea instalar; desmarque aquellos que no desea.

Java [Y/n] :Y

PostgreSQL [Y/n] :n

Alfresco : Y (Cannot be edited)

SharePoint [Y/n] :Y

Web Quick Start [y/N] : N

OpenOffice [Y/n] :Y

¿Es correcta la selección que se muestra aqui arriba? [Y/n]: Y

—————————————————————————-
Carpeta de instalación

Por favor, elija una carpeta para instalar Alfresco Enterprise

Seleccionar una carpeta [/home/alfresco/alfresco-4.1.1]: /opt/alfresco-enterprise-4.1.1

—————————————————————————-
Configuración de la base de datos

URL de JDBC: [jdbc:postgresql://localhost/alfresco]: jdbc:mysql://localhost/alfresco?useUnicode=yes&characterEncoding=UTF-8

Controlador JDBC: [org.postgresql.Driver]: org.gjt.mm.mysql.Driver

Nombre de la base de datos: [alfresco]: alfresco

Nombre de usuario: []: alfresco

Contraseña: :
Verificar: :
—————————————————————————-
Configuración de puerto Tomcat

Por favor, introduzca los parámetros de configuración de Tomcat que desea
utilizar.

Dominio de Servidor Web: [127.0.0.1]:

Puerto del servidor Tomcat: [8080]:

Puerto de cierre de Tomcat: [8005]:

Puerto SSL de Tomcat [8443]:

Puerto AJP de Tomcat: [8009]:

—————————————————————————-
Puerto FTP de Alfresco

Por favor, elija un número de puerto para usar para el servidor FTP integrado de
Alfresco.

Puerto: [2121]:

—————————————————————————-
Puerto RMI de Alfresco

Por favor, elija un número de puerto que utilizará Alfresco para ejecutar
comandos remotos.

Puerto: [50500]:

—————————————————————————-
Contraseña de admin

Por favor, especifique una contraseña a utilizar para la cuenta de administrador
de Alfresco.

Contraseña de admin: :
Repita la contraseña: :
—————————————————————————-
Puerto de SharePoint en Alfresco

Por favor, elija un número de puerto para el protocolo SharePoint.

Puerto: [7070]:

—————————————————————————-
Puerto de servidor OpenOffice

Por favor, introduzca el puerto en el que el Servidor de OpenOffice va a
escuchar por defecto.

Puerto de servidor OpenOffice [8100]:

—————————————————————————-
El programa está listo para iniciar la instalación de Alfresco Enterprise en su
ordenador.

¿Desea continuar? [Y/n]: Y

—————————————————————————-
Por favor espere mientras se instala Alfresco Enterprise en su ordenador.

Instalando
0% ______________ 50% ______________ 100%
#########################################

—————————————————————————-
El programa terminó la instalación de Alfresco Enterprise en su ordenador.

Ver el archivo Léeme [Y/n]: n

Lanzar Alfresco Enterprise Share [Y/n]: n
[/bash]

Como ves en el asistente, no arrancamos ya que nos quedan algunas tareas por acometer todavía.

Fijate sobre todo en las líneas:
PostgreSQL [Y/n] :n
URL de JDBC: [jdbc:postgresql://localhost/alfresco]: jdbc:mysql://localhost/alfresco?useUnicode=yes&characterEncoding=UTF-8
Controlador JDBC: [org.postgresql.Driver]: org.gjt.mm.mysql.Driver
Nombre de la base de datos: [alfresco]: alfresco
Nombre de usuario: []: alfresco

Cambia mysql://localhost/alfresco por la IP o nombre del servidor MySQL y alfresco por el nombre de la base de datos.

Copia el jar con el conector JDBC de MySQL al siguiente directorio:

[bash]
$ cp mysql-connector-java-5.1.18-bin.jar /opt/alfresco-enterprise-4.1.1/tomcat/lib/
[/bash]

Antes de arrancar el servidor de aplicaciones, en el servidor MySQL, que ya debería estar instalado y levantado, ya sea en local o en un servidor separado hay que crear la base de datos y dar los permisos:

[bash]
# mysql -u root -p
Enter password:

mysql> create database alfresco;
Query OK, 1 row affected (0.00 sec)

mysql> grant all privileges on alfresco.* to alfresco@localhost identified by ‘alfresco’;
Query OK, 0 rows affected (0.00 sec)
[/bash]

Hecho lo anterior podrías proceder a hacer algunos cambios en la configuración, pero también puedes hacerlo una vez levantado el servidor (e ir reiniciando con cada cambio si usas Community o sin necesidad de reiniciar si usas Enterprise y la consola de administración).

Arrancamos el servidor:

[bash]
$ cd /opt/alfresco-enterprise-4.1.1/
$ ./alfresco.sh start
Using CATALINA_BASE: /opt/alfresco-enterprise-4.1.1/tomcat
Using CATALINA_HOME: /opt/alfresco-enterprise-4.1.1/tomcat
Using CATALINA_TMPDIR: /opt/alfresco-enterprise-4.1.1/tomcat/temp
Using JRE_HOME: /opt/alfresco-enterprise-4.1.1/java
Using CLASSPATH: /opt/alfresco-enterprise-4.1.1/tomcat/bin/bootstrap.jar
Using CATALINA_PID: /opt/alfresco-enterprise-4.1.1/tomcat/temp/catalina.pid
/opt/alfresco-enterprise-4.1.1/tomcat/scripts/ctl.sh : tomcat started
[/bash]

Podemos ver los logs con el siguiente comando:

[bash]
$ tail -f tomcat/logs/catalina.out
[/bash]

Deberíamos ver lineas que nos indican que se va poblando la base de datos, también que se crean los índices de SORL.
Recuerda que verás el siguiente error en el log:

[bash]
ERROR [org.alfresco.fileserver] [CIFS Server] [SMB] Server error
[/bash]

Al iniciar con un usuario no root, Alfresco no puede levantar el subsistema CIFS ya que no puede usar un puerto por debajo del 1024. Para resolverlo (aunque deberás redireccionar los puertos http://docs.alfresco.com/4.0/topic/com.alfresco.enterprise.doc/tasks/fileserv-CIFS-useracc.html) puedes cambiar la configuración de los puertos de CIFS añadiendo los siguientes parámetros en en el fichero de configuración: tomcat/shared/classes/alfresco-global.properties

[bash]
cifs.tcpipSMB.port=1445
cifs.netBIOSSMB.sessionPort=1139
cifs.netBIOSSMB.namePort=1137
cifs.netBIOSSMB.datagramPort=1138
[/bash]

Cuando en el log veas la línea:

[bash]
INFO: Server startup in 104835 ms
[/bash]

Significa que está arrancado y ya puedes acceder a Alfresco Share mediante http://localhost:8080/share o el nombre de servidor que tengas y a Alfresco Explorer con http://localhost:8080/alfresco. Por FTP, recuerda que se usa el puerto 2121 por defecto (si no haces redirección con IPTables). Por Webdav sería con la URL: http://localhost:8080/alfresco/webdav.

Alfresco Hack: cómo sacar un informe rápido de los contenidos del repositorio

Ya lo vi hace tiempo en Think Alfresco y sabía que algún día lo iba a necesitar, ahora quiero compartirlo con vosotros. Sabemos lo que ocupa el repositorio, sería tan fácil como hacer un du -sh contentstore, pero ¿qué tipo de archivos almacena ese repositorio y cuantos de cada tipo? Saber ese dato es importante al hacer migraciones, optimizar Lucene, etc. Es tan fácil como ejecutar el siguiente comando desde el directorio superior al contentstore de turno:

$ find ./contentstore -type f -exec file -inb {} \;| sort |uniq -c|sort -nr

Este comando nos dará como resultado algo parecido a lo siguiente:

    378 application/msword
    147 application/pdf
     72 text/plain; charset=us-ascii
     58 text/x-c++; charset=iso-8859-1
     12 text/plain; charset=utf-8
      8 text/html
      2 application/x-zip
      2 text/plain; charset=iso-8859-1
      2 image/jpeg
      2 application/x-empty
      2 text/x-c; charset=utf-8
      1 text/x-c++; charset=utf-8
      1 image/png

Fácil ¿no? Claro que también se puede hacer con un JavaScript y ejecutarlo como acción pero pienso que así es más rápido, además es el “Sys Admin way”.

Suse Studio: creación ad-hoc de distribución linux basada en Suse

built-with-web-bigEl pasado febrero, leíamos en barrapunto, la noticia sobre el lanzamiento de Suse Studio, aplicación web que permite crear tu propia distribución Suse Linux personalizando gran parte del sistema (grub, paquetes, servicios, etc.) y pudiendo descargarla en ISO, VMware, USB Live o probarla en la propia web. Aquel día me registré para poder probarla cuando estuviese disponible y hace dos semanas recibí un correo invitándome a usar por fin Suse Studio.

Antes de seguir aclarar que no soy seguidor ni fan de Suse ni de sus tecnologías como por ejemplo Yast, pienso que Yast es un gran invento que permite a muchos usuarios no técnicos realizar acciones más o menos complejas de forma sencilla pero no acaba de convencerme.

Hay algunos sitios web donde poder hacer y personalizar tu propia distribución linux online y descargarla como por ejemplo Slax o Instalinux (usando LinuxCOE, interesante proyecto de HP que permite hacerte tu propio generador de distribuciones Linux de todo tipo, Ubuntu, Debian, Fedora, CentOS, etc.).

Dicho esto, tengo que reconocer que estaba deseando poder probar Suse Studio, por que cada vez es más latente la necesidad de crear y aprovisionar distribuciones personalizadas con aplicaciones integradas entre si tanto para desarrolladores como para entornos corporativos/empresariales.

Aquí un vídeo sobre su funcionamiento, está un poco desfasado pero muestra sus características más importantes: