Alfresco Tip: add more OpenOffice or LibreOffice processes instances to JodConverter

Do you have a bottle neck on your transformations to PDF or any other format done by Libre or OpenOffice inside Alfresco?

This tip is thanks to a conversation with my colleague at Alfresco Antonio Soler. Due to the Alfresco Enterprise support for JodConverter this tip is not valid for the Community version.

Thanks to the JodConverter multiples LibreOffice or OpenOffice instances can be invoked to manage more transactions if needed. For example, one process can handle up to 200 transformations and then it is automatically restarted, if you need to manage more than this and add parallel processes  just add more ports comma separated in the JodConverter port option as seen below:

Screen Shot 2014-02-17 at 11.13.15 AM

After apply this change you can see three soffice processes:

Screen Shot 2014-02-17 at 11.12.52 AM

Remember, if you are using OpenOffice you will see “soffice.bin” process and “.soffice.bin” for LibreOffice.

If you want to know more about the new Admin Panel visit this blog post: http://blogs.alfresco.com/wp/kevinr/2013/09/30/alfresco-repository-admin-console/

Alfresco Tip: got the control and customize your logs (alfresco.log, share.log and solr.log)

Are you wondering about how to have full control on the Alfresco logs? If you are an Alfresco administrator I’m pretty sure you want to manage where the alfresco.log, share.log and solr.log are placed, right?

I asume you want to store all your alfresco logs in /opt/alfresco/tomcat/logs, which is the default logging directory for Tomcat and where you can find catalina.out log file as many other out-of-the-box logging files for this well known application server.

If you use the Alfresco installer or a default installation, logging files like alfresco.log, share.log and solr.log may be created where you run the “alfresco.sh start” script or where you start Tomcat. For example, in an installation placed in /opt/alfresco/, when you start Alfresco with ./alfresco.sh start (once you are in /opt/alfresco) those 3 files will be created in /opt/alfresco. If you are using the initd start/stop script for RedHat or Ubuntu you will see log files created in the root “/“ directory or maybe in the user home directory (it may depends).

Here you go how to manage all of these :
(Disclaimer: remember that after doing all said here, Alfresco will still logging some exception before override of the extension files take place).

  • Alfresco repository logs:

Valid for for any Alfresco version. Copy the original log4j properties from the alfresco deployed war file to the extension directory renamed as custom-log4j.properties:

[bash]

cp /opt/alfresco/tomcat/webapps/alfresco/WEB-INF/classes/log4j.properties /opt/alfresco/tomcat/shared/classes/alfresco/extension/custom-log4j.properties

[/bash]

Edit the custom-log4j.properties file and modify “log4j.appender.File.File” as your needs or like here:

[bash]
###### File appender definition #######
log4j.appender.File=org.apache.log4j.DailyRollingFileAppender
log4j.appender.File.File=/opt/alfresco/tomcat/logs/alfresco.log
log4j.appender.File.Append=true
log4j.appender.File.DatePattern=’.’yyyy-MM-dd
log4j.appender.File.layout=org.apache.log4j.PatternLayout
log4j.appender.File.layout.ConversionPattern=%d{ABSOLUTE} %-5p [%c] %m%n
[/bash]

  • Alfresco Share logs:

At the moment there is no extension mechanism for Share logs, then we can not do it in the same way as for Alfresco repository. In this case you only can edit /opt/alfresco/tomcat/webapps/share/WEB-INF/classes/log4j.properties file and modify appender line as shown below:

[bash]
log4j.appender.File.File=/opt/alfresco/tomcat/logs/share.log
[/bash]

The bad news with this method is that you will need to do it again when you upgrade Alfresco Share or redeploy share.war again.

  • Solr logs:

In Alfresco 4.2 (for previous versions see below): alf_data/solr/log4j-solr.properties you will find the configuration file, now change the line “log4j.appender.File.File” like below:

[bash]
# Set root logger level to error
log4j.rootLogger=WARN, Console, File

###### Console appender definition #######

# All outputs currently set to be a ConsoleAppender.
log4j.appender.Console=org.apache.log4j.ConsoleAppender
log4j.appender.Console.layout=org.apache.log4j.PatternLayout

log4j.appender.Console.layout.ConversionPattern=%d{ISO8601} %x %-5p [%c{3}] [%t] %m%n

###### File appender definition #######
log4j.appender.File=org.apache.log4j.DailyRollingFileAppender
log4j.appender.File.File=/opt/alfresco/tomcat/logs/solr.log
log4j.appender.File.Append=true
log4j.appender.File.DatePattern=’.’yyyy-MM-dd
log4j.appender.File.layout=org.apache.log4j.PatternLayout
log4j.appender.File.layout.ConversionPattern=%d{ABSOLUTE} %-5p [%c] %m%n

###### added Alfresco SOLR class logging #######
log4j.logger.org.alfresco.repo.search.impl.solr=INFO
log4j.logger.org.alfresco.solr.tracker.CoreTracker=ERROR
[/bash]

In previous Alfresco versions just bear in mind to copy the log file into the “solr/home” value defined in “{tomcat}/conf/Catalina/{hostname}/solr.xml”. You also may need to reload the Solr log4j resource from the Solr admin panel: https://localhost:8443/solr/admin/cores?action=LOG4J&resource=log4j-solr.properties
Also remember to use  https://localhost:8443/solr/alfresco/admin/logging to manage your Solr logs.

More info about Solr logs here: http://wiki.alfresco.com/wiki/Alfresco_And_SOLR#Load_Log4J_Settings and here https://issues.alfresco.com/jira/browse/MNT-5803

  • Last step for any configuration about the logs configuration is to restart your application server.

If you want to see and manage the logging with a web tool, see the Alfresco Support Tools in action (for Alfresco Enterprise only) here: https://addons.alfresco.com/addons/support-tools-admin-console. This is just an example about the logging section:

Screen Shot 2014-02-17 at 12.28.26 PM

If you want to know more about the new Admin Panel visit this blog post: http://blogs.alfresco.com/wp/kevinr/2013/09/30/alfresco-repository-admin-console/

UPDATE! Feb 20th

As Cesar mentioned in the comments, the easiest way to have control about where your logs are located just add this line to your init.d script (take care about these variables):

[bash]

su -c $ALF_USER “cd $ALF_LOGS && $ALF_HOME/alfresco.sh start”

[/bash]

Or even if you are using the alfresco.sh script directly add next lines just before the “ERROR=0” line:

[bash]

LOGSDIR=/opt/alfresco/tomcat/logs

cd $LOGSDIR

[/bash]

Alfresco Tip: Enable video thumbnail and transformations with FFMPEG

This is a quick tip to enable video thumbnail and transformations in Alfresco thanks to FFMPEG integration.  This feature can be integrated easily since Alfresco 4.X (for both Enterprise and Community).  The result on the thumbnail creation is something like this: Screen Shot 2014-02-14 at 3.13.19 PM Video format supported for the JPG thumbnail creation are: 3g2, 3gp, asf, avi, avx, flv, mov, movie, mp4, mpeg2, mpg, ogv and wmv. Other than that you will be able to create folder rules to transform between video formats, this is a sample rule to transform from MP4 to FLV: Screen Shot 2014-02-14 at 3.14.25 PM Thanks to the ffmpeg integration we will be able to transform video formats as shows below:

  • from 3g2 to flv
  • from 3gp to flv
  • from asf to flv
  • from avi to flv
  • from avx to flv
  • from mov to flv
  • from movie to flv
  • from mp4 to flv
  • from mpeg2 to flv
  • from mpg to flv
  • from ogv to flv
  • from wmv to flv
  • from 3g2 to mp4
  • from 3gp to mp4
  • from asf to mp4
  • from avx to mp4
  • from mov to mp4
  • from movie to mp4
  • from mpeg2 to mp4
  • from mpg to mp4
  • from wmv to mp4

By default in Alfresco, ffmpeg also supports next audio transformations:

  • from aiff to mp3
  • from au to mp3
  • from m4a to mp3
  • from oga to mp3
  • from wav to mp3

Now you may are wondering “does ffmpeg support mov to wmv video transformation?” No, it doesn’t do it by default with the out-of-the-box configuration. It only supports conversions TO mp4 and flv. You may add more formats using other tool than ffmpeg or customizing the existing transformers (see last paragraph of this post).

Installation: You already should have an Alfresco 4.2 up and running (it may works with 4.X and pretty similar for Windows and Linux). This procedure is very easy, just install ffmpeg, add some config lines to alfresco-global.properties, rename a couple of files and restart Alfresco:

  • Install ffmpeg on your server. I have installed the static binary for 64 bits from http://www.ffmpeg.org/download.html
  • Copy the ffmpeg binary (if static) to a place like  /opt/alfresco/common/bin/
  • Once you have this, run the command from the command line to see if it works correctly: ./ffmpeg
  • Edit your alfresco-global.properties and add next lines:

[bash]
ffmpeg.exe=/opt/alfresco/common/bin/ffmpeg

### Needed for video thumbnails ###
# ffmpeg.thumbnail
# ================
content.transformer.ffmpeg.thumbnail.priority=50
content.transformer.ffmpeg.thumbnail.extensions.3g2.jpg.supported=true
content.transformer.ffmpeg.thumbnail.extensions.3gp.jpg.supported=true
content.transformer.ffmpeg.thumbnail.extensions.asf.jpg.supported=true
content.transformer.ffmpeg.thumbnail.extensions.avi.jpg.supported=true
content.transformer.ffmpeg.thumbnail.extensions.avx.jpg.supported=true
content.transformer.ffmpeg.thumbnail.extensions.flv.jpg.supported=true
content.transformer.ffmpeg.thumbnail.extensions.mov.jpg.supported=true
content.transformer.ffmpeg.thumbnail.extensions.movie.jpg.supported=true
content.transformer.ffmpeg.thumbnail.extensions.mp4.jpg.supported=true
content.transformer.ffmpeg.thumbnail.extensions.mpeg2.jpg.supported=true
content.transformer.ffmpeg.thumbnail.extensions.mpg.jpg.supported=true
content.transformer.ffmpeg.thumbnail.extensions.ogv.jpg.supported=true
content.transformer.ffmpeg.thumbnail.extensions.wmv.jpg.supported=true

### Needed for video transformations ###
# ffmpeg.flv
# ==========
content.transformer.ffmpeg.flv.priority=50
content.transformer.ffmpeg.flv.extensions.3g2.flv.supported=true
content.transformer.ffmpeg.flv.extensions.3gp.flv.supported=true
content.transformer.ffmpeg.flv.extensions.asf.flv.supported=true
content.transformer.ffmpeg.flv.extensions.avi.flv.supported=true
content.transformer.ffmpeg.flv.extensions.avx.flv.supported=true
content.transformer.ffmpeg.flv.extensions.mov.flv.supported=true
content.transformer.ffmpeg.flv.extensions.movie.flv.supported=true
content.transformer.ffmpeg.flv.extensions.mp4.flv.supported=true
content.transformer.ffmpeg.flv.extensions.mpeg2.flv.supported=true
content.transformer.ffmpeg.flv.extensions.mpg.flv.supported=true
content.transformer.ffmpeg.flv.extensions.ogv.flv.supported=true
content.transformer.ffmpeg.flv.extensions.wmv.flv.supported=true

# ffmpeg.mp4
# ==========
content.transformer.ffmpeg.mp4.priority=50
content.transformer.ffmpeg.mp4.extensions.3g2.mp4.supported=true
content.transformer.ffmpeg.mp4.extensions.3gp.mp4.supported=true
content.transformer.ffmpeg.mp4.extensions.asf.mp4.supported=true
content.transformer.ffmpeg.mp4.extensions.avx.mp4.supported=true
content.transformer.ffmpeg.mp4.extensions.mov.mp4.supported=true
content.transformer.ffmpeg.mp4.extensions.movie.mp4.supported=true
content.transformer.ffmpeg.mp4.extensions.mpeg2.mp4.supported=true
content.transformer.ffmpeg.mp4.extensions.mpg.mp4.supported=true
content.transformer.ffmpeg.mp4.extensions.wmv.mp4.supported=true
# The avi and ogv to mp4 transformations did not work with ffmpeg 0.8.6
# Please check the latest ffmpeg documentation for the latest information
# content.transformer.avi.mp4.extensions.mpg.mp4.supported=true
# content.transformer.ogv.mp4.extensions.wmv.mp4.supported=true

# ffmpeg.mp3
# ==========
content.transformer.ffmpeg.mp3.priority=50
content.transformer.ffmpeg.mp3.extensions.aiff.mp3.supported=true
content.transformer.ffmpeg.mp3.extensions.au.mp3.supported=true
content.transformer.ffmpeg.mp3.extensions.m4a.mp3.supported=true
content.transformer.ffmpeg.mp3.extensions.oga.mp3.supported=true
content.transformer.ffmpeg.mp3.extensions.wav.mp3.supported=true

[/bash]

  • Find two files in your extension directory (tomcat/shared/clases/alfresco/extension) and rename them without the .sample extension: video-thumbnail-context.xml and video-transformation-context.xml
  • Restart the application server and done!

And what about if I want to do conversions to other formats? How can I do  transformation for changing resolution, size, quality and so forth? Just take a look to “video-transformation-context.xml” you will se how easy is to create a new commands using different options in the ffmpeg command.

This forum thread could be also helpful for you.

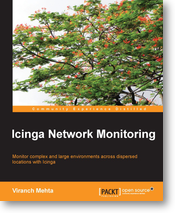
Revisión del libro “Icinga Network Monitoring” de Packt Publishing

Icinga Network Monitoring Book

La editorial Packt Publishing ha publicado recientemente un libro en el que he podido ayudar en su gestación; he colaborado como revisor técnico. Se trata del libro Icinga Network Monitoring. En este libro se puede encontrar todo lo necesario para aprender lo esencial de este software de monitorización que no sólo está en auge sino que es una realidad que anuncié aquí en 2009.

Este libro va al grano desde el primer capítulo, ejemplos útiles y descripciones que te permitirán aprender este potente sistema desde cero y con una base sólida. Además también te servirá para aprender a configurar Nagios.

Posiblemente lo más interesante del libro es forma de describir el core de la aplicación, como funcionan los diferentes tests y como entender y hacer plugins.

Finalmente, se añade un capitulo entero sobre las diversas interfaces gráficas (principalmente web) que dispone Icinga. Para muestra un botón:

Screen Shot 2014-01-27 at 10.06.13 PM

Puedes leer el capítulo 2 en este enlace. Enjoy monitoring!

Essential commands for Alfresco BART

Alfresco BART usage:

[bash]
./alfresco-bart.sh [set] [date dest]
[/bash]

But what really modes are? With modes I mean different ways to use Alfresco BART depending of what do you want to do, for instance:

  • backup: runs an incremental backup or a full if first time
  • restore: runs the restore, wizard if no arguments, see below more commands with arguments [set] [date] [dest], while [set] can also be “all” for all sets.
  • verify: verifies the backup, it compares what you have backed up and what you have in your live system.
  • collection: shows all the backup sets already in the backup archive that might be restored.
  • list: lists the files currently backed up in the archive. It shows files contained in the last backup.

Sets:

  • no value: use all backup sets
  • index: use index backup set (group) for selected mode.
  • db: use data base backup set (group) for selected mode.
  • cs: use content store backup set (group) for selected mode.
  • files: use rest of files backup set (group) for selected mode.

Now lets see how to use Alfresco BART.

To make a backup:

[bash]
./alfresco-bart.sh backup
[/bash]

NOTE1: if first time, it makes a full backup
NOTE2: you should add this command to your root crontab with something like “0 5 * * * /path/to/alfresco-bart.sh backup” (without quotes) if you want to run your backup daily at 5AM (after Alfresco’s nightly backups and maintenance jobs).
NOTE3: running command above with without any data sets (index, db, cs or files) it will perform a backup of all data sets configured in alfresco-bart.properties. You can run “./alfresco-bart.sh backup files” to only perform a backup of your configuration files, installation and customization files or “./alfresco-bart.sh backup cs” to create a backup (full if first time or incremental if not) of your contentstore and additional stores configured.

Commands and options to restore backup:

To restore an existing backup guided by the wizard:

[bash]
./alfresco-bart.sh restore

################## Welcome to Alfresco BART Recovery wizard ###################

This backup and recovery tool does not overrides nor modify your existing
data, then you must have a destination folder ready to do the entire
or partial restore process.

##############################################################################

Choose a restore option:
1) Full restore
2) Set restore
3) Restore a single file of your Alfresco repository
4) Restore alfresco-global.properties from a given date
5) Restore other configuration file or directory

Enter an option [1|2|3|4|5] or CTRL+c to exit:
[/bash]

To restore the last (now) existing backup of all sets (all) and leave it in /tmp:

[bash]
./alfresco-bart.sh restore all now /tmp
[/bash]

To restore a DB backup from 14 days ago to /tmp:

[bash]
./alfresco-bart.sh restore db 14D /tmp
[/bash]

To restore the indexes backup from december 2nd 2013:

[bash]
./alfresco-bart.sh restore index 12-02-2013 /tmp
[/bash]

Valid date format is: now: for last backup, s: for second, m: minutes, h: hours, D: days, W: weeks, M: months or Y: years, all date values must be specified without spaces, i.e: 4D, 2W, 1Y, 33m. Dates may also be like: YYYY/MM/DD, YYYY-MM-DD, MM/DD/YYYY or MM-DD-YYYY.

To restore a single file deleted on the repository but existing in previous backup please use the backup wizard by typing: “./alfresco-bart.sh restore” and then follow instructions in the menu option “3”.

To restore the alfresco-global.properties configuration file from a given date please use the backup wizard by typing: “./alfresco-bart.sh restore” and then follow instructions in the menu option “4”.

Finally if you want to restore any other configuration, installation or custom file from your existing backup on a given date follow instructions by choosing option 5 in the recovery wizard.

NOTE4: Alfresco BART restore options or recovery wizard never will overrides your existing Alfresco files, you should specify a temporary recovery folder with enough space, then you have to move that content manually or following the instructions on the screen.

In case of source mismatch error with Duplicity try running this command:

[bash]
./alfresco-bart.sh backup all force
[/bash]

My talk about “Alfresco Backup and Recovery Tool” in the Alfresco Summit

All recorded videos has been published recently in the Alfresco Summit portal and here you go my talk “Alfresco Backup and Recovery Tool: A Real World Backup Solution” I gave in both Boston and Barcelona. I was the first public presentation about Alfresco BART.

Thanks to all who attended this session and made it one of the most-well attended and highest-rated in both cities. I’m looking forward to keep talking covering security topics as usual (I already have some “hack-ideas”…).

If you only want to see the demo, it starts at minute 33:

The presentation is published in Slideshare as well:

Remember you can download here the White Paper I mention during the talk.

If you only want to see the practical demo (best resolution in the talk video above), you can enjoy it here:

Any questions and comments are always welcome!

Running the Alfresco Solr backup from the command line

SOLR can be backed up by different ways. It uses a scheduled job by default but also can be triggered by the JMX interface in Alfresco Enterprise. Additionally can be done by direct using next URLs. Example for doing a backup of the alfresco solr core and only keep 1 backup:

https://localhost:8443/solr/alfresco/replication?command=backup&location=/opt/alfresco/alf_data/solrBackup/alfresco&numberToKeep=1

For the archive core and only keep 1 backup:

https://localhost:8443/solr/archive/replication?command=backup&location=/opt/alfresco/alf_data/solrBackup/archive&numberToKeep=1

In order to do the backup from the command line, you may use the “curl” command and run it like this (see comment about pem certificate below):

[bash]curl -k –cert /opt/alfresco/alf_data/keystore/browser.pem:alfresco "https://localhost:8443/solr/alfresco/replication?command=backup&location=/opt/alfresco/alf_data/solrBackup/alfresco&numberToKeep=1"
[/bash]


[bash]curl -k –cert /opt/alfresco/alf_data/keystore/browser.pem:alfresco "https://localhost:8443/solr/archive/replication?command=backup&location=/opt/alfresco/alf_data/solrBackup/archive&numberToKeep=1"
[/bash]

Please, note that “curl” does not support p12 certificates therefore you need to convert the default browser.p12 to browser.pem by running (password is alfresco):

[bash]
openssl pkcs12 -in /opt/alfresco/alf_data/keystore/browser.p12 -out /opt/alfresco/alf_data/keystore/browser.pem –nodes
[/bash]

This option will be included in next version (0.3) of the Alfresco BART (Backup and Recovery Tool).

Deploying an Alfresco cluster in Amazon AWS in just minutes

I have been playing with Amazon Web Services since few months ago. AWS is for a SysAdmin like Disneyland is for a 8 years old child, I enjoy so much doing this kind of stuff.
If you are not familiar with AWS products/services, let me describe with Amazon words and in my own words what are the most important services and concepts we have been using for deploying an Alfresco on-premise installation in AWS:

  • EC2: virtual servers in the cloud.
  • VPC: isolated cloud resources. Yes, a real isolated cloud architecture and resources.
  • S3: Scalable storage, like a CAS (Content Addressable Storage) for your local or cloud servers.
  • RDS: Managed Relational Database Service (MySQL, Oracle or MS SQL Server).
  • ELB: Elastic Load Balancer, as part of EC2 allows you to create load balancers easily.
  • CloudFormation: Templated AWS resource creation. *This is why I’m writing this article. A CloudFormation template is a json file which creates a wizard and options based in our needs.
  • AWS Region: a location with multiples AZ .
  • AZ: Availability Zone (data centers connected through low-latency links in the same region).

Once said so, my colleague Luis Sala has been working together with the Amazon AWS crew and they have made a CloudFormation template to deploy an Alfresco cluster in just minutes. This template is available here: https://github.com/AlfrescoLabs/alfresco-cloudformation.

This CloudFormation template will create a 2 nodes Alfresco cluster inside a virtual private cloud (VPC), a Load Balancer (ELB) with sticky sessions bases on the Tomcat JSESSIONID, a shared ContentStore based on S3, a shared MySQL DB based on a RDS instance. Each Alfresco node will be in a separate Availability Zone and finally the template includes auto-scaling roles for add extra Alfresco nodes when some thresholds are reached.

We will have something like the diagram below, I say “like this” because we will have only 2 Alfresco nodes in the cluster and the auto-scaling will add more nodes in case of thresholds are reached (clic to see it bigger).

aws-cf-alfresco

Finally in the video below you can see step by step a real CloudFormation deployment, I think the video screencast is self-explanatory, it does not have audio. As you can see, the video is 6 minutes length after cropping some dead times but it was around 15 minutes total.

I thought it is a very interesting approach about Alfresco clustering and it worth it to share with you all. Any question or feedback is welcome, even in spanish or english 😉

How to compare two documents or versions in Alfresco

I use to be asked about the ability of  Alfresco to compare documents or versions of a document. I used to say “not by default” but, this is not totally true, the right answer is “it depends”. In Alfresco, thanks “Edit Online” option and to the Share Point Protocol implementation in the server and with MS Office 2010 (or any other version with SPP support), you can compare versions of MS Office documents stored in Alfresco. Here you can see what I’m saying:

Apart from this solution, that is very straightforward but also very Windoze based solution, you can try to implement some of these other options (I haven’t tried them, by the way):

the_raven_diff