10 Security Concepts You Must Know (in 5 minutes with GoT)

Here is a lightning talk I have recorded recently. I did it internally at Alfresco for an Engineering meeting but I think is good idea to share it and take advantage of the coming new season of Game of Thrones 😉

You have links and resources also available below the video.

If you want to use the ppt for your own use you can download it from here in my GitHub:

https://github.com/toniblyx/10-security-concepts-with-got

All references and recommended reads about the subject are here:

http://www.infoworld.com/article/3144362/devops/10-key-security-terms-devops-ninjas-need-to-know.html

https://danielmiessler.com/study/encoding-encryption-hashing-obfuscation/

https://blog.instant2fa.com/how-to-build-a-wall-that-stops-white-walkers-fantastic-threat-models-ef2dfa7864a4


Security Monkey deployment with CloudFormation template

netflix-security-monkey-overview-1-638
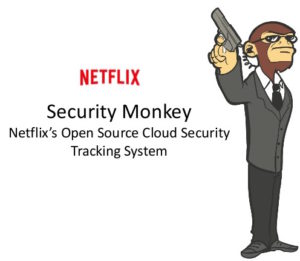
In order to give back to the Open Source community what we take from it (actually from the Netflix awesome engineers), I wanted to make this work public, a CloudFormation template to easily deploy and configure Security Monkey in AWS. I’m pretty sure it will help many people to get their AWS infrastructure more secure.

Security Monkey is a tool for monitoring and analyzing the security of our Amazon Web Services configurations.

You are maybe thinking on AWS CloudTrail or AWS Trusted Advisor, right? This is what the authors say:
“Security Monkey predates both of these services and meets a bit of each services’ goals while having unique value of its own:
CloudTrail provides verbose data on API calls, but has no sense of state in terms of how a particular configuration item (e.g. security group) has changed over time. Security Monkey provides exactly this capability.
Trusted Advisor has some excellent checks, but it is a paid service and provides no means for the user to add custom security checks. For example, Netflix has a custom check to identify whether a given IAM user matches a Netflix employee user account, something that is impossible to do via Trusted Advisor. Trusted Advisor is also a per-account service, whereas Security Monkey scales to support and monitor an arbitrary number of AWS accounts from a single Security Monkey installation.”

cloud-formation
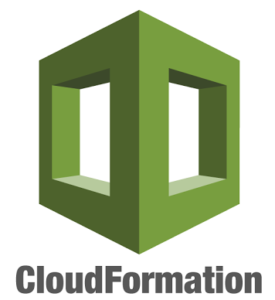
Now, with this provided CloudFormation template you can deploy SecurityMonkey pretty much production ready in a couple of minutes.

For more information, documentation and tests visit my Github project: https://github.com/toniblyx/security_monkey_cloudformation

[ES] Análisis Forense en AWS: introducción

English version here.

AWS siempre está monitorizando cualquier uso no autorizado de sus/nuestros recursos. Si tienes docenas de servicios ejecutándose en AWS, en algún momento serás avisado de un incidente debido a varias razones como compartir accidentalmente una contraseña en Github, una mala configuración de un servidor que lo hace fácil de atacar, servicios con vulnerabilidades, DoS o DDoS, 0days, etc… Así que debes estar preparado para realizar un análisis forense y/o gestionar la respuesta ante incidentes de tu infraestructura en AWS.

Recuerda, encaso de incidente debes mantener la calma y procura seguir un procedimiento definido, no dejes este proceso en manos del azar porque probablemente tu o tu jefe este lo suficientemente nervioso como para no esperar ni pensar. Siempre es mucho mejor seguir una guía previamente testeada que tu intuición (que ya la usarás después).

ADVERTENCIA: si has llegado a este artículo de forma desesperada haciendo una búsqueda en Google, te recomiendo probar todos los comandos antes en un entorno controlado como tu laboratorio o sistemas de pruebas. Como decía, deberías tener una guia de respuesta a incidentes y proceso de análisis forense antes de que ocurra un incidente.

En este artículo quiero recomendar algunos pasos y trucos que nosotros hemos usado en algún momento. Doy por hecho que tienes el cliente de linea de comandos de AWS ya instalado, si no es así mira aquí: http://docs.aws.amazon.com/general/latest/gr/GetTheTools.html. Todos los comandos están basados en una posible instancia comprometida en EC2 (Linux), pero la mayoría de estos comandos “aws” se pueden usar también para servidores Windows aunque no lo he probado. Todas estas acciones también se pueden realizar mediante la AWS Cosole. Estos serían algunos de los pasos a tener en cuenta:

1) Desactiva o borra el Access Key. Si una AWS Access Key ha sido comprometida  (AWS te lo hará saber en un correo electrónico u tu lo notarás pagando una gran factura) o te das cuenta que lo has publicado en Github:

aws iam list-access-keys
aws iam update-access-key --access-key-id AKIAIOSFODNN7EXAMPLE \
--status Inactive --user-name Bob
aws iam delete-access-key --access-key AKIDPMS9RO4H3FEXAMPLE \
--user-name Bob

2) En caso de que la Key sea comprometida, comprueba si algún recurso ha sido creado usando esa Key, en todas las regiones. Es común ver que alguien ha usado tus claves para lanzar instancias EC2 en otras regiones de AWS así que comprueba todas buscando instancias que te parezcan sospechosas. Aquí un ejemplo para buscar instancias creadas en la región us-east-1 desde el 9 de Marzo de 2016:

aws ec2 describe-instances --region us-east-1 \
--query 'Reservations[].Instances[?LaunchTime>=`2016-03-9`][].{id: InstanceId, type: InstanceType, launched: LaunchTime}'

3) Contacta con el equipo de soporte de AWS y avísales del incidente, están siempre dispuestos a ayudar y en caso necesario escalarán al equipo de seguridad de AWS.

4) Aisla la instancia, en este caso cuando hablo de YOUR.IP.ADDRESS.HERE, puede ser la IP pública de tu oficina o un servidor intermedio donde saltar y hacer el análisis:

    • Crea un security group para aislar la isntancia, ojo con la diferencia entre EC2-Classic y EC2-VPC, apunta el Group-ID
aws ec2 create-security-group --group-name isolation-sg \
--description "Security group to isolate EC2-Classic instances"
aws ec2 create-security-group --group-name isolation-sg \
--description "Security group to isolate a EC2-VPC instance" --vpc-id vpc-1a2b3c4d 
# where vpc-1a2b3c4d is the VPC ID that the instance is member of
    • Configura una regla para permitir SSH solo desde tu IP pública, aunque primero debes saber tu IP pública:
dig +short myip.opendns.com @resolver1.opendns.com
aws ec2 authorize-security-group-ingress --group-name isolation-sg \
--protocol tcp --port 22 --cidr YOUR.IP.ADDRESS.HERE/32
aws ec2 authorize-security-group-ingress --group-id sg-BLOCK-ID \
--protocol tcp --port 22 --cidr YOUR.IP.ADDRESS.HERE/32 
# note the difference between both commands in group-name \
and group-id, sg-BLOCK-ID is the ID of your isolation-sg
    • Los EC2-Classic Security Groups no soportan reglas de trafico saliente (solo entrante). Sin embargo, para EC2-VPC Security Groups, reglas de trafico saliente se puede configurar con estos comandos:
aws ec2 revoke-security-group-egress --group-id sg-BLOCK-ID \
--protocol '-1' --port all --cidr '0.0.0.0/0’ 
# removed rule that allows all outbound traffic
aws ec2 authorize-security-group-egress --group-id sg-BLOCK-ID \
--protocol 'tcp' --port 80 --cidr '0.0.0.0/0’ 
# place a port or IP if you want to enable some other outbound \
 traffic otherwise do not execute this command.
    • Aplica ese Security Group a la instancia comprometida:
aws ec2 modify-instance-attribute --instance-id i-INSTANCE-ID \
--groups sg-BLOCK-ID 
# where sg-BLOCK-ID is the ID of your isolation-sg
aws iam put-user-policy --user-name MyUser --policy-name MyPowerUserRole \
--policy-document file://C:\Temp\MyPolicyFile.json

5) Etiqueta la instancia para marcarla como “en investigación”:

aws ec2 create-tags –-resources i-INSTANCE-ID \
–tags "Key=Environment, Value=Quarantine:REFERENCE-ID"

6) Guarda los metadatatos de la instancia:

    • Más información sobre la instancia comprometida:
aws ec2 describe-instances --instance-ids i-INSTANCE-ID > forensic-metadata.log
or
aws ec2 describe-instances --filters "Name=ip-address,Values=xx.xx.xx.xx"
    • La salida de consola, puede ser útil dependiendo del tipo de ataque o compromiso aunque recuerda que deberías tener un sistema de logs centralizado:
aws ec2 get-console-output --instance-id i-INSTANCE-ID

7) Crea un Snapshot del volumen o volúmenes de la instancia comprometida para el análisis forense:

aws ec2 create-snapshot –-volume-id vol-xxxx –-description "IR-ResponderName- Date-REFERENCE-ID"
    • Ese snapshot no se modificará o montará, sino que trabajaremos con un volumen.

8) Ahora podemos seguir dos caminos, Parar la instancia:

aws ec2 stop-instances --instance-ids i-INSTANCE-ID
    • Dejarla ejecutándose, si podemos, en cuyo caso deberíamos aislarla también desde dentro  (iptables) y hacer un volcado de la memoria RAM usando LiME.

9) Crea un Volume desde el snapshot:

    • Piensa que región vas a usar, y otras opciones como  –region us-east-1 –availability-zone us-east-1a –volume-type y personaliza los comandos siguientes:
aws ec2 create-volume --snapshot-id snap-abcd1234
    • Toma nota del volumen:
aws ec2 describe-volumes

10) Monta ese volumen en tu distribución favorita de análisis forense y comienza la investigación.

Iré añadiendo más información en futuros artículos, por ahora esto es una introducción adecuada.

Si quieres aprender mucho más sobre este tema, voy a dar un curso online sobre Análisis forense en AWS, GCE y Azure en español con Securizame, más info aquí.

Forense2-1

Algunas referencias que he usado:

https://securosis.com/blog/my-500-cloud-security-screwup

https://securosis.com/blog/cloud-forensics-101

http://www.slideshare.net/AmazonWebServices/sec316-your-architecture-w-security-incident-response-simulations

http://sysforensics.org/2014/10/forensics-in-the-amazon-cloud-ec2/

The 10 commandments to avoid disabling SELinux

Well, they are 10 ideas or commands actually 😉
Due to my new role at Alfresco as Senior DevOps Security Architect, I’m doing some new cool stuff (that I will be publishing here soon) and also learning a lot and helping a little bit with my knowledge on security to the DevOps team.
One of the goals I promised myself was to “never disable SELinux”, even if that means to learn more about it and spend time on it. I may say that it’s being a worth it investment of my time and here you go some results of it.

This article is not about what is or what is not SELinux, you have the Wikipedia for that. But a brief description could be: a MAC (Mandatory Access Control) implementation in Linux that prevents a process to access to other processes or files that is supposed to not to have access (open, read, write files, etc.)

If you are here is because you want to finally start using SELinux and you are really interested on make it work, to tame this wild horse. Let me just say something, if you are really worry about security and have dozens of Linux servers in production, keep SELinux enabled, keep it “Enforcing”, no question.
Once said that, here is my list. It is not an exhaustive list, I’m looking forward to see your insights in the comments:
  1. Enable SELinux in Enforcing mode:
    • In configuration files (need restart)
      • /etc/sysconfig/selinux (RedHat/CentOS 6.7 and older)
      • /etc/selinux/config (RedHat/CentOS 7.0 and newer)
    • Through commands (no restart required)
      • setenforce Enforcing
    • To check the status use
      • sestatus # or command getenforce
  2. Use the right tools. To do cool things you need cool tools, we will need some of them:
    • yum install -y setools-console policycoreutils-python setroubleshoot-server
    • policycoreutils-python comes with the great semanage command, the lord of the SELinux commands
    • setools-console comes with seinfosesearch and sechecker among others
    • from setroubleshoot-server package we will use sealert to easily identify issues
  3. Get to know what is going on: Dealing with SELinux happens mostly during installation, configuration and tests of Linux services. Therefore, in case something in your system is not working properly or in the same manner as with SELinux disabled. When you are configuring and installing a service or application on a server and something is not working as expected, not starting as it should to, you always think “Damn SELinux, let’s disable it”. Forget about that, you have to check the proper place to see what is going on with it: the Audit logs. Check /var/log/audit/audit.log and look for lines with “denied”.
    • tail -f /var/log/audit/audit.log | perl -pe ‘s/(\d+)/localtime($1)/e’
    • the perl command is to convert the Epoch time (or UNIX or POSIX time) inside the audit.log file to human readable time.
  4. See the extended attributes in the file system that SELinux use:
    • ls -ltraZ # most important here is the Z
    • ls -ltraZ /etc/nginx/nginx.conf will show:
      • -rw-r–r–. root root system_u:object_r:httpd_config_t:s0 /etc/nginx/nginx.conf
      • where system_u: is the user (not always a user of the system), object_r: role and  httpd_config_t: is the object type, other objects can be a directory, a port or socket and types of an object can be a config file, log file, etc.; finally s0 means the level or category of that object.
  5. See the SELinux attributes that applies to a running process:
    • ps auxZ
      • You need to know this command in case of issues.
  6. Who am I for SELinux:
    • id -Z
      • You need to know this command in case of issues.
  7. Check, enable or disable defined modes (enforcing or permissive) per deamon:
    • getsebool -a # list all current status
    • setsebool -P docker_connect_any 1 # allow Docker to connect to all TCP ports
    • semanage boolean -l # is another alternative command
    • semanage fcontext -l # to see al contexts where SELinux applies
  8. Add a non default directory or file to be used by a given daemon:
    • For a folder used by a service, i.e.: change Mysql data directory:
      • Change your default data directory in /etc/my.cnf
      • semanage fcontext -a -t mysqld_db_t “/var/lib/mysql-default/(/.*)?”
      • restorecon -Rv /var/lib/mysql-default
      • ls -lZ /var/lib/mysql-default
    • For a new file used by a service, i.e.: a new index.html file for Apache:
      • semanage fcontext -a -t httpd_sys_content_t ‘/myweb/web1/html/index.html’
      • restorecon -v ‘/myweb/web1/html/index.html’
  9. Add a non default port to be used by a given service:
    • i.e.: If you want nginx to listen in other additional port:
      • semanage port -a -t http_port_t -p tcp 2100
      • semanage port -l | grep  http_port # check if the change is effective
  10. Spread the word!
    • SELinux is not easy but writing easy tips make people using it and making the Internet a safer place!

Alfresco security check list

Alfresco security check list is a list of elements to check before going live with an Alfresco installation in a production environment. This check list is part of the Alfresco Security Best Practices Guide, but I wanted to give it a post in case you missed (thinks that happen due to the 30+ pages of the guide).

[slideshare id=43292696&doc=alfrescosecuritybestpractices-checklistonly-150107130033-conversion-gate02&type=d]


Understanding Alfresco Content Deletion

As part of the work I’m doing for the upcoming Alfresco Summit, where I will be talking about my favorite topic: “Security and Alfresco”, I have written a few lines about Alfresco node deletion, how it works and why is important to take it into account in terms of security control.
I just wanted to clarify how Alfresco works when a content item is deleted and also how content deletion works in Records Management (RM). Basic content deletion is already very well explained in this Ixxus blog post but there are some differences in the database schema between Alfresco 4.1 and 4.2 worth noting, such as the alf_node table has a field named ‘node_deleted in versions 4.0 and earlier.
To develop a deep knowledge about Alfresco security and also how to configure Alfresco backup and disaster recovery, you should first need to understand how the Alfresco repository manages the lifecycle of a content item.
Node creation:
When a node is created,regardless how it is uploaded or created in Alfresco (via the API, web UI, FTP, CIFS, etc.)Alfresco will do the following:

  1. Metadata properties are stored into the Database in the logical store workspace://SpacesStore (alf_node, alf_content_url among others).
  2. The file itself is store and renamed as .bin under alf_data/contentstore/YYYY/MM/DD/hh/mm/url-id-of-the-file.bin
  3. Next, depending on your indexing you chose, its index entries are created within Lucene (alf_data/lucene-indexes/workspace/SpacesStore) or Solr (alf_data/solr/workspace/SpacesStore).
  4. Finally, in most cases, a content thumbnail is created as a child of the file created.

Node deletion:
There are two phases to node deletion:
Phase 1- A user or admin deletes a content item (sending it to the trashcan):

  1. When someone deletes a content item, the content and its children (eg. thumbnails) are moved (archived) within  the DB from workspace://SpacesStore to archive://SpacesStore. Nothing else happens in the DB.
  2. The actual content “.bin” file remains in the same location inside the contentstore directory.
  3. Finally,the indexes are moved from the existing location to the corresponding archive alf_data/lucene-indexes/archive/SpacesStore) or Solr (alf_data/solr/archive/SpacesStore) depending on your index engine selection.

NOTE: A deleted node stays in the trashcan FOREVER, unless the user or admin either empties the trashcan or recovers the file. This default” behavior can be changed by using third party modules that empty the trashcan automatically on a custom schedule. See below for more information on these modules.
The trashcan may be found at these locations:
 Alfresco Share: User -> My Profile -> Trashcan (admin user will see all users deleted files, since 4.2 all users can also see and restore their own deleted files).
Alfresco Explorer: User Profile -> Manage Deleted Items (for all users).
Phase 2- Any user or admin (or trashcan cleaner) empties the trashcan:
That means the content is marked as an “orphan” and after a pre-determined amount of time elapses, the orphaned content item ris moved from the alf_data/contentstore directory to alf_data/contentstore.deleted directory.
Internally at DB level a timestamp (unix format) is added to alf_content_url.orphan_time field where an internal process called contentStoreCleanerJobDetail will check how many long the content has been orphaned.,f it is more than 14 days old, (system.content.orphanProtectDays option) .bin file is moved to contentstore.deleted. Finally, another process will purge all of its references in the database by running nodeServiceCleanupJobDetail and once the index knows the node has bean removed, the indexes will be purged as well.
NOTE: Alfresco will never delete content in alf_data/contentstore.deleted folder. It has to be deleted manually or by a scheduled job configured by the system administrator.
By default, the contentStoreCleanerJobDetail runs every day at 4AM by checking how the age of an orphan node and if it exceeds system.content.orphanProtectDays (14 days) it is moved to contentstore.deleted.
Additionally, the nodeServiceCleanupJobDetail runs every day at 9PM and purges information related to deleted nodes from the database.
Now, that we understand how Alfresco works by default, let’s learn how to modify Alfresco’s behavior in order to clean the trashcan automatically:
There are several third party modules to achieve this, but I recommend the Alfresco Trashcan Cleaner by Alfresco’s very own Rui Fernandes. Tt can be found at https://code.google.com/p/alfresco-trashcan-cleaner/.
Once the amp is installed, you can use this sample configuration  by copying it to alfresco-global.properties:

[bash]
trashcan.cron=0 30 * * * ?
trashcan.daysToKeep=7
trashcan.deleteBatchCount=1000

[/bash]

The options above configure the cleaner to run every hour at thethe half hour and it will remove content from the trashcan and mark them as orphan if a content has been in the trashcan for more than 7 days. It will do this in batches of 1000 deletions every time it runs. To delete from the trashcan without waiting any grace period set the trashcan.daysToKeep property value to -1.
Can I configure Alfresco to avoid using contentstore.deleted and ensure it really deletes a file after the trashcan is cleaned?
Yes, this is possible by setting system.content.eagerOrphanCleanup=true in alfresco-global.properties and once the trashcan is emptied, the file will not be moved to contentstore.deleted but it will be deleted from the file system (contentstore). After that, nodeServiceCleanupJobDetail will purge any related information from the database. Using sys:temporary aspect it also perform same behavior.
So, what is the recommended configuration for a production server?
This is something you have to figure out based on your backup and disaster recovery strategy. See my  Alfresco Summit presentation and white paper here: http://blyx.com/2013/12/04/my-talk-about-alfresco-backup-and-recovery-tool-in-the-alfresco-summit/.
If you have a proper l backup strategy, you can offer your users a grace period of 30 days to recover their own deleted documents from the trashcan and after the grace period delete them simultaneously from the trashcan and the filesystem. This can be achieved by installing the previously mentioned trashcan-cleaner and with this configuration in alfresco-global.properties:

[bash]
system.content.eagerOrphanCleanup=true
trashcan.cron=0 30 * * * ?
trashcan.daysToKeep=30
trashcan.deleteBatchCount=1000

[/bash]

And what about Alfresco Records Management, does it work in the same way? How a record destruction works?
In the Records Management world you don’t tend to delete documents as often it is done in Document Management. When a content item is deleted from the RM file plan, it is considered to be a regular delete operation. This is rarely used and only done by RM admins when there is some justifiable reason such as correcting  a mistake that requires a record to be removed.
The only difference is that the deleted record by-passes the archive store, hence it never goes to the trashcan, it is marked as orphan once it is deleted. Then it will be moved to contentstore.deleted after orphanProtectDays or it is truly deleted if eagerOrphanCleanup is set as true.
Destruction of a record works in the same way that a record is removed, this will by-pass the archive and immediately trigger the clean-up (eagerOrphanCleanup) process so the content does not stay in the file system contentstore or contentstore.deleted.
As far as the meta-data goes, there are two options; the first is that all the meta-data (and hence the node itself) are completely deleted, the alternative method cleans out all the content but the node remains with only the meta-data (called ghosting). In Alfresco RM versions before 2.2 this was a global configuration value (rm.ghosting.enabled=true), in 2.2 it can be defined on the destroy step of the disposition schedule: “Maintain record metadata after destroy”.

Alfresco content deletion graph
Alfresco content deletion

Some final words on content deletion:
As we have seen, Alfresco offers different ways to delete content. It is important to remember, even if Alfresco completely deletes content such as when using the destroy option in RM or by using eagerOrphanCleanup, Alfresco will not wipe the removed content from the physical storage, it therefore can be recovered by file system recovery tools. Wiping a deleted content item may vary depending on multiple factors, since filesystem type to hardware configuration, etc. If you want to guarranty a real physical wipe of a file in your file system, a third party software must be used to “zero out” the corresponding disk sectors. The specific tools depend on the operating system type, hardware, etc.
Thanks to my colleagues at Alfresco Kevin Dorr, Roy Wetherall for the Records Management section and Luis Sala for the document syntax review.

Alfresco Tip: How to enable SSL in Alfresco SharePoint Protocol

There are two ways to approach getting the Alfresco SharePoint Protocol to run over SSL and avoid having to modify the Windows registry for allow non-ssl connections from MS Office (in both Windows and Mac).

One way is to use the out of the box SSL certificate that Alfresco uses for communications between itself and Solr (this blog post is about this option). The other is to generate a new certificate and configure Alfresco to use it, which is the option if you want to use a custom certificate. Next steps tested on Alfresco 4.2, it should work in 4.2 as well for both Enterprise and Community. Please, let me know through a comment if you have an objection on this.

  • 1. Rename file tomcat/shared/classes/alfresco/extension/vti-custom-context.xml.ssl to tomcat/shared/classes/alfresco/extension/vti-custom-context.xml, if it does not exist just create it like below:

[xml]

<?xml version=’1.0′ encoding=’UTF-8′?>
<!DOCTYPE beans PUBLIC ‘-//SPRING//DTD BEAN//EN’ ‘http://www.springframework.org/dtd/spring-beans.dtd’>

<beans>
<!–
<bean id="vtiServerConnector" class="org.mortbay.jetty.bio.SocketConnector">
<property name="port">
<value>${vti.server.port}</value>
</property>
<property name="headerBufferSize">
<value>32768</value>
</property>
</bean>
–>

<!– Use this Connector instead for SSL communications –>
<!– You will need to set the location of the KeyStore holding your –>
<!– server certificate, along with the KeyStore password –>
<!– You should also update the vti.server.protocol property to https –>
<bean id="vtiServerConnector" class="org.mortbay.jetty.security.SslSocketConnector">
<property name="port">
<value>${vti.server.port}</value>
</property>
<property name="headerBufferSize">
<value>32768</value>
</property>
<property name="maxIdleTime">
<value>30000</value>
</property>
<property name="keystore">
<value>${vti.server.ssl.keystore}</value>
</property>
<property name="keyPassword">
<value>${vti.server.ssl.password}</value>
</property>
<property name="password">
<value>${vti.server.ssl.password}</value>
</property>
<property name="keystoreType">
<value>JCEKS</value>
</property>
</bean>
</beans>

[/xml]

  • 2. Now add the required attributes to alfresco-global.properties:

[bash]

vti.server.port=7070
vti.server.protocol=https
vti.server.ssl.keystore=/opt/alfresco/alf_data/keystore/ssl.keystore
vti.server.ssl.password=kT9X6oe68t
vti.server.url.path.prefix=/alfresco
vti.server.external.host=localhost
vti.server.external.port=7070
vti.server.external.protocol=https
vti.server.external.contextPath=/alfresco

[/bash]

Remember to change localhost to your server full name (i.e. your-server-name.domain.com).

  • 3. Restart the Alfresco application server and try the “Edit online” action on a MS Office document through Alfresco Share. A warning message will appear to accept the Alfresco self-signed certificate but is a common behavior.

Essential commands for Alfresco BART

Alfresco BART usage:

[bash]
./alfresco-bart.sh [set] [date dest]
[/bash]

But what really modes are? With modes I mean different ways to use Alfresco BART depending of what do you want to do, for instance:

  • backup: runs an incremental backup or a full if first time
  • restore: runs the restore, wizard if no arguments, see below more commands with arguments [set] [date] [dest], while [set] can also be “all” for all sets.
  • verify: verifies the backup, it compares what you have backed up and what you have in your live system.
  • collection: shows all the backup sets already in the backup archive that might be restored.
  • list: lists the files currently backed up in the archive. It shows files contained in the last backup.

Sets:

  • no value: use all backup sets
  • index: use index backup set (group) for selected mode.
  • db: use data base backup set (group) for selected mode.
  • cs: use content store backup set (group) for selected mode.
  • files: use rest of files backup set (group) for selected mode.

Now lets see how to use Alfresco BART.

To make a backup:

[bash]
./alfresco-bart.sh backup
[/bash]

NOTE1: if first time, it makes a full backup
NOTE2: you should add this command to your root crontab with something like “0 5 * * * /path/to/alfresco-bart.sh backup” (without quotes) if you want to run your backup daily at 5AM (after Alfresco’s nightly backups and maintenance jobs).
NOTE3: running command above with without any data sets (index, db, cs or files) it will perform a backup of all data sets configured in alfresco-bart.properties. You can run “./alfresco-bart.sh backup files” to only perform a backup of your configuration files, installation and customization files or “./alfresco-bart.sh backup cs” to create a backup (full if first time or incremental if not) of your contentstore and additional stores configured.

Commands and options to restore backup:

To restore an existing backup guided by the wizard:

[bash]
./alfresco-bart.sh restore

################## Welcome to Alfresco BART Recovery wizard ###################

This backup and recovery tool does not overrides nor modify your existing
data, then you must have a destination folder ready to do the entire
or partial restore process.

##############################################################################

Choose a restore option:
1) Full restore
2) Set restore
3) Restore a single file of your Alfresco repository
4) Restore alfresco-global.properties from a given date
5) Restore other configuration file or directory

Enter an option [1|2|3|4|5] or CTRL+c to exit:
[/bash]

To restore the last (now) existing backup of all sets (all) and leave it in /tmp:

[bash]
./alfresco-bart.sh restore all now /tmp
[/bash]

To restore a DB backup from 14 days ago to /tmp:

[bash]
./alfresco-bart.sh restore db 14D /tmp
[/bash]

To restore the indexes backup from december 2nd 2013:

[bash]
./alfresco-bart.sh restore index 12-02-2013 /tmp
[/bash]

Valid date format is: now: for last backup, s: for second, m: minutes, h: hours, D: days, W: weeks, M: months or Y: years, all date values must be specified without spaces, i.e: 4D, 2W, 1Y, 33m. Dates may also be like: YYYY/MM/DD, YYYY-MM-DD, MM/DD/YYYY or MM-DD-YYYY.

To restore a single file deleted on the repository but existing in previous backup please use the backup wizard by typing: “./alfresco-bart.sh restore” and then follow instructions in the menu option “3”.

To restore the alfresco-global.properties configuration file from a given date please use the backup wizard by typing: “./alfresco-bart.sh restore” and then follow instructions in the menu option “4”.

Finally if you want to restore any other configuration, installation or custom file from your existing backup on a given date follow instructions by choosing option 5 in the recovery wizard.

NOTE4: Alfresco BART restore options or recovery wizard never will overrides your existing Alfresco files, you should specify a temporary recovery folder with enough space, then you have to move that content manually or following the instructions on the screen.

In case of source mismatch error with Duplicity try running this command:

[bash]
./alfresco-bart.sh backup all force
[/bash]