Prowler 2.0: New release with improvements and new checks ready for re:Invent and BlackHat EU

Taking advantage of this week AWS re:Invent and  next week BlackHat Europe, I wanted to push forward a new version of Prowler.

In case you are new to Prowler:

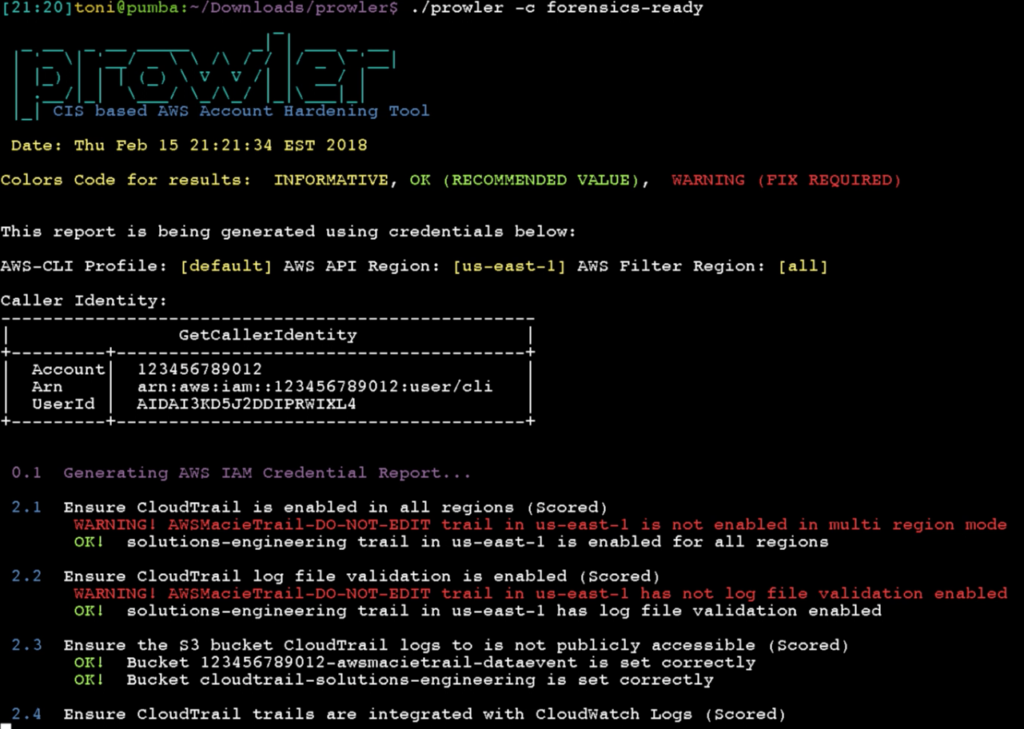
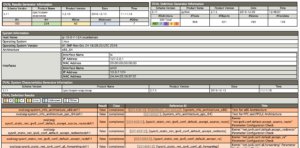
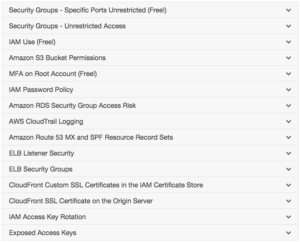
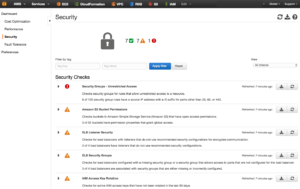
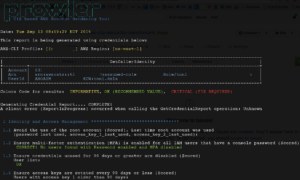
Prowler is an AWS Security Best Practices Assessment, Auditing, Hardening and Forensics Readiness Tool. It follows guidelines of the CIS Amazon Web Services Foundations Benchmark and DOZENS of additional checks including GDPR and HIPAA groups. Official CIS benchmark for AWS guide is here.

This new version has more than 20 new extra checks (of +90), including GDPR and HIPAA group of checks as for a reference to help organizations to check the status of their infrastructure regarding those regulations. Prowler has also been refactored to allow easier extensibility. Another important feature is the JSON output that allows Prowler to be integrated, for example, with Splunk or Wazuh (more about that soon!). For all details about what is new, fixes and improvements please see the release notes here: https://github.com/toniblyx/prowler/releases/tag/2.0

For me, personally, there are two main benefits of Prowler. First of all, it helps many organizations and individuals around the world to improve their security posture on AWS, and using just one easy and simple command, they realize what do they have to do and how to get started with their hardening. Second, I’m learning a lot about AWS, its API, features, limitations, differences between services and AWS security in general.

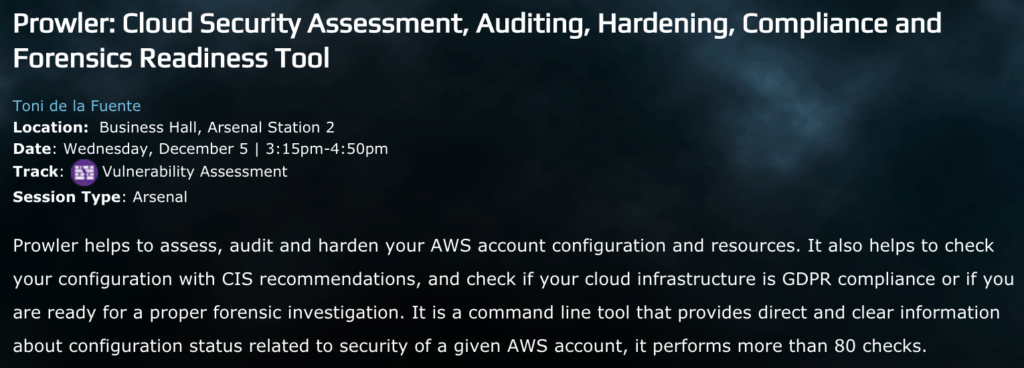
Said that, I’m so happy to present Prowler 2.0 in BlackHat Europe next week in London! It will be at the Arsenal

and I’ll talk about AWS security, and show all new features, how it works, how to take advantage of all checks and output methods and some other cool things. If you are around please come by and say hello, I’ve got a bunch of laptop sticklers! Here all details, Location:  Business Hall, Arsenal Station 2. Date: Wednesday, December 5 | 3:15pm-4:50pm. Track Vulnerability Assessment. Session Type: Arsenal

BIG THANKS!

I want to thank the Open Source community that has helped out since first day, almost a thousand stars in Github and more than 500 commits talk by itself. Prowler has become pretty popular out there and all the community support is awesome, it motivates me to keep up with improvements and features. Thanks to you all!!

Prowler future?

Main goals for future versions are: to improve speed and reporting, including switch base code to Python to support existing checks and new ones in any language.

If you are interested on helping out, don’t hesitate to reach out to me. \m/

My arsenal of AWS security tools

I’ve been using and collecting a list of helpful tools for AWS security. This list is about the ones that I have tried at least once and I think they are good to look at for your own benefit and most important: to make your AWS cloud environment more secure.

They are not in any specific order, I just wanted to group them somehow. I have my favorites depending on the requirements but you can also have yours once you test them.

Feel free to send a pull request for improvements or add more tools (open source only in this list) here:

New additions at https://github.com/toniblyx/my-arsenal-of-aws-security-tools


Defensive (Hardening, Security Assessment, Inventory)

Offensive:

Continuous Security Auditing:

DFIR:

Development Security:

S3 Buckets Auditing:

Training:

Others:

Prowler 1.6: AWS Security Best Practices Assessment and Forensics Readiness Tool

It looks like Prowler has become a popular tool for those concerned about AWS security. I just made Prowler to solve an internal requirement we have here in Alfresco. I decided to make it public and I started getting a lot of feedback, pull requests, comments, advices, bugs reported, new ideas and I keep pushing to make it better and more comprehensive following all what cloud security community seems to need.
I know Prowler is not the best tool out there but it does what I wanted it to do: “Take a picture of my AWS account (or accounts) security settings and tell me from where to start working to improve it”. Do the basics, at least. And that’s what it does. I would use other tools to track service change, etc., I discuss that also in my talks.
Currently, Prowler performs 74 checks (for an entire list run `prowler -l`), being 52 of them part of the CIS benchmark.

Digital Forensics readiness capabilities into Prowler 1.6

`prowler -c forensics-ready`
I’m into DFIR, I love it and I read lot about cloud digital forensics and incident response, I enjoy investing my time R&D about that subject. And I’m concerned about random or targeted attacks to cloud infrastructure. For the talk I’m doing today at the SANS Cloud Security Summit 2018 in San Diego, I wanted to show something new and I thought about adding new checks to Prowler related to forensics and how to make sure you have all (or as much) what you need to perform a proper investigation in case of incident, logs that are not enabled by default in any AWS account by the way. Some of those checks are included and well described in the current CIS benchmark for AWS, or even in the CIS benchmark for AWS three tiers web deployments (another hardening guide that is way less popular but pretty interesting too), but there are checks that are not included anywhere. For example, I believe it is good idea to keep record of your API Gateway logs in your production accounts or even your ELB logs, among many others. So when you run  `prowler -c forensics-ready` now you will get the status of your resources across all regions, and you can make sure you are logging all what you may eventually need in case of security incident. Currently these are the checks supported (https://github.com/toniblyx/prowler#forensics-ready-checks):
  • 2.1 Ensure CloudTrail is enabled in all regions (Scored)
  • 2.2 Ensure CloudTrail log file validation is enabled (Scored)
  • 2.3 Ensure the S3 bucket CloudTrail logs to is not publicly accessible (Scored)
  • 2.4 Ensure CloudTrail trails are integrated with CloudWatch Logs (Scored)
  • 2.5 Ensure AWS Config is enabled in all regions (Scored)
  • 2.6 Ensure S3 bucket access logging is enabled on the CloudTrail S3 bucket (Scored)
  • 2.7 Ensure CloudTrail logs are encrypted at rest using KMS CMKs (Scored)
  • 4.3 Ensure VPC Flow Logging is Enabled in all VPCs (Scored)
  • 7.12 Check if Amazon Macie is enabled (Not Scored) (Not part of CIS benchmark)
  • 7.13 Check if GuardDuty is enabled (Not Scored) (Not part of CIS benchmark)
  • 7.14 Check if CloudFront distributions have logging enabled (Not Scored) (Not part of CIS benchmark)
  • 7.15 Check if Elasticsearch Service domains have logging enabled (Not Scored) (Not part of CIS benchmark)
  • 7.17 Check if Elastic Load Balancers have logging enabled (Not Scored) (Not part of CIS benchmark)
  • 7.18 Check if S3 buckets have server access logging enabled (Not Scored) (Not part of CIS benchmark)
  • 7.19 Check if Route53 hosted zones are logging queries to CloudWatch Logs (Not Scored) (Not part of CIS benchmark)
  • 7.20 Check if Lambda functions are being recorded by CloudTrail (Not Scored) (Not part of CIS benchmark)
  • 7.21 Check if Redshift cluster has audit logging enabled (Not Scored) (Not part of CIS benchmark)
  • 7.22 Check if API Gateway has logging enabled (Not Scored) (Not part of CIS benchmark)
Screenshot while running `forensics-ready` group of checks, here only showing 3 of the first checks that are part of that group
I haven’t added yet a RDS logging check and I’m probably missing many others so please feel free to open an issue in Github and let me know!
If you want to check out my slide deck used during my talk at the SANS Cloud Security Summit 2018 in San Diego, look at here: https://github.com/toniblyx/SANSCloudSecuritySummit2018

Getting started with AWS Certificate Manager (and Route53)

…with your own domain not hosted in Amazon Route 53 and a wild card certificate.
A main premise I follow when it comes to deploying or architecting any service in the cloud, whatever vendor I use, is full encryption between layers and intent to add elasticity on each service (adding them to what AWS calls Auto Scaling Groups).
For a pretty cool new project (wink wink) that we are working in the Security Operations Group at Alfresco, we need to deploy a bunch of AWS resources and we want to use https between all the services. Since we will use AutoScaling groups and ELB, we want to configure all ELB with HTTPS and to do so we have to provide the certificates. We can do that manually or automated with CloudFormation, and the CloudFormation option is what we have chosen as in many other projects. We also want to use our own certificates.
This article is to show you how to create your own wild card certificate with AWS Certificate Manager and use Route53 for a subdomain that you own. For example, if you have a domain that is not hosted in Route 53, like in my case with blyx.com which is hosted at joker.com using their own name servers. I’ll use a subdomain called cloud.blyx.com for this example.
Long story short, the whole process is something like this:
  1. Add a hosted zone in Route 53
  2. Configure your DNS server to point the custom subdomain to Route 53
  3. Create the wildcard certificate
So let’s go ahead:
  1. Start creating a hosted zone in Route 53. This new hosted zone will be a subdomain of our main domain that we will be able to manage entirely in AWS for our wild card certificates and obviously for our load balancers and URLs domain names instead of using default amazonaws.com names, in my case, I create a hosted zone called “cloud.blyx.com”:

  1. Now we have to go to our DNS server and add all records that we got in the previous step, in my case I will do it using joker.com web panel, if you use Bind or other solution you have to create a NS zone called cloud.blyx.com (something like that, like a 3rd level domain) and then point the Name servers that we got from AWS Route 53 above. Here an example, easy:

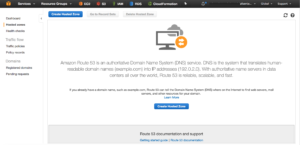
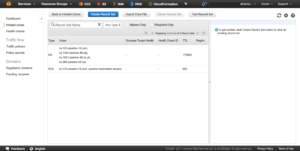
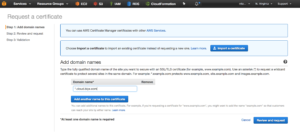
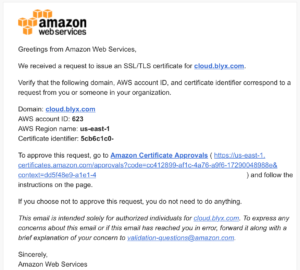
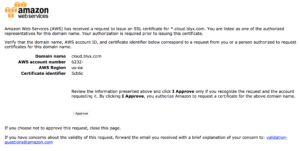
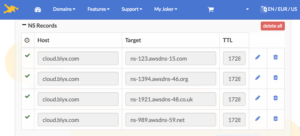
3. Once we have all DNS steps done, let’s create our wild card certificate with AWS Certificate Manager for *.cloud.blyx.com. Remember that to validate the certificate creation you will get an email from AWS and you will have to approve the request by following the instructions on the email:

This is the email to approve the request:

Here is the approval page:

Once it is approved you will see it as “issued”. And you are ready to use it. Now, from CloudFormation we can call Route 53 and use your own certificate to make all communications through HTTPS when needed.
Hope you get this article helpful. The Trooper is coming!

10 Security Concepts You Must Know (in 5 minutes with GoT)

Here is a lightning talk I have recorded recently. I did it internally at Alfresco for an Engineering meeting but I think is good idea to share it and take advantage of the coming new season of Game of Thrones 😉

You have links and resources also available below the video.

If you want to use the ppt for your own use you can download it from here in my GitHub:

https://github.com/toniblyx/10-security-concepts-with-got

All references and recommended reads about the subject are here:

http://www.infoworld.com/article/3144362/devops/10-key-security-terms-devops-ninjas-need-to-know.html

https://danielmiessler.com/study/encoding-encryption-hashing-obfuscation/

https://blog.instant2fa.com/how-to-build-a-wall-that-stops-white-walkers-fantastic-threat-models-ef2dfa7864a4


Bypassing AWS IAM: How important it is to look closely at your policies

If you are dealing everyday with dozens of users in AWS and you like to have (or believe that you have) control over them; that you like to believe that you drive them like a good flock of sheep, you will feel my pain, and I’ll feel yours.

We manage multiple AWS accounts, for many purposes. Some accounts with more restrictions than others, we kinda control and deny to use some regions, some instance types, some services, etc. Just for security and budget control (like you do as well, probably).

That being said, you are now a “ninja” of AWS IAM because you have to add, remove, create, change, test and simulate easy and complex policies pretty much everyday, to make your flock trustfully follow its shepherd.

But dealing with users is great to test the strength of your policies. I have a policy where explicitly denied a list of instance types to be used (a black list with “ec2:RunInstances”). Ok, it denies to create them, but not to stop them, change instance type and start them again. You may end up feeling that your control is like this:

Let me show you all the technical details and a very self-explanatory demo in this video:

What do you think? Is it an expected behavior? It is actually. But I also think that the “ec2:ModifyInstanceAttribute” control should be more granular and should have “instanceType” somehow related to “ec2:RunInstances”. A limitation from AWS IAM, I guess.
In case you want to try by yourself, here you go below all commands I used (you will have to change the instance id, profile and region), if you want to copy a similar IAM policy, look at here in my blog post How to restrict by regions and instance types in AWS with IAM:
# create an allowed instance
aws ec2 run-instances --image-id ami-c58c1dd3 \
--count 1 --instance-type t2.large --key-name sec-poc \
--security-group-ids sg-12b5376a --subnet-id subnet-11fe4e49 \
--profile soleng --region us-east-1

# check status
aws ec2 describe-instances --instance-ids i-0152bc219d24c5f25 \
--query 'Reservations[*].Instances[*].[InstanceType,State]' \
--profile soleng --region us-east-1

# stop instance
aws ec2 stop-instances --instance-ids i-0152bc219d24c5f25 \
--profile soleng --region us-east-1

# check status
aws ec2 describe-instances --instance-ids i-0152bc219d24c5f25 \
--query 'Reservations[*].Instances[*].[InstanceType,State]' \
--profile soleng --region us-east-1

# change instance type
aws ec2 modify-instance-attribute --instance-id i-0152bc219d24c5f25 \
--instance-type "{\"Value\": \"i2.2xlarge\"}" \
--profile soleng --region us-east-1

# start instance type
aws ec2 start-instances --instance-ids i-0152bc219d24c5f25 \
--profile soleng --region us-east-1

# check status
aws ec2 describe-instances --instance-ids i-0152bc219d24c5f25 \
--query 'Reservations[*].Instances[*].[InstanceType,State]' \
--profile soleng --region us-east-1

# terminate instance
aws ec2 terminate-instances --instance-ids i-0152bc219d24c5f25 \
--profile soleng --region us-east-1

Automate or Die! My next talk at RootedCON 2017 in Madrid

UPDATED!  My talk will be on March, Friday the 3rd at 11AM (Sala 25)
Regardless I’ve given many talks in Spain during the last 18 years, It has been a while since I don’t do a talk in a security congress. I think last time was NcN when I presented phpRADmin in 2006.
I have to confess that I was mad to talk at RootedCON. Living abroad for more than four years now, the RootedCON has been a reference event for Spanish speakers and I always have been following it very closely, I think it is one of the most popular security conferences in Spain.
Last year I tried to attend with a “Docker Security” paper but it wasn’t good enough, and honestly I didn’t work much on the paper itself. This time I worked on a more decent paper (and better tittle as well) and voila! My talk was approved.
And what I’m gonna talk about? Security in IaaS, attacks, hardening, incident response, forensics and all about its automation. Despite I will talk about general concept related to AWS, Azure and GCP, I will show specific demos and threats in AWS and I will go in detail with some caveats and hazards in AWS. My talk is called “Automate or die! How to survive to an attack in the Cloud” and you have more details here.
If you are in Spain or around the place, don’t miss the opportunity to learn from people like Mikko Hypponen, Paul Vixie, Hugo Teso, Juan Garrido or Chema Alonso. As you may see in the full list, there are 3 days plenty of good material to improve your skills from very good professionals, they also offer a training day. And compared to the price of security cons in other countries, this one is not expensive at all.
My talk will be on March, Friday the 3rd at 11AM (Sala 25). Looking forward to see you there!

Hardening assessment and automation with OpenSCAP in 5 minutes

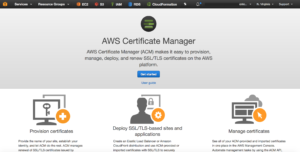
SCAP (Security Content Automation Protocol) provides a mechanism to check configurations, vulnerability management and evaluate policy compliance for a variety of systems. One of the most popular implementations of SCAP is OpenSCAP and it is very helpful for vulnerability assessment and also as hardening helper.
In this article I’m going to show you how to use OpenSCAP in 5 minutes (or less). We will create reports and also dynamically hardening a CentOS 7 server.
Installation for CentOS 7:
yum -y install openscap openscap-utils scap-security-guide
wget http://people.redhat.com/swells/scap-security-guide/RHEL/7/output/ssg-rhel7-ocil.xml -O /usr/share/xml/scap/ssg/content/ssg-rhel7-ocil.xml
Create a configuration assessment report in xccdf (eXtensible Configuration Checklist Description Format):
oscap xccdf eval --profile stig-rhel7-server-upstream \
--results $(hostname)-scap-results-$(date +%Y%m%d).xml \
--report $(hostname)-scap-report-$(date +%Y%m%d)-after.html \
--oval-results --fetch-remote-resources \
--cpe /usr/share/xml/scap/ssg/content/ssg-rhel7-cpe-dictionary.xml \
 /usr/share/xml/scap/ssg/content/ssg-centos7-xccdf.xml
Now you can see your report, and it will be something like this (hostname.localdomain-scap-report-20161214.html):
 
See also different group rules considered:
You can go through the fails in red and see how to fix them manually or dynamically generate a bash script to fix them. Take a note of the Score number that your system got, it will be a reference after hardening.
In order to generate a script to fix all needed and harden the system (and improve the score), we need to know our report result-id, we can get it running this command using the results xml file:
export RESULTID=$(grep TestResult $(hostname)-scap-results-$(date +%Y%m%d).xml | awk -F\" '{ print $2 }')
Run oscap command to generate the fix script, we will call it fixer.sh:
oscap xccdf generate fix \
--result-id $RESULTID \
--output fixer.sh $(hostname)-scap-results-$(date +%Y%m%d).xml
chmod +x fixer.sh
Now you should have a fixer.sh script to fix all issues, open and edit it if needed. For instance, remember that the script will enable SELINUX and do lots of changes to Auditd configuration. If you have a different configuration you can run commands like bellow after running ./fixer.sh to keep SElinux permissive and in case you can change some actions of Auditd.
sed -i "s/^SELINUX=.*/SELINUX=permissive/g" /etc/selinux/config
sed -i "s/^space_left_action =.*/space_left_action = syslog/g" /etc/audit/auditd.conf
sed -i "s/^admin_space_left_action =.*/admin_space_left_action = syslog/g" /etc/audit/auditd.conf
Then you can build a new assessment report to see how much it improved your system hardening (note I added -after to the files name):
oscap xccdf eval --profile stig-rhel7-server-upstream \
--results $(hostname)-scap-results-$(date +%Y%m%d)-after.xml \
--report $(hostname)-scap-report-$(date +%Y%m%d)-after.html \
--oval-results --fetch-remote-resources \
--cpe /usr/share/xml/scap/ssg/content/ssg-rhel7-cpe-dictionary.xml \
 /usr/share/xml/scap/ssg/content/ssg-centos7-xccdf.xml
Additionally, we can generate another evaluation report of the system in OVAL format (Open Vulnerability and Assessment Language):
oscap oval eval --results $(hostname)-oval-results-$(date +%Y%m%d).xml \
--report $(hostname)-oval-report-$(date +%Y%m%d).html \
/usr/share/xml/scap/ssg/content/ssg-rhel7-oval.xml
OVAL report will give you another view of your system status and configuration ir order to allow you improve it and follow up, making sure your environment reaches the level your organization requires.
Sample OVAL report:
Happy hardening!

Prowler: an AWS CIS Security Benchmark Tool

screenshot-2016-09-14-22-43-39In this blog post I’m happy to announce the recent release of Prowler: an AWS CIS Security Benchmark Tool.

At Alfresco we run several workloads on AWS and, like many others companies, we use multiple AWS accounts depending on use cases, projects, etc.

To make sure we have a foundation security controls applied to each  account, AWS counts with a service called Trusted Advisor which has, among other features, a section for Security Best practices, it checks some services and give us some recommendations to improve Security of our account, 3 checks are free the rest of them (12) are available only for customers with Business or Enterprise support plan:

screenshot-2016-09-14-17-26-09

Trusted Advisor is fine, but it is not enough comprehensive and it is not free. Here is a screenshot of Trusted Advisor in the AWS Console on a Business support plan account:
screenshot-2016-09-14-17-30-09

In addition to that AWS service, few months ago the Center or Internet Security (CIS) along with Amazon Web Services and others, released the CIS AWS Foundations Benchmark. In that document we can find a collection of audit checks and remediations that cover the security foundations for these main areas in AWS:

  • Identity and Access Management (15 checks)
  • Logging (8 checks)
  • Monitoring (16 checks)
  • Networking (4 checks)

The 89 pages guide goes through 43 recommendations by explaining why that check is important, how to audit it and how to remediate it in case you don’t have it properly configured.

If you try to follow all these checks manually it may take you a couple of days to have all of them checked. This is why in Alfresco we decided to write a tool to make it faster, thus I wrote “Prowler”, a command line tool based on AWS-CLI that creates a report in a minute and shows you how is your AWS account configured in terms of security (using fancy color codes).

screenshot-2016-09-13-09-31-07

Prowler, whose name comes from the Iron Maiden song with the same name, works in Linux, OSX and Windows (with Cygwin), with AWS-CLI installed. It also requires an AWS account with at least the SecurityAudit policy applied as specified in the documentation. For more information, details and sample reports visit the project repository in Github here https://github.com/toniblyx/aws-cis-security-benchmark.

Please, go ahead, check it out and give me feedback!

Hope it helps!

UPDATE! Right after I published this post, I was pointed in Twitter by @MonkeySecurity about Scout2, which is a tool we use here since long time and it is very helpful. It has many different checks and it is complementary to Prowler, don’t forget to give it a try! And also use SecurityMonkey if you are not doing so already!

UPDATE2! Another tool to perform AWS security checks is the CloudSploit Scans, more info here.


Cloud Forensics: CAINE7 on AWS

caine-7-accessories-481x460
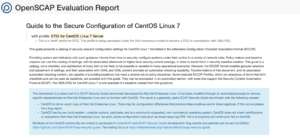
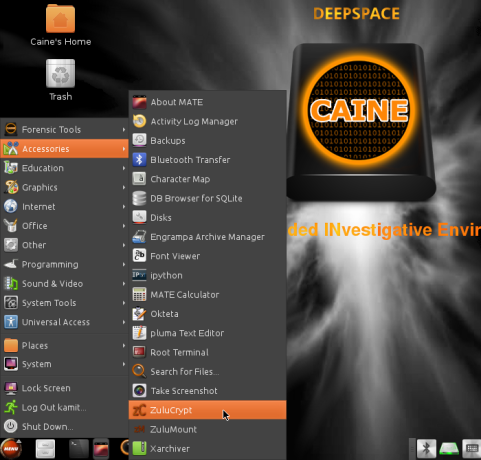
If you work with AWS, you may have to perform a forensics analisys at some point. As discussed in previous articles here, there are many tasks we can achieve in the cloud.
Here is a quick quide based on AWS-CLI on how to install, upload and use the well known CAINE7 distribution up in the Amazon Cloud importing it as an EC2 AMI:
  • First of all start CAINE7.iso as live CD in Virtualbox,  12GB of disk in VHD format will be fine ( if you don’t use VHD or you have VMDK instead you can convert it with “VBoxManage clonemedium CAINE7.vmdk  CAINE7.vhd –format vhd”)
  • Inside CAINE:
    • Run BlockON/OFF app from Desktop icon, select your virtual hard drive and make it Writable.
    • Go to Menu / System / Administration / gParted
    • In gParted  Device / Create Partition Table… msdos
    • Partition new create a 10GB partition and leave the rest empty
    • Create another partition linux-swap for the remaining 2GB
    • Edit – Apply all operations
    • Run Systemback (installer) form the Desktop icon.
    • System Install, fill the form with user full name: caine, system user: ec2-user, your password and hostname: caine. Then Next
    • Select the 10GB partition and set the mount point /
    • Click Next and the installation will start
  • Once the installation is finished you can stop the virtual machine, remove the liveCD, start it and log in to the VM again to do some additional steps inside your just installed CAINE7.
  • Update and upgrade:
    • sudo apt-get update; sudo apt-get upgrade
  • Install aws-cli:
    • sudo pip install aws-cli
  • Now we will install some dependences needed to get access via RDP once we run CAINE in AWS, just like if it is in our local workstation.
    • sudo apt-get install xrdp curl
    • sudo sed -i s/port=-1/port=ask-1/g /etc/xrdp/xrdp.ini
    • sudo sed -i s#/\.\ \/etc\/X11\/Xsession#mate-session#g /etc/xrdp/startwm.sh
    • sudo service xrdp restart
  • Extra: install the Amazon EC2 Simple Systems Manager (SSM) agent to process Run Command requests remotely and automated:
    • cd /tmp
    • curl https://amazon-ssm-<region>.s3.amazonaws.com/latest/debian_386/amazon-ssm-agent.deb -o amazon-ssm-agent.deb
    • dpkg -i amazon-ssm-agent.deb
  • Now we have to upload this VM VHD file to a S3 bucket, it will be around 8GBaws-logo1.png
    • aws s3 cp CAINE7.vhd  s3://your-forensics-tools-bucket/CAINE7.vhd
    • This will take time, depending on your bandwith.
  • If the AWS IAM user you are running doesn’t have proper permissions, you should review and follow these prerequisites http://docs.aws.amazon.com/AWSEC2/latest/UserGuide/VMImportPrerequisites.html
  • Then we can import this virtual hard drive as AWS AMI. Firs create a json file like below to use it as parameter for the import task (caine7vm.json):
[{
    “Description”: “CAINE7”,
    “Format”: “vhd”,
    “UserBucket”: {
        “S3Bucket”: “your-forensics-tools-bucket”,
        “S3Key”: “CAINE7.vhd”
    }
}]
  • Lets perform the import:
    • aws ec2 import-image –description “CAINE7” –disk-containers file://caine7vm.json –profile default –region us-east-1
    • NOTE: you probably don’t need to specify profile or region.
  • The import taks may take some minutes, depending on how big is the VHD and how busy is AWS by that time. To check the status use this command:
    • aws ec2 describe-import-image-tasks –profile default –region us-east-1 –query ‘ImportImageTasks[].[ImportTaskId,StatusMessage,Progress]’
    • or this one with your custom “import-ami-XXXXX”
    • aws ec2 describe-import-image-tasks –profile default –region us-east-1 –query ‘ImportImageTasks[].[ImportTaskId,StatusMessage,Progress]’ –cli-input-json “{ \”ImportTaskIds\”: [\”import-ami-XXXXX\”]}”
    • You will see “StatusMessage”: “pending” –> “validated”–> “converting” –> “preparing to boot” –> “booted” –> “preparing ami” –> “completed”
  • Once it is completed, look for your brand new AMI id:
    • aws ec2 describe-images –owners self –profile default –region us-east-1 –filters “Name=name,Values=import-ami-XXXXX”
  • Good, we know the AMI id so let’s create a new instance inside an existing VPC and a Public Subnet (I use t2.medium with 2GB of RAM), please use your own Security Group with RDP and SSH open and your own ssh keyname:
    • aws ec2 run-instances –image-id ami-XXXX –count 1 –instance-type t2.medium –key-name YOURKEY –security-group-ids sg-YOURSG –subnet-id subnet-YOURPUBLIC –profile default –region us-east-1
  • Add it a tag for better identification:
    • aws ec2 create-tags –resources i-XXXX –tags Key=Name,Value=Investigator –profile default –region us-east-1
  • At this point you can attache a public IP to the instance and get access to it.
  • First allocate a public Elastic IP:
    • aws ec2 allocate-address –domain vpc-XXXX –profile default –region us-east-1
  • Then associate that new Elastic IP to our just launched CAINE7 instance (changeeipalloc-XXXX):
    • aws ec2 associate-address –instance-id i-XXXX –allocation-id eipalloc-XXXX –profile security –region us-east-1
  • Now open your favorite remote desktop application and access to your CAINE7, remember you will be asked for the username and password you set when CAINE was installed in your VirtualBox VM:

Screenshot 2016-06-13 23.09.56

  • Now you should be in!

Screenshot 2016-06-16 13.40.33