Prowler 2.0: New release with improvements and new checks ready for re:Invent and BlackHat EU

Taking advantage of this week AWS re:Invent and  next week BlackHat Europe, I wanted to push forward a new version of Prowler.

In case you are new to Prowler:

Prowler is an AWS Security Best Practices Assessment, Auditing, Hardening and Forensics Readiness Tool. It follows guidelines of the CIS Amazon Web Services Foundations Benchmark and DOZENS of additional checks including GDPR and HIPAA groups. Official CIS benchmark for AWS guide is here.

This new version has more than 20 new extra checks (of +90), including GDPR and HIPAA group of checks as for a reference to help organizations to check the status of their infrastructure regarding those regulations. Prowler has also been refactored to allow easier extensibility. Another important feature is the JSON output that allows Prowler to be integrated, for example, with Splunk or Wazuh (more about that soon!). For all details about what is new, fixes and improvements please see the release notes here: https://github.com/toniblyx/prowler/releases/tag/2.0

For me, personally, there are two main benefits of Prowler. First of all, it helps many organizations and individuals around the world to improve their security posture on AWS, and using just one easy and simple command, they realize what do they have to do and how to get started with their hardening. Second, I’m learning a lot about AWS, its API, features, limitations, differences between services and AWS security in general.

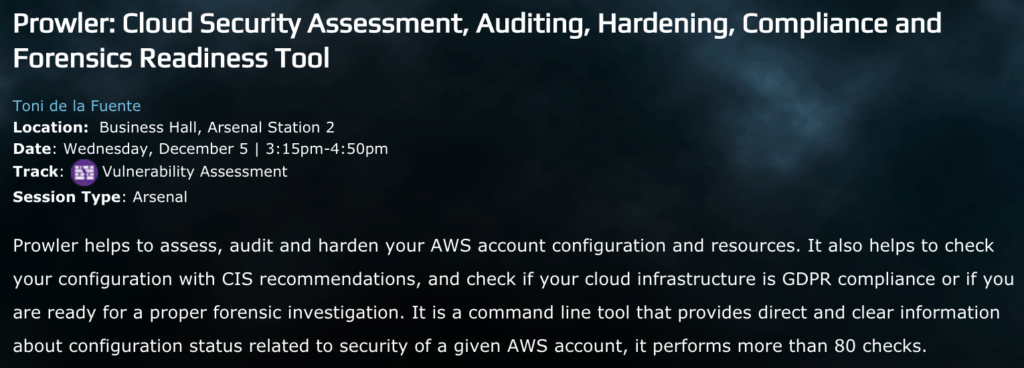
Said that, I’m so happy to present Prowler 2.0 in BlackHat Europe next week in London! It will be at the Arsenal

and I’ll talk about AWS security, and show all new features, how it works, how to take advantage of all checks and output methods and some other cool things. If you are around please come by and say hello, I’ve got a bunch of laptop sticklers! Here all details, Location:  Business Hall, Arsenal Station 2. Date: Wednesday, December 5 | 3:15pm-4:50pm. Track Vulnerability Assessment. Session Type: Arsenal

BIG THANKS!

I want to thank the Open Source community that has helped out since first day, almost a thousand stars in Github and more than 500 commits talk by itself. Prowler has become pretty popular out there and all the community support is awesome, it motivates me to keep up with improvements and features. Thanks to you all!!

Prowler future?

Main goals for future versions are: to improve speed and reporting, including switch base code to Python to support existing checks and new ones in any language.

If you are interested on helping out, don’t hesitate to reach out to me. \m/

My arsenal of AWS security tools

I’ve been using and collecting a list of helpful tools for AWS security. This list is about the ones that I have tried at least once and I think they are good to look at for your own benefit and most important: to make your AWS cloud environment more secure.

They are not in any specific order, I just wanted to group them somehow. I have my favorites depending on the requirements but you can also have yours once you test them.

Feel free to send a pull request for improvements or add more tools (open source only in this list) here:

New additions at https://github.com/toniblyx/my-arsenal-of-aws-security-tools


Defensive (Hardening, Security Assessment, Inventory)

Offensive:

Continuous Security Auditing:

DFIR:

Development Security:

S3 Buckets Auditing:

Training:

Others:

Buenas Prácticas de Seguridad en Docker

DockerLogoNota: Este artículo lo escribí para SecurityByDefault.com el 18/05/2015, espero que lo disfrutéis.
Docker es una plataforma abierta que permite construir, portar y ejecutar aplicaciones distribuidas, se basa en contenedores que corren en Linux y funcionan tanto en máquinas físicas como virtuales simplemente usando un runtime. Está escrito en Go y usa librerías del sistema operativo así como funcionalidades del kernel de Linux en el que se ejecuta. Consta de un engine con API RESTful y un cliente que pueden ejecutarse en la misma máquina o en máquinas separadas. Es Open Source (Apache 2.0) y gratuito.
Los contenedores existen desde hace muchos años, Docker no ha inventado nada en ese sentido, o casi nada, pero no hay que quitarles mérito, están en el momento adecuado y aportan las características y herramientas concretas que se necesitan en la actualidad, donde la portabilidad, escalabilidad, alta disponibilidad y los microservicios en aplicaciones distribuidas son cada vez más utilizados, y no sólo eso, sino que también son mejor entendidos por la comunidad de desarrolladores y administradores de sistemas. Cada vez se desarrollan menos aplicaciones monolíticas y más basadas en módulos o en microservicios, que permiten un desarrollo más ágil, rápido y a la vez portable. Empresas de sobra conocidas como Netflix, Spotify o Google e infinidad de Start ups usan arquitecturas basadas en microservicios en muchos de los servicios que ofrecen.
Te estarás preguntando ¿Y no es más o menos lo mismo que hacer un chroot de una aplicación? Sería como comparar una rueda con un coche. El concepto de chroot es similar ya que se trata de aislar una aplicación, pero Docker va mucho más allá, sería un chroot con esteroides, muchos esteroides. Por ejemplo, puede limitar y controlar los recursos a los que accede la aplicación en el contenedor, generalmente usan su propio sistema de archivos como UnionFS o variantes como AUFS, btrfs, vfs, Overlayfs o Device Mapper que básicamente son sistemas de ficheros en capas. La forma de controlar los recursos y capacidades que hereda del host es mediante namespaces y cgroups de Linux. Esas opciones de Linux no son nuevas en absoluto, pero Docker lo hace fácil y el ecosistema que hay alrededor lo ha hecho tan utilizado.
Adicionalmente, la flexibilidad, comodidad y ahorro de recursos de un contenedor es mayor a la que aporta una máquina virtual o un servidor físico, esto es así en muchos casos de uso, no en todos. Por ejemplo, tres servidores web para un cluster con Nginx en una VM con una instalación de Linux CentOS mínima ocuparía unos 400MB, multiplicado por 3 máquinas sería total de uso en disco de 1,2 GB, con contenedores serían 400MB las mismas 3 máquinas corriendo ya que usa la misma imagen para múltiples contenedores. Eso es sólo por destacar una característica interesante a nivel de recursos. Otro uso muy común de Docker es la portabilidad de aplicaciones, imagina una aplicación que solo funciona con Python 3.4 y hacerla funcionar en un sistema Linux con Python 2.x es complicado, piensa en lo que puede suponer en un sistema en producción actualizar Python, con contenedores sería casi automático, descargar la imagen del contenedor y ejecutar la aplicación de turno.
Solo por ponernos en situación de la envergadura Docker, unos números alrededor del producto y la compañía (fuente aquí):
  • 95 millones de dólares de inversión.
  • Valorada en 1.000 millones de dólares.
  • Más de 300 millones de descargas en 96 releases desde marzo de 2013
Pero un contenedor no es para todo, ni hay que volverse loco “dockerizando” cualquier cosa, aunque no es este el sitio para esa reflexión. Al cambiar la forma de desarrollar, desplegar y mantener aplicaciones, también cambia en cierto modo la forma de securizar estos nuevos actores.
Docker aporta seguridad en capas, aísla aplicaciones entre ellas y del host sin usar grandes recursos, también se pueden desplegar contenedores en máquinas virtuales lo que aporta otra capa adicional de aislamiento (estaréis pensando en VENOM pero eso es otra película que no afecta directamente a Docker). Dada la arquitectura de Docker y usando buenas prácticas, aplicar parches de seguridad al anfitrión o a aplicaciones suele ser más rápido y menos doloroso.
Buenas Prácticas de Seguridad:
Aunque la seguridad es algo innato en un contenedor, desde Docker Inc. están haciendo esfuerzos por la seguridad, por ejemplo, contrataron hace unos meses a ingenieros de seguridad de Square, que no son precisamente nuevos en el tema. Ellos, junto a compañías como VMware entre otras, han publicado recientemente un extenso informe de sobre buenas prácticas de seguridad en Docker en el CIS. Gracias a este informe tenemos acceso a más de 90 recomendaciones de seguridad a tener siempre en cuenta cuando vamos a usar Docker en producción. En la siguiente tabla podemos ver las recomendaciones de seguridad sugeridas, algunas son muy obvias pero un check list así nunca viene mal:
1. Recomendaciones a nivel de host
1.1. Crear una partición separada para los contenedores 
1.2. Usar un Kernel de Linux actualizado 
1.3. No usar herramientas de desarrollo en producción
1.4. Securizar el sistema anfitrión 
1.5. Borrar todos los servicios no esenciales en el sistema anfitrión
1.6. Mantener Docker actualizado 
1.7. Permitir solo a los usuarios autorizados controlar el demonio Docker
1.8. Auditar el demonio Docker  (auditd)
1.9. Auditar el fichero o directorio de Docker – /var/lib/docker 
1.10. Auditar el fichero o directorio de Docker – /etc/docker 
1.11. Auditar el fichero o directorio de Docker – docker-registry.service 
1.12. Auditar el fichero o directorio de Docker – docker.service 
1.13. Auditar el fichero o directorio de Docker – /var/run/docker.sock 
1.14. Auditar el fichero o directorio de Docker – /etc/sysconfig/docker 
1.15. Auditar el fichero o directorio de Docker – /etc/sysconfig/docker-network 
1.16. Auditar el fichero o directorio de Docker – /etc/sysconfig/docker-registry 
1.17. Auditar el fichero o directorio de Docker – /etc/sysconfig/docker-storage 
1.18. Auditar el fichero o directorio de Docker – /etc/default/docker 
 
2. Recomendaciones a nivel de Docker Engine (daemon)
2.1 No usar el driver obsoleto de ejecución de lxc 
2.2 Restringir el tráfico de red entre contenedores 
2.3 Configurar el nivel de logging deseado 
2.4 Permitir a Docker hacer cambios en iptables 
2.5 No usar registros inseguros (sin TLS)
2.6 Configurar un registro espejo local
2.7 No usar aufs como driver de almacenamiento
2.8 No arrancar Docker para escuchar a  una IP/Port o Unix socket diferente
2.9 Configurar autenticación TLS para el daemon de Docker
2.10 Configurar el ulimit por defecto de forma apropiada

3. Recomendaciones a nivel de configuración de Docker
3.1 Verificar que los permisos del archivo docker.service están como root:root 
3.2 Verificar que los permisos del archivo docker.service están en 644 o más restringidos 
3.3 Verificar que los permisos del archivo docker-registry.service están como root:root 
3.4 Verificar que los permisos del archivo docker-registry.service están en 644 o más restringidos
3.5 Verificar que los permisos del archivo docker.socket están como root:root 
3.6 Verificar que los permisos del archivo docker.socket están en 644 o más restringidos
3.7  Verificar que los permisos del archivo de entorno Docker (/etc/sysconfig/docker o /etc/default/docker) están como root:root 
3.8 Verificar que los permisos del archivo de entorno Docker (/etc/sysconfig/docker o /etc/default/docker) están en 644 o más restringidos
3.9 Verificar que los permisos del archivo /etc/sysconfig/docker-network (si se usa systemd) están como root:root 
3.10 Verificar que los permisos del archivo /etc/sysconfig/docker-network están en 644 o más restringidos
3.11  Verificar que los permisos del archivo /etc/sysconfig/docker-registry (si se usa systemd) están como root:root
3.12 Verificar que los permisos del archivo /etc/sysconfig/docker-registry (si se usa systemd) están en 644 o más restringidos
3.13 Verificar que los permisos del archivo /etc/sysconfig/docker-storage (si se usa systemd) están como root:root 
3.14 Verificar que los permisos del archivo /etc/sysconfig/docker-storage (si se usa systemd) están en 644 o más restringidos 
3.15 Verificar que los permisos del directorio /etc/docker están como root:root 
3.16 Verificar que los permisos del directorio /etc/docker están en 755 o más restrictivos 
3.17 Verificar que los permisos del certificado del registry están como root:root 
3.18 Verificar que los permisos del certificado del registry están en 444 o más restringidos 
3.19 Verificar que los permisos del certificado TLS CA están como root:root 
3.20 Verificar que los permisos del certificado TLS CA están en 444 o más restringidos 
3.21 Verificar que los permisos del certificado del servidor Docker están como root:root 
3.22 Verificar que los permisos del certificado del servidor Docker están en 444 o más restringidos 
3.23 Verificar que los permisos del archivo de clave del certificado del servidor Docker están como root:root 
3.24 Verificar que los permisos del archivo de clave del certificado del servidor Docker están en 400 
3.25 Verificar que los permisos del archivo de socket de Docker están como root:docker 
3.26 Verificar que los permisos del archivo de socket de Docker están en 660 o más restringidos 
 
4 Imágenes de Contenedores y Dockerfiles
4.1 Crean un usuario para el contenedor
4.2 Usar imágenes de confianza para los contenedores 
4.3 No instalar paquetes innecesarios en el contenedor
4.4 Regenerar las imágenes si es necesario con parches de seguridad
 
5 Runtime del contenedor
5.1 Verificar el perfil de AppArmor (Debian o Ubuntu) 
5.2 Verificar las opciones de seguridad de SELinux (RedHat, CentOS o Fedora) 
5.3 Verificar que los contenedores esten ejecutando un solo proceso principal
5.4 Restringir las Linux Kernel Capabilities dentro de los contenedores 
5.5 No usar contenedores con privilegios   
5.6 No montar directorios sensibles del anfitrión en los contenedores
5.7 No ejecutar ssh dentro de los contenedores
5.8 No mapear puertos privilegiados dentro de los contenedores
5.9 Abrir solo los puertos necesarios en un contenedor
5.10 No usar el modo “host network” en un contenedor 
5.11 Limitar el uso de memoria por contenedor 
5.12 Configurar la prioridad de uso de CPU apropiadamente 
5.13 Montar el sistema de ficheros raíz de un contenedor como solo lectura
5.14 Limitar el tráfico entrante al contenedor mediante una interfaz específica del anfitrión
5.15 Configurar la política de reinicio ‘on-failure’ de un contenedor a 5 
5.16 No compartir PID de procesos del anfitrión con contenedores
5.17 No compartir IPC del anfitrión con contenedores 
5.18 No exponer directamente dispositivos del anfitrión en contenedores
5.19 Sobre-escribir el ulimit por defecto en tiempo de ejecución solo si es necesario
 
6 Operaciones de Seguridad en Docker
6.1 Realizar auditorías de seguridad tanto en el anfitrión como en los contenedores de forma regular
6.2 Monitorizar el uso, rendimiento y métricas de los contenedores
6.3 Endpoint protection platform (EPP) para contenedores (si las hubiese) 
6.4 Hacer Backup de los datos del contenedor 
6.5 Usar un servicio centralizado y remoto para recolección de logs
6.6 Evita almacenar imágenes obsoletas, sin etiquetar correctamente o de forma masiva.   
6.7 Evita almacenar contenedores obsoletos, sin etiquetar correctamente o de forma masiva.
En algunos casos, hay recomendaciones que merecen un artículo por si solas. Si quieres profundizar más en este tema recuerda que los pormenores de estos aspectos de seguridad y auditoría los ampliaremos durante el curso online Hardening de Windows, Linux e Infraestructuras” en el que colaboraré junto a Lorenzo Martínez, Yago Jesús, Juan Garrido y Pedro Sanchez, todo un lujo de curso en el que aportaré mi granito de arena con seguridad en Docker completando el módulo de Hardening Linux. Más información aquí: https://www.securizame.com/curso-online-de-hardening-de-sistemas-windows-y-linux-e-infraestructuras_yj/
Para otros posibles artículos en el futuro me parece interesante ver algunas consideraciones de seguridad en Docker Hub y otros componentes relacionados, así como auditorías de contenedores con Lynis.
Recursos y referencias:


Revisión del libro “Icinga Network Monitoring” de Packt Publishing

Icinga Network Monitoring Book

La editorial Packt Publishing ha publicado recientemente un libro en el que he podido ayudar en su gestación; he colaborado como revisor técnico. Se trata del libro Icinga Network Monitoring. En este libro se puede encontrar todo lo necesario para aprender lo esencial de este software de monitorización que no sólo está en auge sino que es una realidad que anuncié aquí en 2009.

Este libro va al grano desde el primer capítulo, ejemplos útiles y descripciones que te permitirán aprender este potente sistema desde cero y con una base sólida. Además también te servirá para aprender a configurar Nagios.

Posiblemente lo más interesante del libro es forma de describir el core de la aplicación, como funcionan los diferentes tests y como entender y hacer plugins.

Finalmente, se añade un capitulo entero sobre las diversas interfaces gráficas (principalmente web) que dispone Icinga. Para muestra un botón:

Screen Shot 2014-01-27 at 10.06.13 PM

Puedes leer el capítulo 2 en este enlace. Enjoy monitoring!

Essential commands for Alfresco BART

Alfresco BART usage:

[bash]
./alfresco-bart.sh [set] [date dest]
[/bash]

But what really modes are? With modes I mean different ways to use Alfresco BART depending of what do you want to do, for instance:

  • backup: runs an incremental backup or a full if first time
  • restore: runs the restore, wizard if no arguments, see below more commands with arguments [set] [date] [dest], while [set] can also be “all” for all sets.
  • verify: verifies the backup, it compares what you have backed up and what you have in your live system.
  • collection: shows all the backup sets already in the backup archive that might be restored.
  • list: lists the files currently backed up in the archive. It shows files contained in the last backup.

Sets:

  • no value: use all backup sets
  • index: use index backup set (group) for selected mode.
  • db: use data base backup set (group) for selected mode.
  • cs: use content store backup set (group) for selected mode.
  • files: use rest of files backup set (group) for selected mode.

Now lets see how to use Alfresco BART.

To make a backup:

[bash]
./alfresco-bart.sh backup
[/bash]

NOTE1: if first time, it makes a full backup
NOTE2: you should add this command to your root crontab with something like “0 5 * * * /path/to/alfresco-bart.sh backup” (without quotes) if you want to run your backup daily at 5AM (after Alfresco’s nightly backups and maintenance jobs).
NOTE3: running command above with without any data sets (index, db, cs or files) it will perform a backup of all data sets configured in alfresco-bart.properties. You can run “./alfresco-bart.sh backup files” to only perform a backup of your configuration files, installation and customization files or “./alfresco-bart.sh backup cs” to create a backup (full if first time or incremental if not) of your contentstore and additional stores configured.

Commands and options to restore backup:

To restore an existing backup guided by the wizard:

[bash]
./alfresco-bart.sh restore

################## Welcome to Alfresco BART Recovery wizard ###################

This backup and recovery tool does not overrides nor modify your existing
data, then you must have a destination folder ready to do the entire
or partial restore process.

##############################################################################

Choose a restore option:
1) Full restore
2) Set restore
3) Restore a single file of your Alfresco repository
4) Restore alfresco-global.properties from a given date
5) Restore other configuration file or directory

Enter an option [1|2|3|4|5] or CTRL+c to exit:
[/bash]

To restore the last (now) existing backup of all sets (all) and leave it in /tmp:

[bash]
./alfresco-bart.sh restore all now /tmp
[/bash]

To restore a DB backup from 14 days ago to /tmp:

[bash]
./alfresco-bart.sh restore db 14D /tmp
[/bash]

To restore the indexes backup from december 2nd 2013:

[bash]
./alfresco-bart.sh restore index 12-02-2013 /tmp
[/bash]

Valid date format is: now: for last backup, s: for second, m: minutes, h: hours, D: days, W: weeks, M: months or Y: years, all date values must be specified without spaces, i.e: 4D, 2W, 1Y, 33m. Dates may also be like: YYYY/MM/DD, YYYY-MM-DD, MM/DD/YYYY or MM-DD-YYYY.

To restore a single file deleted on the repository but existing in previous backup please use the backup wizard by typing: “./alfresco-bart.sh restore” and then follow instructions in the menu option “3”.

To restore the alfresco-global.properties configuration file from a given date please use the backup wizard by typing: “./alfresco-bart.sh restore” and then follow instructions in the menu option “4”.

Finally if you want to restore any other configuration, installation or custom file from your existing backup on a given date follow instructions by choosing option 5 in the recovery wizard.

NOTE4: Alfresco BART restore options or recovery wizard never will overrides your existing Alfresco files, you should specify a temporary recovery folder with enough space, then you have to move that content manually or following the instructions on the screen.

In case of source mismatch error with Duplicity try running this command:

[bash]
./alfresco-bart.sh backup all force
[/bash]

My talk about “Alfresco Backup and Recovery Tool” in the Alfresco Summit

All recorded videos has been published recently in the Alfresco Summit portal and here you go my talk “Alfresco Backup and Recovery Tool: A Real World Backup Solution” I gave in both Boston and Barcelona. I was the first public presentation about Alfresco BART.

Thanks to all who attended this session and made it one of the most-well attended and highest-rated in both cities. I’m looking forward to keep talking covering security topics as usual (I already have some “hack-ideas”…).

If you only want to see the demo, it starts at minute 33:

The presentation is published in Slideshare as well:

Remember you can download here the White Paper I mention during the talk.

If you only want to see the practical demo (best resolution in the talk video above), you can enjoy it here:

Any questions and comments are always welcome!

Alfresco Backup and Recovery Tool, release v0.1

Project was moved to Github!

Please go to https://github.com/toniblyx/alfresco-backup-and-recovery-tool for downloads, questions, issues, suggestions or feedback. Thanks!

Here you go, first release of the Alfresco Backup and Recovery Tool (Alfresco BART). An Apache 2.0 licensed tool for backup and restore of Alfresco ECM.

DESCRIPTION
Alfresco BART is a tool written in shell script on top of Duplicity for Alfresco backups and restore from a local file system, FTP, SCP or Amazon S3 of all its components: indexes, data base, content store and all deployment and configuration files. It should runs in most Linux distributions, for Windows you may use Cygwin (non tested yet).

Brief description of its features: full and incremental backups, backup policies, backup volume control, encryption with GPG, compression. Also it has a restore wizard with shortcuts for quick restore of some key components (alfresco-global.properties and more).

DISCLAIMER
This is an initial version, it has bugs and needs many improvements, please take care 🙂

FEATURES
Features in this version (v0.1):

  • 5 different modes of work: backup, restore, verify, collection and list
    • backup: runs an incremental backup or a full if first time or configured
    • restore: runs the restore wizard
    • verify: verifies the backup
    • collection: shows all the backup sets in the archive
    • list: lists the files currently backed up in the archive
  • Full and incremental backups.
  • Backup policies:
    • Periodicity: number of days of every full backup, if not backup found it does a full
    • Retention: keep full or incremental copies, clean old backups.
    • Control of number of moths to remove all backups older than or backup retention period.
  • Separated components (backup sets or groups), ability to enable or disable any set (cluster and dedicated search server aware), all backup sets supported are:
    • Indexes (SOLR or Lucene)
    • Data base (MySQL, PostgreSQL and Oracle)
    • Content Store plus deleted, cached and content store selector (optional).
    • Files: all configuration files, deployments, installation files, etc.
  • Restore wizard with support to:
    • restore a full backup (all sets)
    • given backup set
    • restore from a given date or days, month, year ago
    • restore alfresco-global.properties from a point in time
  • Backup volume control:
    • All backups collections are split in a volume size 25MB by default, this can help to store your backup in tapes or in order to upload to a FTP, SCP or S3 server.
  • Backup to different destinations:
    • Local filesystem
    • Remote FTP or FTPS server
    • SCP server (should have shared keys already configured, no authentication with user and password supported)
    • Amazon S3
  • Encryption with GnuPG, all backup volumes are encrypted, this feature is configurable (enable or disable).
  • Compression, all backup volumes are compressed by default
  • Log reporting, Alfresco BART creates a log file each day of operation with in a report of any activity.

DEPENDENCES

  • Duplicity 0.6 (with boto and fabric)
  • Python 
  • GnuPG
  • NcFTP
  • librsync
  • mysqldump for MySQL backup
  • pg_dump for PostgreSQL backup
  • exp for Oracle backup

TODO

  • TEST, TEST and TEST with JBOSS, MySQL, Oracle, S3, FTPs, SCP, etc.
  • Add more input and task controllers (and configuration, first run).
  • Restore single repository file.
  • Snapshots (LVM if exist, AWS if exist).
  • Support for MS SQL Server.
  • Configuration wizard (shell).
  • Share admin panel configuration page as main point to configure more options related to backup (eager, cleaner, index backup, trascan cleaner, etc.).
  • Custom logging control and reporting improvement.

DOWNLOADS and INSTALLATION 

Most recent information about tool and latest code is available in:
http://blyx.com/alfresco-bart

Please report bugs and improvements to: reverse moc.xylb@inot

How to enable Tomcat Manager in an Alfresco installation

In order to address some maintenance tasks in Tomcat, may be useful to get access to the Tomcat Manager (http) interface, things like stop or start an application if you are doing some changes in Alfresco or Share, even a different way to access to its JMX interface using jmxproxy if you are working remotely.

This is a easy step by step guide about how you can enable the Tomcat Manager that comes with an Alfresco default (bundle) installation. Tested with Alfresco Enterprise 4.1.4, but should work with any other Alfresco 4 version.

  • Edit tomcat/conf/tomcat-users.xml and adapt it like below:

[xml]
<tomcat-users>

<role rolename="manager-gui"/>

<role rolename="manager-status"/>

<role rolename="manager-jmx"/>

<role rolename="manager-script"/>

<user username="CN=Alfresco Repository Client, OU=Unknown, O=Alfresco Software Ltd., L=Maidenhead, ST=UK, C=GB" roles="repoclient" password="null"/>

<user username="CN=Alfresco Repository, OU=Unknown, O=Alfresco Software Ltd., L=Maidenhead, ST=UK, C=GB" roles="repository" password="null"/>

<user username="manager" roles="manager,manager-gui,manager-status" password="manager"/>

<user username="manager2" roles="manager-jmx,manager-script" password="manager"/>

</tomcat-users>
[/xml]

  • Then edit tomcat/conf/Catalina/localhost/manager.xml and change like this:

[xml]
<Context antiResourceLocking="false" privileged="true" useHttpOnly="true" override="true">

<Valve className="org.apache.catalina.authenticator.BasicAuthenticator" securePagesWithPragma="false" />

</Context>
[/xml]

  • Restart your Tomcat and thats all.

Once Alfresco is up agan, lets try to access to the manager with user “manager” and password “manager”, please avoid using this credentials in production environments.

To access html interface:

http://localhost:8080/manager/html

Screen Shot 2013-05-30 at 12.38.33 PM

To list all applications:

http://localhost:8080/manager/list

To list server information:

http://localhost:8080/manager/serverinfo

To see default session info (use / or /context):

http://localhost:8080/manager/sessions?path=/

To start, stop, and undeploy alfresco or share

http://localhost:8080/manager/start?path=/alfresco

http://localhost:8080/manager/stop?path=/alfresco

http://localhost:8080/manager/undeploy?path=/alfresco

http://localhost:8080/manager/start?path=/share

http://localhost:8080/manager/stop?path=/share

http://localhost:8080/manager/undeploy?path=/share

To see all MBeans (jmxproxy):

http://localhost:8080/manager/jmxproxy.

Screen Shot 2013-05-30 at 12.39.34 PM

Sources: http://forums.alfresco.com/forum/developer-discussions/other-apis/unable-access-tomcat-manager-03292012-1345

and http://www.ixxus.com/blog/2011/02/monitor-and-manage-alfresco-jmx

Playing with Duplicity backup and restore tool and Amazon S3

Duplicity is a python command line tool for encrypted bandwidth-efficient backup.

In their creator words: “Duplicity  incrementally  backs  up  files  and directory by encrypting tar-format volumes with GnuPG and uploading them to a remote (or local) file server.  Currently local, ftp, sftp/scp, rsync, WebDAV, WebDAVs, Google Docs, HSi and Amazon S3 backends  are  available.   Because  duplicity  uses librsync,  the  incremental  archives  are  space  efficient  and only record the parts of files that have changed since the last backup.  Currently duplicity supports deleted files, full Unix permissions, directories, symbolic links, fifos, etc., but not hard links.

My brief description: a free and open source tool for doing full and incremental backup and restore from linux to local or almost any remote target, compressed and encrypted. A charm for any sys admin.

In order to explain how Duplicity works for backup and restore. I’m going to show how to do a backup of a folder called “sample_data” to an Amazon S3 bucket called “alfresco-backup” and a folder called “test” inside my bucket (use your own bucket name) the bucket and folder has been created by me before running any command but could be created by duplicity first time we run the command. If you want to let Duplicity create your own Amazon S3 bucket and you are located in Europe, please read the Duplicity man page.

Note: please not get confused with my bucket name “alfresco-backup”, use your own bucket name. I will use this bucket name also in future articles 😉

How to install Duplicity in Ubuntu:

[bash]
# sudo apt-get install duplicity
[/bash]

Create a gpg key and remember the passphrase because will be required by Duplicity, defaults values works good. Your backup will be encrypted with the passphrase, all files created by command below will be on your Linux home/.gnupg but you won’t need that at all:

[bash]
# gpg –gen-key
[/bash]

Create required system variables (you can also use them with an script):

[bash]
# export PASSPHRASE=yoursupersecretpassphrase
# export AWS_ACCESS_KEY_ID=XXXXXXXXXXX
# export AWS_SECRET_ACCESS_KEY=XXXXXXXXXX
[/bash]

Backup:

To perform a backup with the Duplicity command (the easy and simple command):

[bash]
# duplicity sample-data/ s3+http://alfresco-backup/test
[/bash]

If you get errors, some dependencies for Python and S3 support are required, try installing librsync1 and next python libraries python-gobject-2, boto and dbus.

The command output should be something like this:

[bash]
Local and Remote metadata are synchronized, no sync needed.
Last full backup date: none
No signatures found, switching to full backup.
————–[ Backup Statistics ]————–
StartTime 1368207483.83 (Fri May 10 19:38:03 2013)
EndTime 1368207483.86 (Fri May 10 19:38:03 2013)
ElapsedTime 0.02 (0.02 seconds)
SourceFiles 5
SourceFileSize 1915485 (1.83 MB)
NewFiles 5
NewFileSize 1915485 (1.83 MB)
DeletedFiles 0
ChangedFiles 0
ChangedFileSize 0 (0 bytes)
ChangedDeltaSize 0 (0 bytes)
DeltaEntries 5
RawDeltaSize 1907293 (1.82 MB)
TotalDestinationSizeChange 5543 (5.41 KB)
Errors 0
————————————————-
[/bash]

This will create 3 files in your S3 bucket:

  • duplicity-full-signatures.20130510T160711Z.sigtar.gpg
  • duplicity-full.20130510T160711Z.manifest.gpg
  • duplicity-full.20130510T160711Z.vol1.difftar.gpg

All files are stored with the GNU tar format and encrypted, “duplicity-full” means that was first backup, in next backups you will see “duplicity-inc” in different volumes.

  • sigtar.gpg file contains files signatures then Duplicity will know what file has changed and do the incremental backup
  • manifest.gpg contains all files backed up and a SHA1 hash of each one
  • volume files (vol1 to volN depending of your backup size) will contains data files, a volume file use to be up to 25MB each one, this is for improve performance doing backup and restoration.

For more information about file format look at here: http://duplicity.nongnu.org/duplicity.1.html#sect19

[bash]
# duplicity –full-if-older-than 30D sample-data s3+http://alfresco-backup/test
[/bash]

Verify if there are changes between last backup and your local files:

[bash]
# duplicity verify s3+http://alfresco-backup/test sample-data
Local and Remote metadata are synchronized, no sync needed.
Last full backup date: Fri May 10 19:38:03 2013
Difference found: File . has mtime Fri May 10 19:39:05 2013, expected Fri May 10 19:34:53 2013
Difference found: File file1.txt has mtime Fri May 10 19:39:05 2013, expected Fri May 10 18:25:36 2013
Verify complete: 5 files compared, 2 differences found.
[/bash]

In last example we can see that a fine called file1.txt has changed and also the root directory “.” date,

List files backed up in S3:

[bash]
# duplicity list-current-files s3+http://alfresco-backup/test
Local and Remote metadata are synchronized, no sync needed.
Last full backup date: Fri May 10 18:32:59 2013
Fri May 10 19:34:53 2013 .
Fri May 10 18:25:36 2013 file1.txt
Fri May 10 18:54:31 2013 file2.txt
Fri May 10 19:35:03 2013 mydir
Fri May 10 19:35:03 2013 mydir/file3.txt
[/bash]

You can see 3 files and 2 directories, in the statistics report duplicity counts any directory as file.

Restore:

Duplicity can also manage the restore process but it will never override any existing file, the you can restore to a different location or remove your corrupted or old data if you want to restore in the original place. If duplicity successfully completes the restore it is not going to show any output.

How to restore last full backup:

[bash]
# duplicity s3+http://alfresco-backup/test restore-dir/
[/bash]

How to restore a single file:

[bash]
# duplicity –file-to-restore mydir/file3.txt s3+http://alfresco-backup/test restore-dir/file3.txt
[/bash]

How to restore entire backup in a given date:

[bash]
# duplicity -t 2D s3+http://alfresco-backup/test restore-dir/
[/bash]

this will restore full backup of  2 days ago (see -t options, seconds, minutes, hours, months, etc may be used)

How to restore a single file in a given date:

If you are looking for a file with a content but you don’t know what version of the file you have to recover, you can try restoring different file versions in the backup:

[bash]
# duplicity -t 2D –file-to-restore file1.txt s3+http://alfresco-backup/test file1.txt.2D
# duplicity -t 30D –file-to-restore file1.txt s3+http://alfresco-backup/test file1.txt.30D
[/bash]

Note, you have to specify a different file name for local restoration, remember that duplicity never overrides existing content.

Delete older backups:

[bash]
# duplicity remove-older-than 1Y s3+http://alfresco-backup/test –force
[/bash]

also you can use for example 6M (six months), 30D (30 days) or 60m (60 minutes).

To see more information when you are running a duplicity command can use the vervosity flag -v [1-9] but also can see all logs here /root/.cache/duplicity/[directory with unique ID]/duplicity-full.YYYMMDDT182930Z.manifest.part

When you are finished playing with Duplicity and Amazon S3 remember to clean your passphrase and Amazon keys from the variables:

[bash]
# unset PASSPHRASE
# unset AWS_ACCESS_KEY_ID
# unset AWS_SECRET_ACCESS_KEY
[/bash]

In next posts I will show  how to use Duplicity to have a perfect backup and restore policy of Alfresco.

Integration demo between LibreOffice 4 and Alfresco 4 with CMIS

As first post for 2013 I want to share with you all this new screencast about the straightforward configuration and how it works the new version of LibreOffice with Alfresco. Note that my demo was done with Alfresco Enterprise 4.1 but this CMIS integration also should works with Alfresco Community 4.2. As you can see check-in/out and versioning with comments are already supported out-of-the-box from LibreOffice.

Also I would like to highlight the connection binding URL “http://localhost:8080/alfresco/cmisws/RepositoryService?wsdl” that is automatically filled by LibreOffice at configuration time, this URL is the new CMIS Web Services binding address for Alfresco 4.

Appendix:

Alfresco 4 CMIS binding address (based on OpenCMIS):
CMIS Web Services Binding: WSDL Documents = http://localhost:8080/alfresco/cmisws
CMIS AtomPub Binding: AtomPub Service Document = http://localhost:8080/alfresco/cmisatom

Alfresco 3 CMIS binding address (based on Apache CXF, obsolete/deprecated)
CMIS Web Services Binding: WSDL Documents = http://localhost:8080/alfresco/cmis
CMIS AtomPub Binding: AtomPub Service Document = http://localhost:8080/alfresco/service/cmis

More info about Alfresco and CMIS here.